Categories
Nail Care Uncategorized

Nail Care Routine: How to Keep Your Nails Healthy, Strong and Beautiful

Do you dream of having strong, healthy and beautiful nails without spending hours at a salon? The good news is that you can support healthier-looking nails with a simple nail care routine at home.

Your nails go through a lot every day. Frequent handwashing, household cleaning products, nail polish removers and rough filing can leave them feeling dry, weak or prone to breaking. The right nail care habits can help protect them and keep your hands looking neat and well-groomed.

In this beginner-friendly guide, you will learn how to take care of your nails at home, build a daily nail care routine, moisturize your cuticles, and avoid common mistakes that may damage your nails.

Whether you prefer natural nails or enjoy wearing nail polish, these practical nail care tips can help you make nail health part of your regular beauty and wellness routine.

Why Is Nail Care Important?

Nail care is about more than creating a beautiful manicure. Healthy nail habits help protect the nails and the surrounding skin from unnecessary damage.

Your fingernails are made primarily of a protein called keratin. Repeated exposure to water, harsh chemicals, picking at the cuticles and rough manicure techniques can contribute to nail damage.

A consistent nail care routine can help you:

  • Keep your nails clean and neatly shaped.
  • Reduce avoidable splitting, peeling and breakage.
  • Maintain moisturized nails and cuticles.
  • Protect the skin around your nails.
  • Enjoy a polished, well-groomed appearance.

Remember that nail appearance can also be affected by nutrition, medical conditions and other factors. Good grooming supports nail health, but it cannot resolve every underlying nail problem.

10 Simple Nail Care Tips for Strong, Healthy Nails

1. Keep Your Nails Clean and Dry

Clean nails are an essential part of good nail hygiene. Wash your hands regularly with mild soap and water, and gently clean underneath your nails without digging into the skin.

After washing, dry your hands and the areas around your nails thoroughly. Prolonged moisture can contribute to weak, splitting nails and may encourage certain infections.

Tip: Use a soft nail brush gently when needed instead of scraping underneath your nails with sharp objects.

2. Trim and File Your Nails Gently

Regular trimming helps keep nails neat and reduces the chance of snagging or accidental breakage.

Use clean nail clippers or manicure scissors. Trim your fingernails relatively straight across, then gently round the corners with a nail file.

File in a controlled, gentle motion rather than aggressively sawing back and forth. Avoid filing too deeply into the sides of your nails.

Tip: Choose a comfortable nail length that suits your everyday activities and makes your nails easier to maintain.

3. Moisturize Your Nails and Cuticles Daily

Moisturizing is one of the simplest steps in a nail care routine. Your nails and the surrounding skin can become dry, especially after frequent handwashing or exposure to cleaning products.

Apply hand cream after washing your hands. Massage a small amount around your nails and cuticles as well.

You can also use a cuticle oil or a simple moisturizer to help condition the skin around your nails.

Tip: Keep hand cream near your sink or bedside table so that moisturizing becomes an easy daily habit.

4. Protect Your Nails From Harsh Chemicals

Household cleaning products and other chemicals can irritate the surrounding skin and contribute to nail damage.

Wear suitable protective gloves when washing dishes, cleaning the bathroom or handling cleaning products. Follow the product’s safety instructions and wash your hands afterward.

If you use nail polish remover frequently, consider reducing how often you use it and avoid unnecessarily harsh nail treatments.

Tip: Never mix household cleaning chemicals. Follow their labels and use them only as directed.

5. Avoid Biting Your Nails and Picking Your Cuticles

Nail biting and cuticle picking can injure the nail and surrounding skin. Small breaks in the skin may also allow germs to enter.

Instead of biting or picking, keep your nails comfortably trimmed and moisturize dry cuticles. If you have a hangnail, carefully clip the loose piece of skin with clean nail scissors rather than pulling it off.

Avoid cutting or aggressively removing your cuticles. The cuticle helps protect the area where the nail grows.

Tip: If nail biting is a persistent habit, try identifying the situations that trigger it and keeping your hands occupied with another activity.

6. Eat a Balanced Diet for Nail Health

Your nails need adequate nutrition to grow normally. A balanced diet that includes protein, fruits, vegetables, whole grains and a variety of other nutrient-rich foods supports general health, including nail health.

Useful dietary sources include:

  • Protein: Eggs, beans, lentils, dairy products, fish and tofu.
  • Iron: Lentils, beans, leafy greens, meat and iron-fortified foods.
  • Zinc: Beans, nuts, seeds, dairy products and seafood.
  • B vitamins: Whole grains, eggs, legumes and other varied foods.

Nail problems can sometimes be associated with nutritional deficiencies, but brittle nails do not automatically mean that you need a supplement.

Tip: Avoid starting high-dose supplements just to improve your nails. Speak with a healthcare professional if you suspect a deficiency or are considering supplementation.

7. Be Gentle With Nail Polish and Manicures

Nail polish can be part of a fun beauty routine, but rough removal and repeated intensive treatments can damage the nail plate.

Avoid peeling off polish or gel manicures. Do not scrape away layers of your natural nail, and give your nails a break from treatments if they become damaged or irritated.

If you visit a salon, choose a clean establishment that properly disinfects or sterilizes its tools. Avoid having your cuticles aggressively removed.

Tip: If your nails are already peeling or sore, pause cosmetic treatments and allow the damaged portion to grow out.

8. Avoid Using Your Nails as Tools

Your nails are not designed for opening cans, scraping labels, removing stubborn lids or prying objects apart.

Using them as tools can cause chips, cracks, splitting or lifting from the nail bed.

Instead, use the appropriate household tool and avoid putting unnecessary pressure on your fingertips.

Tip: Keep a small opener or other useful tool nearby rather than relying on your nails.

9. Build a Simple Daily Nail Care Routine

You do not need an elaborate collection of beauty products to maintain your nails. A few consistent habits can make nail care easier.

Morning:

  • Check that your nails are clean and free of snags.
  • Apply hand cream if your skin feels dry.
  • Use protective gloves when a task requires them.

During the day:

  • Dry your hands thoroughly after washing.
  • Reapply moisturizer when needed.
  • Avoid biting, picking or using your nails as tools.

Before bed:

  • Apply hand cream and gently massage it around your nails.
  • Use cuticle oil if you enjoy using it.
  • Check for rough edges and file gently when necessary.

Tip: Keep the routine simple enough that you can follow it consistently.

10. Pay Attention to Changes in Your Nails

Healthy-looking nails are generally smooth and consistent in appearance, although some harmless variations can occur.

Pay attention to changes such as persistent discoloration, unusual thickening, nail separation, swelling, pain or bleeding around the nails.

If you notice a persistent or unexplained change, consult a dermatologist or another qualified healthcare professional. Nail changes can sometimes be associated with infection, injury or an underlying health condition.

Tip: Do not try to diagnose a nail problem from appearance alone, especially if it is painful or getting worse.

A Simple At-Home Nail Care Routine

Here is an easy weekly schedule to help you stay consistent.

DayNail care activity
MondayClean, inspect and moisturize your nails.
TuesdayApply hand cream and cuticle moisturizer.
WednesdayCheck for snags and gently file rough edges.
ThursdayProtect your hands during cleaning and washing dishes.
FridayGive your nails a gentle tidy-up if needed.
SaturdayEnjoy a simple manicure without aggressive cuticle removal.
SundayReview your routine and moisturize your hands and nails.

You do not need to follow a strict schedule. Trim and file your nails when necessary, and adjust your routine to suit your lifestyle.

Common Nail Care Mistakes to Avoid

Even a well-intentioned manicure can sometimes cause unnecessary damage. Avoid these common mistakes:

  • Cutting your cuticles: The cuticle provides a protective barrier, so avoid cutting or aggressively removing it.
  • Peeling off nail polish: Pulling polish or gel from the nail can remove layers of the natural nail.
  • Over-filing: Excessive filing can thin and weaken the nail plate.
  • Ignoring persistent nail changes: Pain, swelling, separation or unusual discoloration deserve attention.
  • Using nails as tools: This can cause cracks, chips and other injuries.
  • Taking supplements without a reason: Supplements are not a guaranteed solution for brittle nails and may not be appropriate for everyone.

A gentle approach is often easier to maintain than a complicated routine filled with intensive treatments.

Frequently Asked Questions About Nail Care

How can I make my nails stronger naturally?

Start with gentle nail grooming, daily moisturizing, protection from harsh chemicals and a balanced diet. Avoid biting your nails, peeling off polish and excessive filing. If your nails remain brittle, a healthcare professional can help identify possible causes.

How often should I trim my fingernails?

Trim your fingernails whenever they become too long, develop snags or interfere with your daily activities. There is no single schedule that works for everyone. Use clean clippers and file the edges gently.

Does applying oil help nails?

Cuticle oil can help condition the skin around your nails and improve the feel of dry cuticles. It is a useful moisturizing step, but it is not a guaranteed treatment for weak nails or a proven way to make them grow faster.

Should I cut my cuticles?

It is generally best to avoid cutting or aggressively removing your cuticles. They help protect the nail area from germs. Keep them moisturized and avoid picking at them.

How can I stop my nails from breaking?

Keep your nails at a manageable length, file gently, moisturize regularly and wear gloves when handling cleaning products or doing prolonged wet work. Avoid using your nails as tools and take breaks from damaging cosmetic treatments.

Can nail care make nails grow faster?

There is no reliably proven home remedy that makes nails grow dramatically faster. Gentle care and good nutrition can help support normal nail health and reduce breakage, allowing nails to maintain more length as they grow.

When should I see a dermatologist about my nails?

Seek professional advice for persistent or unexplained nail discoloration, thickening, separation, pain, swelling, bleeding or other concerning changes. Prompt evaluation is particularly important if you have a nail injury or signs of infection.

Final Thoughts

Beautiful nails begin with healthy habits, not necessarily expensive salon treatments. A simple nail care routine at home can help you keep your nails clean, moisturized, neatly shaped and protected from avoidable damage.

Start with the basics: trim and file gently, moisturize your hands and cuticles, protect your nails from harsh chemicals, eat a balanced diet and avoid biting or picking.

Consistency matters more than complexity. Choose a few habits that fit your lifestyle and make them part of your everyday self-care routine.

Healthy nails, happy hands, and a little daily care can go a long way.
Categories
Skincare

How Long to Wait Between Skincare Products (and in What Order)

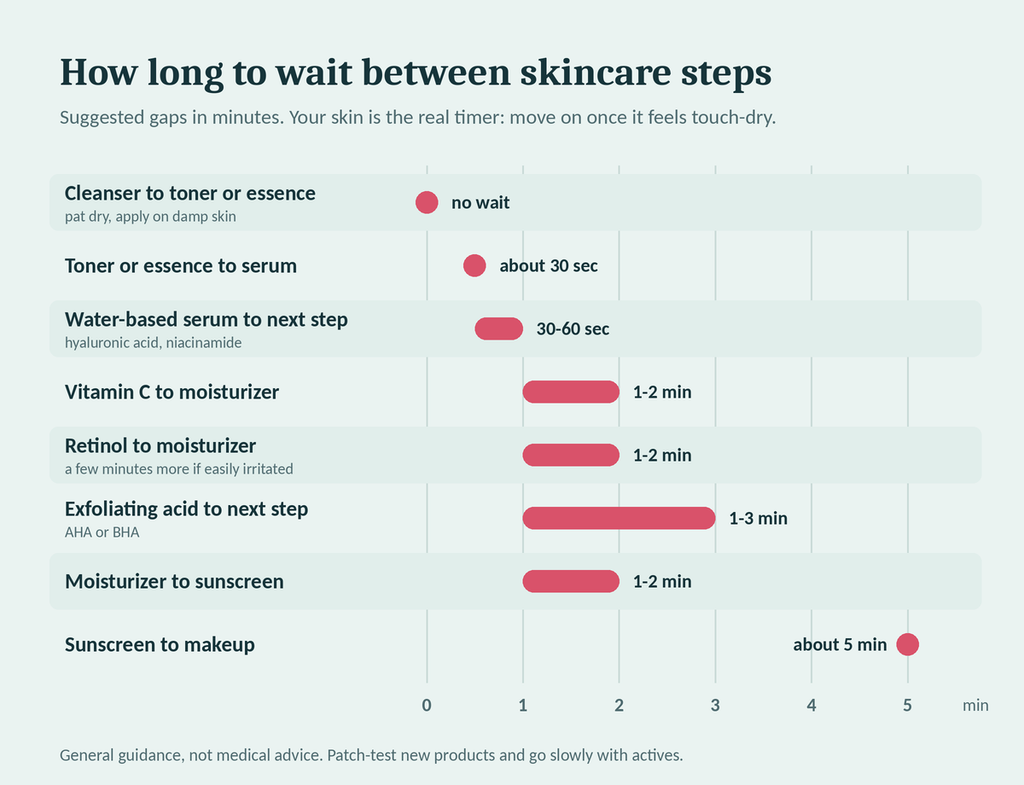
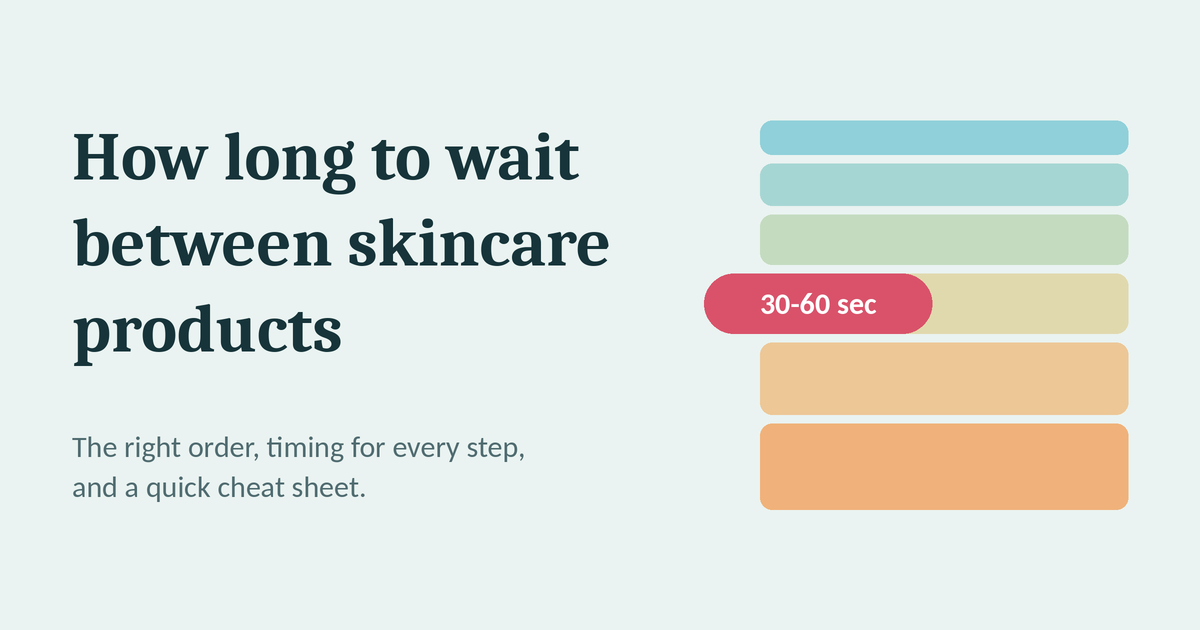
Chart showing how long to wait between skincare steps, from 30 seconds to 5 minutes

You’ve bought the serum, the moisturizer and the sunscreen. Now you’re standing at the mirror wondering whether to apply them one after another or wait in between.

Timing affects how your products feel and perform. Layer too fast and you get pilling, those little balls of product that roll off your face. Wait too long and you’re just wasting your morning.

This guide covers the order to apply your products, how long to wait between each step, and the mistakes to avoid.

The short answer

For most routines, wait 30 to 60 seconds between products, or until your skin feels touch-dry, meaning no longer slippery or wet. You don’t need a timer. You need to see whether the last layer has settled.

The three layering rules

1. Go from thinnest to thickest. Start with watery products (toner, essence, water-based serums) and finish with creams and oils.

2. Water before oil. Oil-based products form a barrier on top of your skin. Water-based products applied afterward can’t get through.

3. Let each layer settle. If a product still feels wet or tacky, the next layer will likely roll off or dilute it.

Skincare layering order

Morning

  1. Cleanser
  2. Toner or essence (optional)
  3. Serum (vitamin C, niacinamide, hyaluronic acid)
  4. Eye cream (optional)
  5. Moisturizer
  6. Sunscreen (always last)

Night

  1. Cleanser (double cleanse if you wore sunscreen or makeup)
  2. Toner or essence (optional)
  3. Treatment (retinol or exfoliating acids)
  4. Eye cream (optional)
  5. Moisturizer or night cream
  6. Facial oil (optional, last)

How long to wait after each product

StepSuggested waitWhy
Cleanser → toner or essenceNone (pat dry lightly)Damp skin takes up hydrating products well
Toner or essence → serumAbout 30 secondsLets the first layer settle so the serum doesn’t dilute
Water-based serum (hyaluronic acid, niacinamide) → next step30–60 secondsThese are light and absorb quickly
Vitamin C → moisturizer1–2 minutes, until touch-dryPrevents pilling and lets the serum sit on skin
Retinol → moisturizer1–2 minutes (a few more if your skin is easily irritated)Applying to dry skin may feel gentler for sensitive types
Exfoliating acids (AHA/BHA) → next step1–3 minutesLet the product settle before layering
Moisturizer → sunscreen1–2 minutesA slippery base makes sunscreen streak or pill
Sunscreen → makeupAbout 5 minutesHelps sunscreen form an even film and stops makeup from sliding

These are general guidelines. Your products, climate and skin type all change what works, so use touch-dry as your real test.

The touch-dry test

Lightly touch your cheek with a clean fingertip. If it feels slippery or wet, wait another 20 to 30 seconds. If it feels smooth and slightly tacky but not wet, you’re ready for the next layer.

Mistakes that ruin your routine

Applying too many actives at once. Vitamin C, retinol, and exfoliating acids are all powerful. Using several in one sitting can irritate your skin. Some combinations can also reduce each other’s effectiveness, such as benzoyl peroxide with vitamin C. If you use multiple actives, split them between morning and night or alternate days.

Putting oil before serum. Oil blocks water-based products from reaching your skin.

Rubbing products in aggressively. Gentle pressing or patting works better and irritates less.

Skipping sunscreen. Sunscreen should be the last step in your morning routine every day, however good the rest of your routine is.

Ignoring pilling. If your products roll into balls, you’re probably layering too fast, using too much, or combining products with incompatible textures (for example, some silicone-heavy primers over water-based serums).

Do you need to wait at all?

If your routine is just cleanser, moisturizer and sunscreen, the wait is short and simple: a minute or so between each. You only need to plan your timing carefully once you add serums and actives.

FAQ

How long should I wait between serum and moisturizer?
About 30 to 60 seconds, or until the serum feels touch-dry.

Should I wait between retinol and moisturizer?
Usually 1 to 2 minutes. If your skin is sensitive, waiting a few minutes longer can help.

Can I apply moisturizer right after cleansing?
Yes, if you’re only using cleanser and moisturizer. Applying to slightly damp skin can help lock in hydration.

How long should sunscreen sit before makeup?
About 5 minutes gives it time to set.

Does waiting between products really matter?
It matters most for preventing pilling and for keeping actives like retinol and vitamin C working as intended. If your products feel fine and you’re seeing good results, you don’t need to obsess over seconds.

Bottom line

Apply from thin to thick, wait until each layer is touch-dry, and give actives a little extra time. Start simple, add one new product at a time, and patch-test anything new.

This article is general information, not medical advice. If you have persistent irritation, acne or a skin condition, see a dermatologist.

Categories
Beauty + Wellness

7 Simple Wellness Habits for Healthier, Naturally Glowing Skin

Healthy skin doesn’t begin and end with expensive skincare products. Your daily habits—including sleep, nutrition, stress management, sun protection, and the way you care for your skin—can all play a role in how your skin looks and feels.

The good news? You don’t need a complicated 10-step routine to build better habits. A simple, consistent approach can often be more sustainable than constantly switching products and following every new beauty trend.

Here are seven practical beauty and wellness habits worth making part of your everyday routine.

1. Keep Your Skincare Routine Simple

One of the biggest beauty mistakes is assuming that more products automatically mean better results.

In reality, a basic routine can provide a strong foundation. Dermatologists commonly recommend focusing on gentle cleansing, moisturizing, and sun protection rather than constantly adding new products.

A simple morning routine

  1. Gently cleanse your face if needed.
  2. Apply moisturizer suited to your skin type.
  3. Finish with broad-spectrum sunscreen.

A simple evening routine

  1. Remove makeup and sunscreen.
  2. Cleanse gently.
  3. Apply any treatment appropriate for your skin.
  4. Finish with moisturizer.

The goal isn’t to own the most products. It’s to create a routine you can actually follow consistently.

2. Make Sun Protection a Daily Habit

If there’s one skincare habit worth prioritizing, it’s sun protection.

Regular exposure to ultraviolet radiation contributes to premature skin aging and can increase the risk of skin cancer. Dermatologists recommend choosing a broad-spectrum, water-resistant sunscreen with SPF 30 or higher.

Sun protection isn’t only about sunny beach days. If you’re spending time outdoors during daylight hours, make sunscreen part of your routine.

You can also complement sunscreen with:

  • Shade when appropriate
  • Sun-protective clothing
  • A hat
  • Sunglasses
  • Avoiding intentional tanning

Think of sunscreen as part of your everyday skincare—not an occasional beauty product.

3. Treat Your Skin Gently

Healthy-looking skin doesn’t need aggressive scrubbing.

Using harsh products, scrubbing too hard, or washing your face excessively can irritate the skin. The American Academy of Dermatology recommends using a gentle, non-abrasive cleanser, lukewarm water, and your fingertips rather than rough tools.

After cleansing, gently pat your skin dry rather than rubbing it.

If your skin frequently feels tight, burning, excessively dry, or irritated, your routine may be doing too much.

Sometimes the best beauty upgrade is actually doing less—but doing it consistently.

4. Don’t Underestimate the Importance of Sleep

Your nighttime routine shouldn’t stop with skincare.

Sleep is an important part of overall wellness. The CDC notes that most adults need at least seven hours of sleep each night, and adequate sleep supports normal daytime functioning and the body’s recovery processes.

Instead of treating sleep as something you sacrifice for work, entertainment, or scrolling, try making it part of your beauty and wellness routine.

Try these simple habits:

  • Keep a relatively consistent bedtime.
  • Reduce unnecessary screen time before bed.
  • Keep your bedroom comfortable, dark, and quiet.
  • Get natural light earlier in the day.
  • Stay physically active during the day.
  • Create a relaxing pre-bed routine.

A good night’s sleep won’t magically transform your skin overnight, but consistently prioritizing sleep is a much better wellness strategy than chasing quick fixes.

5. Build a Better Relationship With Food

Beautiful skin isn’t about following extreme diets or eliminating every food you enjoy.

Instead, focus on building a balanced eating pattern that provides a variety of nutrients.

Colorful fruits and vegetables, whole grains, legumes, nuts, seeds, and other nutrient-rich foods can contribute to an overall healthy diet. Harvard Health also highlights the importance of obtaining many vitamins and minerals through food.

A simple way to improve your meals is to ask:

“What can I add?” rather than “What must I remove?”

For example, you could add:

  • More colorful vegetables
  • Seasonal fruits
  • Nuts and seeds
  • Beans or lentils
  • Whole grains
  • Adequate protein
  • Healthy sources of fat

Beauty nutrition should support your overall health rather than encourage restrictive eating.

6. Manage Stress in Healthy Ways

Stress can affect more than your mood.

For some people, periods of stress may coincide with changes in their skin or existing skin concerns. The American Academy of Dermatology includes healthy stress management among its general tips for maintaining healthier-looking skin.

You don’t need an elaborate wellness ritual.

Try something realistic:

  • Take a short walk.
  • Practice slow breathing.
  • Stretch for a few minutes.
  • Spend time outdoors.
  • Read before bed.
  • Talk to someone you trust.
  • Take regular breaks from your screen.
  • Make time for activities you genuinely enjoy.

The best stress-management habit is usually the one you’ll actually continue doing.

7. Stop Chasing Every Beauty Trend

New beauty trends appear almost every week.

One month it’s a complicated skincare routine. The next month it’s a new ingredient, supplement, gadget, or viral DIY treatment.

Trying something new isn’t automatically bad, but constantly changing your routine can make it difficult to understand what actually works for you. Dermatologists emphasize that consistency and a simple routine are often more useful than using a large number of products.

Before adding a new product, ask yourself:

Do I actually need this, or did social media convince me that I need it?

That one question can save you money, reduce unnecessary irritation, and simplify your routine.

Your Simple Beauty + Wellness Routine

You don’t need to completely change your lifestyle tomorrow.

Start with a manageable routine.

Morning

Cleanse → Moisturize → Sunscreen → Balanced breakfast → Hydration → Movement

During the day

Eat nourishing meals → Stay active → Take breaks → Manage stress → Protect your skin from the sun

Evening

Remove makeup/sunscreen → Gentle cleanse → Treatment if appropriate → Moisturize → Relax → Consistent bedtime

The exact routine will vary depending on your skin type, lifestyle, age, environment, and personal needs.

Common Beauty Mistakes to Avoid

Using too many products

More products can mean more opportunities for irritation. Start with the basics and add products only when you have a clear reason.

Scrubbing aggressively

Scrubbing harder doesn’t necessarily mean cleaner skin. It can irritate the skin instead.

Skipping moisturizer because you have oily skin

Oily skin still needs hydration. Dermatologists recommend moisturizing even for oily skin, while choosing products appropriate for your skin type.

Forgetting sunscreen

Sun protection should be a regular part of your daytime routine.

Expecting overnight results

Healthy-looking skin is usually the result of consistent habits rather than one miracle product.

Copying someone else’s routine exactly

Your friend’s skin, lifestyle, climate, and concerns may be completely different from yours.

Frequently Asked Questions

How can I make my skin look healthier naturally?

Start with the basics: gentle skincare, regular sun protection, adequate sleep, a balanced diet, physical activity, and healthy stress-management habits.

How many skincare products do I really need?

There is no universal number. A simple routine built around cleansing, moisturizing, and sun protection can provide a strong foundation. Additional products should have a specific purpose.

Is sunscreen really necessary every day?

Sun protection is an important part of skincare. Dermatologists recommend broad-spectrum SPF 30 or higher, along with other sun-protection measures when appropriate.

Can sleep affect your skin?

Sleep is an important part of overall health and recovery. Most adults should aim for at least seven hours of sleep per night.

Should people with oily skin use moisturizer?

Yes. Oily skin can still benefit from moisturizer. Look for a formula suited to oily or acne-prone skin and consider products labeled non-comedogenic.

How often should I change my skincare routine?

Avoid changing products constantly without a reason. Give your routine time to work unless a product is causing irritation or another problem.

When should I see a dermatologist?

If you have persistent, painful, worsening, or unexplained skin problems—or if your skincare routine is causing significant irritation—consider consulting a qualified dermatologist.

Final Thoughts

Healthy-looking skin isn’t about perfection.

It’s about taking care of yourself consistently.

A gentle skincare routine, daily sun protection, nutritious food, adequate sleep, regular movement, and healthy ways to manage stress can create a much stronger foundation for beauty and wellness than constantly chasing the latest trend.

Start small. Stay consistent. Give your routine time.

Your best beauty routine doesn’t have to be complicated—it simply needs to work for you.


Categories
Nail Care Uncategorized

Nail Care: The Complete Guide to Healthy, Strong and Beautiful Nails

Beautiful nails are more than just a finishing touch to your look. Your nails can also reflect how well you care for your hands and overall nail health.

Whether you love a fresh manicure or prefer natural nails, following a simple nail care routine can help keep your nails clean, strong, smooth and healthy.

The good news? You don’t need an expensive collection of products or complicated treatments. A few consistent habits can make a noticeable difference.

Why Is Nail Care Important?

Your fingernails are exposed to water, soap, cleaning products, weather changes and everyday friction. Without proper care, they can become dry, weak, brittle or prone to splitting.

Good nail care helps you:

  • Keep your nails clean and healthy
  • Reduce breakage and splitting
  • Protect the skin around your nails
  • Prevent excessive dryness
  • Maintain stronger, smoother nails
  • Keep your hands looking neat and well-groomed

A healthy nail care routine is ultimately about consistency rather than complexity.

10 Essential Nail Care Tips for Healthy Nails

1. Keep Your Nails Clean and Dry

Clean nails are the foundation of good nail care. Wash your hands regularly and gently clean underneath your nails.

However, avoid keeping your hands submerged in water for long periods. Repeated exposure to water can contribute to weaker, splitting nails.

After washing your hands, dry them thoroughly, including around your nails and cuticles.

2. Moisturize Your Hands and Cuticles

Just like your skin, your nails and cuticles can become dry.

Apply a nourishing hand cream regularly, paying particular attention to your cuticles. A cuticle oil can also help keep the surrounding skin soft and moisturized.

For best results, make moisturizing part of your daily routine, especially after washing your hands.

3. Trim Your Nails Regularly

Long nails aren’t necessarily unhealthy, but nails that become excessively long can be more likely to catch on clothing or break.

Use clean nail clippers or scissors to trim your nails. Avoid cutting them too aggressively, and leave enough nail length to protect the fingertip.

For fingernails, gently following the natural shape of your nail can create a neat appearance while reducing the risk of snagging.

4. File Your Nails the Right Way

Filing helps smooth rough edges and can prevent small cracks from becoming larger splits.

Use a clean nail file and gently shape your nails. Instead of aggressively sawing back and forth, use controlled strokes and avoid excessive pressure.

If your nails are naturally thin or brittle, a gentle file may be a better choice than a very coarse one.

5. Don’t Cut or Pick Your Cuticles

Cuticles provide a protective barrier around the base of your nails. Cutting or aggressively picking them can damage the surrounding skin.

Instead, keep your cuticles moisturized and gently push them back only if needed.

If you have painful, swollen or damaged skin around a nail, avoid trying to cut it yourself.

6. Protect Your Nails From Harsh Chemicals

Cleaning products and other chemicals can dry out your hands and nails.

If you’re doing household cleaning, consider wearing protective gloves. This simple habit can reduce direct contact with detergents and other irritating substances.

Remember: healthy nails need protection just as much as they need grooming.

7. Give Your Nails a Break From Frequent Manicures

Manicures can make your nails look beautiful, but frequent treatments involving strong chemicals, filing or removal processes may contribute to dryness or damage in some people.

If you regularly wear nail polish, gel polish or extensions, pay attention to the condition of your natural nails.

If your nails start becoming unusually thin, painful or damaged, consider taking a break and focusing on basic nail care.

8. Don’t Use Your Nails as Tools

This is one of the easiest habits to change.

Avoid using your nails to:

  • Open cans or packages
  • Scratch hard surfaces
  • Remove labels
  • Pry objects apart
  • Pick at stickers or polish

Your nails aren’t designed to function as tools. Using them this way can lead to cracks, chips and breakage.

9. Maintain a Balanced Diet

Nail health is influenced by your overall nutrition. A balanced diet containing adequate protein, fruits, vegetables, whole grains and other nutrient-rich foods supports normal nail growth.

Rather than relying on a single “nail supplement,” focus first on maintaining a varied and balanced diet.

If you experience persistent nail changes, speaking with a healthcare professional can help identify whether an underlying nutritional or health issue could be involved.

10. Don’t Ignore Changes in Your Nails

Occasional nail breakage is common. However, persistent or unusual changes deserve attention.

Pay attention to changes such as:

  • Persistent discoloration
  • Significant changes in nail thickness
  • Nails separating from the skin underneath
  • Persistent pain or swelling
  • Repeated splitting or breaking
  • New dark streaks or unusual markings

If you notice a concerning or persistent change, consult a qualified healthcare professional or dermatologist rather than trying to diagnose it yourself.

A Simple Daily Nail Care Routine

You don’t need to spend a lot of time caring for your nails.

Try this simple routine:

Morning:
Wash and dry your hands properly, then apply hand moisturizer if your skin feels dry.

During the day:
Protect your hands when using household cleaning products and avoid using your nails as tools.

Evening:
Apply hand cream and massage a small amount of cuticle oil or moisturizer around your nails.

Weekly:
Check your nails, trim them if necessary and gently file rough edges.

This simple approach can help you maintain healthier-looking nails without turning nail care into a complicated chore.

Common Nail Care Mistakes to Avoid

Even people with a regular nail care routine can make mistakes. Here are some habits worth avoiding:

Biting Your Nails

Nail biting can damage the nail and surrounding skin. It can also transfer bacteria between your hands and mouth.

Peeling Off Nail Polish

Peeling polish can remove layers from the surface of the nail. Use an appropriate remover instead.

Cutting Cuticles Too Deeply

Aggressive cuticle cutting can injure the surrounding skin and increase the risk of irritation.

Over-Buffing

Buffing may temporarily make nails look smooth and shiny, but excessive buffing can thin the nail surface.

Ignoring Your Hands

Nail care isn’t only about the nails. Healthy-looking nails go hand in hand with moisturized, protected hands and cuticles.

How Long Does It Take to Improve Nail Health?

Nails grow gradually, so improving their appearance takes patience.

Your fingernails don’t transform overnight. Consistent nail care, protection from damage and good general nutrition can support healthier-looking nails as new nail growth replaces older nail tissue.

The key is to focus on long-term habits rather than quick fixes.

Frequently Asked Questions About Nail Care

How often should I trim my nails?

There is no single schedule that works for everyone. Trim your nails whenever they become too long, uneven or prone to catching on things.

How can I make my nails stronger?

Protecting your nails from excessive water and chemicals, moisturizing regularly, avoiding picking and maintaining a balanced diet can all support healthy nails.

Is cuticle oil necessary?

Cuticle oil isn’t essential, but it can be a useful way to moisturize dry cuticles and the skin surrounding the nail.

Should I give my nails a break from nail polish?

If your nails are becoming dry, thin or damaged, taking a break from polish, gel treatments or extensions may be helpful while you focus on basic nail care.

Can nail care improve nail growth?

Good nail care can help reduce breakage and protect the nails as they grow. However, nail growth itself is influenced by factors such as genetics, age and overall health.

Final Thoughts

Healthy, beautiful nails don’t require a complicated routine. Clean nails, regular moisturizing, gentle trimming, proper filing and protection from damage are the foundations of effective nail care.

The most important step is consistency. Take a few minutes each day to care for your hands and nails, and avoid habits that cause unnecessary damage.

Remember, nail care isn’t just about having attractive nails—it’s about maintaining healthy nails and the skin around them.

Start with the basics, stay consistent, and let your nails benefit from the care they deserve.

Categories
Hair Care & Styling

Hard Water Hair Damage: Signs, Causes & How to Fix It

If your hair feels rough, tangled, and duller no matter how much conditioner you use, the problem might not be your shampoo, your diet, or even the weather — it could be your hard water. Hard water hair damage is one of the most common yet most overlooked causes of frizz, breakage, and hair fall, especially if you live in a city where groundwater is your main water source.

The good news: once you know what’s happening, hard water hair damage is easy to manage — often without spending a rupee on new equipment. Here’s exactly what’s going on, how to confirm it’s the culprit, and the routine that actually reverses it.

[Image alt text: woman checking dry, tangled hair strands caused by hard water damage]

What Is Hard Water, and Why Does It Damage Hair?

“Hard” water simply means it carries a high concentration of dissolved minerals — mostly calcium and magnesium — picked up as it passes through rock and soil before reaching your tap.

Those minerals don’t just disappear when you shampoo. They:

  • Coat the hair shaft, forming a dull, waxy film that blocks moisture from getting in
  • React with shampoo and soap, leaving behind a residue instead of rinsing clean
  • Roughen the hair’s outer cuticle, which is what makes hard-water hair feel like straw
  • Irritate and dry out the scalp, which can worsen shedding over time

None of this is instant. It’s a slow buildup — which is exactly why so many people blame the wrong thing (a new shampoo, stress, “the season changing”) before realising the water itself is the constant.

Signs of Hard Water Hair Damage

You don’t need a lab test to suspect hard water. Watch for this pattern:

  • Hair feels rough or straw-like within hours of washing, even with conditioner
  • Shampoo barely lathers, or leaves a slightly filmy, waxy feeling
  • Colour-treated hair fades or turns brassy faster than expected
  • Increased hair fall or breakage with no other lifestyle changes
  • A dry, sometimes itchy or flaky scalp
  • Hair looks dull and “lifeless” despite regular oiling or masks
  • Soap scum or white mineral deposits on your shower glass or tap fittings — this is the biggest tell, since it confirms the water itself, not just the hair symptoms

If two or more of these sound familiar, hard water is worth treating as a suspect, not just a footnote.

Do You Actually Have Hard Water? A Quick Way to Check

You don’t need a testing kit to get a rough answer:

  1. Look at your fixtures. White, chalky scale on taps, shower heads, or kettles is a strong sign.
  2. Check the lather test. Hard water makes soap and shampoo foam poorly and rinse off unevenly.
  3. Ask about your water source. Groundwater and borewell-fed supplies are almost always harder than water from large surface reservoirs.
  4. Buy a cheap TDS meter. Anything consistently above 150–200 ppm is worth treating as hard water for hair-care purposes; above 300 ppm is considered quite hard.

[Image alt text: TDS meter reading showing hard water levels for hair care]

How to Fix and Prevent Hard Water Hair Damage

You don’t need to overhaul your bathroom to see a difference. Work through these in order of effort — start at the top.

1. Switch to a Chelating or Clarifying Shampoo

This is the single highest-impact change you can make. Chelating shampoos contain ingredients like EDTA or citric acid that bind to mineral deposits and rinse them away, rather than just cleaning the hair’s surface.

  • Use it once every 1–2 weeks — it’s stronger than a daily shampoo and can be drying if overused
  • Follow immediately with a deep conditioner or hair mask to replace moisture it strips away
  • Look for the words “chelating,” “clarifying,” or “mineral removing” on the label

2. Add an Acidic Rinse After Washing

Mineral deposits are alkaline, so a mild acid helps dissolve and rinse them off.

  • Mix 2 tablespoons of apple cider vinegar into 1 litre of water
  • Pour over clean, wet hair after your last shampoo rinse
  • Leave for 2–3 minutes, then rinse with plain water
  • Use once a week — it also helps close the hair cuticle, adding shine

3. Install a Shower Filter

A shower head filter is a low-cost, no-plumbing-work fix that reduces mineral and chlorine exposure at the source. It won’t soften water as fully as a whole-home softener, but it noticeably cuts down on residue build-up over a few weeks of use.

4. Deep-Condition Weekly, Non-Negotiably

Hard water strips moisture faster than normal, so a once-a-week deep conditioning mask isn’t optional here — it’s maintenance. Look for masks with amino acids, hydrolysed proteins, or ceramides, which help rebuild the cuticle layer that hard water roughens.

5. Consider a Water Softener for Long-Term Relief

If you’re dealing with genuinely hard water (300+ ppm) and can invest in it, a point-of-use or whole-home water softener addresses the root cause rather than managing symptoms. It’s the most effective long-term fix, but also the most expensive — reasonable to plan for once you’ve confirmed hard water is a real, ongoing issue rather than a one-off.

6. Rinse with Filtered or Bottled Water When You Can

Not practical every day, but if you’re doing a colour treatment, a keratin service, or any chemical process, a final rinse with filtered or RO water helps the treatment set properly without mineral interference.

A Simple Weekly Routine to Follow

DayWhat to do
Wash days (2–3x/week)Regular sulphate-free shampoo + conditioner
Once a weekChelating/clarifying shampoo, followed by deep conditioning mask
Once a weekApple cider vinegar rinse after your regular wash
OngoingShower filter installed and filter cartridge replaced per instructions
Special occasionsFinal rinse with filtered/RO water before or after colour/keratin treatments

When to See a Dermatologist or Trichologist

Hard water can worsen hair fall, but it’s rarely the only cause. See a professional if:

  • Hair fall continues for more than 8–12 weeks despite the routine above
  • You notice visible thinning or widening of the parting
  • Your scalp is persistently red, flaky, or painful
  • Hair fall started suddenly alongside other symptoms (fatigue, weight changes, etc.), which can point to a medical cause unrelated to water

A trichologist can rule out thyroid issues, iron deficiency, or androgenetic alopecia — conditions that hard water can mask or mimic.

Frequently Asked Questions

Can hard water actually cause hair fall, or just dryness? Both. Hard water primarily causes dryness, roughness, and breakage, but a compromised scalp barrier and weakened, brittle strands do lead to more visible shedding over time — especially when combined with rough towel-drying or tight hairstyles.

How often should I use a chelating shampoo? Once every one to two weeks for most people. Using it more often can strip natural oils and cause the same dryness you’re trying to fix.

Is bottled or RO water enough to wash my hair in every day? It’s effective but rarely practical long-term. Save it for occasions where water quality really matters, like right after a colour or keratin treatment, and rely on chelating shampoo and shower filters for everyday use.

Do water softeners work for hair, or just for skin and appliances? They help both. Softened water reduces mineral buildup on hair the same way it prevents scale on appliances, which is why it’s considered the most complete long-term fix.

What’s the fastest way to see a difference? An apple cider vinegar rinse gives the quickest visible change in texture and shine — often after just one or two uses — while chelating shampoo and deep conditioning build results over 3–4 weeks.

The Takeaway

Hard water hair damage is common, cumulative, and completely manageable once you know what to look for. Start with the cheapest fixes — a chelating shampoo and a vinegar rinse — before spending on equipment, and give any routine at least three to four weeks before judging results. Your hair took months to show the damage; it’s reasonable to give it a few weeks to show the recovery.

[Internal link placeholder: link to your “sulphate-free shampoo guide” or “weekly hair mask routine” post here]

Categories
Uncategorized

How to Repair a Damaged Skin Barrier: Signs, Causes & the Fix

If your skin suddenly feels tight, stings when you apply products that never used to bother you, or keeps breaking out no matter what you try, the problem might not be your routine — it might be your skin barrier.

This guide covers exactly how to repair a damaged skin barrier, why it happens in the first place, and which products actually help versus which ones make it worse.

What Is the Skin Barrier?

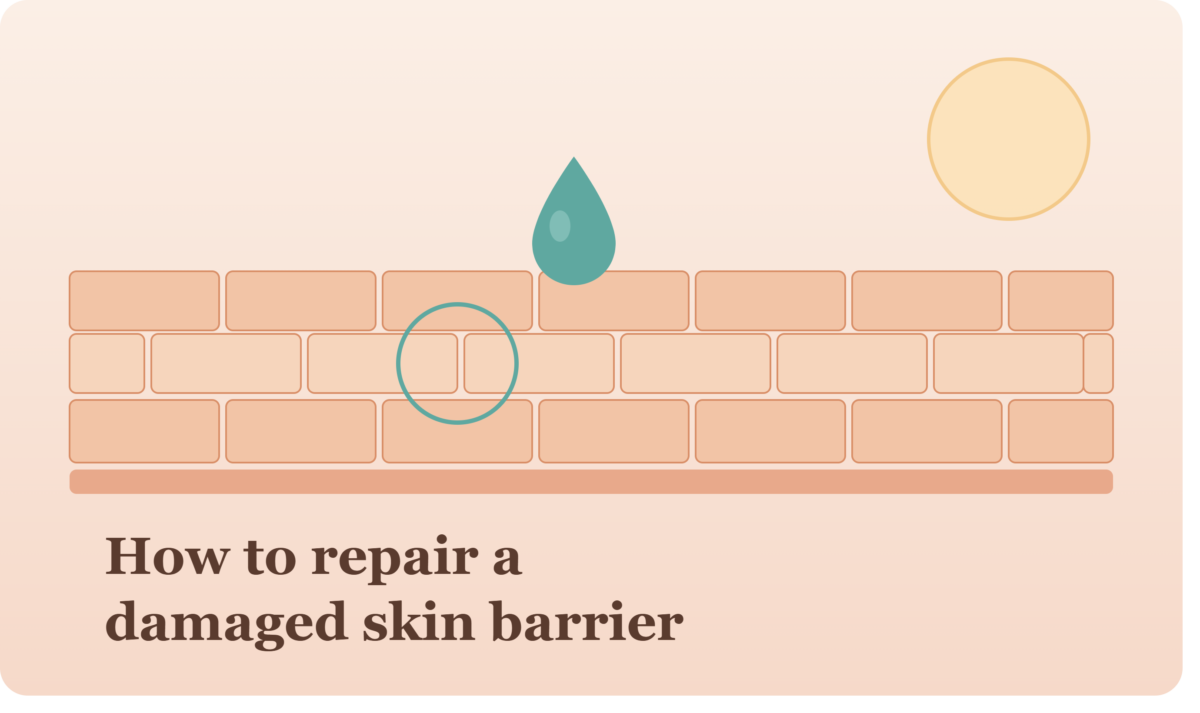
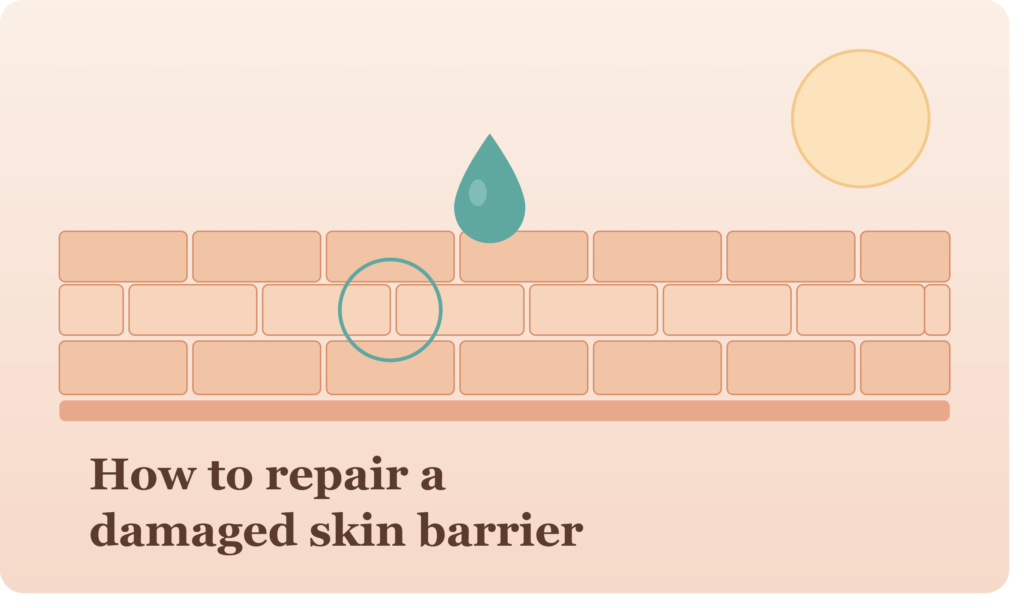
Your skin barrier is the outermost layer of skin (the stratum corneum). Think of it like a brick wall: skin cells are the “bricks,” and lipids like ceramides, cholesterol, and fatty acids are the “mortar” holding everything together. When that mortar breaks down, moisture escapes and irritants get in — which is when problems start.

Signs of a Damaged Skin Barrier

  • Skin feels tight, dry, or rough even right after moisturizing
  • Stinging or burning when applying products that used to feel fine
  • Redness or a flushed appearance that doesn’t fully calm down
  • Random breakouts alongside dry, flaky patches (a confusing combination)
  • Skin looks dull or feels “reactive” to weather, wind, or new products

If two or more of these sound familiar, your barrier likely needs repair before you add anything else to your routine.

What Causes a Damaged Skin Barrier

  • Over-exfoliating — using acids, scrubs, or retinol too frequently
  • Over-cleansing — washing your face more than twice a day, or using hot water
  • Stacking too many actives — combining retinol, vitamin C, and acids without giving skin time to adjust
  • Weather extremes — cold, dry winter air or harsh sun exposure
  • Hormonal shifts — hormonal changes can weaken the barrier and make skin more reactive, which is part of why breakouts and dryness often show up together during these periods
  • Long hot showers — hot water strips natural oils faster than warm or cool water

How to Repair a Damaged Skin Barrier: Step-by-Step

"Flat illustration of a skin barrier shown as a brick wall, with one brick highlighted and healed, symbolizing skin barrier repair"

Step 1: Stop Everything Active for 1–2 Weeks

Pause retinol, exfoliating acids (AHA/BHA), and physical scrubs completely. This is the single most important step — you cannot repair a barrier while continuing to damage it.

Step 2: Simplify to Three Products

Cut your routine down to a gentle cleanser, a barrier-repairing moisturizer, and sunscreen. Skip toners, essences, and serums until your skin calms down.

Step 3: Choose Barrier-Repair Ingredients

Look for these on ingredient labels — they rebuild rather than treat:

  • Ceramides — replace the lipids your barrier has lost
  • Centella asiatica (cica) — calms redness and inflammation
  • Panthenol (pro-vitamin B5) — soothes and supports healing
  • Squalane — lightweight, non-irritating moisture without clogging pores
  • Colloidal oatmeal — reduces itching and sensitivity

Step 4: Use Lukewarm Water Only

Hot water feels good but accelerates moisture loss. Switch to lukewarm water for washing your face, and pat skin dry instead of rubbing.

Step 5: Reintroduce Actives Slowly

Once redness, tightness, and stinging have resolved (usually 2–4 weeks), reintroduce one active ingredient at a time, once every 1–2 weeks, starting with the gentlest option.

Best Products for Skin Barrier Repair (What to Look For)

You don’t need a specific brand — you need the right ingredient profile. When shopping, prioritize:

  • Moisturizers listing ceramides or “ceramide complex” in the first few ingredients
  • Fragrance-free formulas (fragrance is one of the most common irritants during barrier repair)
  • “Barrier repair,” “recovery,” or “sensitive skin” labeling over “brightening” or “exfoliating” labeling

How Long Does Skin Barrier Repair Take?

Most mild cases improve within 2–4 weeks of a simplified routine. More significant damage — from long-term over-exfoliation, for example — can take 6–8 weeks to fully recover. Consistency matters more than speed here; switching products again mid-repair often resets the clock.

Frequently Asked Questions

Can a damaged skin barrier cause acne? Yes. A weakened barrier lets irritants in more easily and struggles to regulate oil production, which can trigger breakouts even in skin that wasn’t previously acne-prone.

Should I stop moisturizing if my skin barrier is damaged? No — moisturizer is essential during repair. What you should stop is anything active or exfoliating, not hydration.

Is Vaseline good for skin barrier repair? Petroleum jelly can help lock in moisture as an occlusive, but it doesn’t actively rebuild the barrier the way ceramides do. It works best as a top layer over a ceramide moisturizer, not a replacement for one.

How do I know if my barrier is healed? Skin stops stinging when you apply products, redness settles, and it feels comfortable rather than tight after cleansing.

Final Thoughts

A damaged skin barrier isn’t fixed by adding more products — it’s fixed by removing what’s causing the damage and giving your skin the specific ingredients it needs to rebuild. Once your barrier is healthy again, everything else in your routine works better too.

Categories
Clean/Green Beauty Uncategorized

How to Build a Zero-Waste Skincare Routine (Beginner’s Guide 2026)

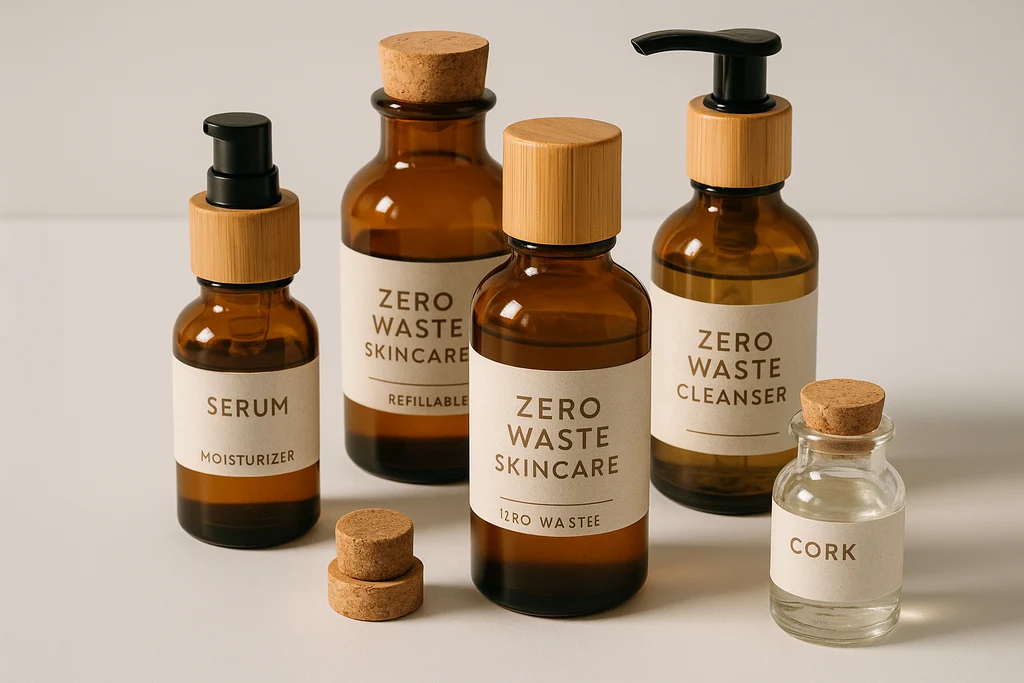
Refillable skincare packaging next to a solid cleansing bar and glass dropper bottle

If your bathroom shelf looks like a plastic recycling bin waiting to happen, you’re not alone. The average skincare routine — cleanser, toner, serum, moisturizer, sunscreen, exfoliant — can rack up six or seven plastic bottles before you’ve even started your makeup. A zero-waste skincare routine is about closing that gap: choosing products, packaging, and habits that send less to landfill without giving up results.

This guide walks through exactly how to do it, one step at a time, so you can build a routine that’s good for your skin and the planet.

What Does “Zero-Waste Skincare” Actually Mean?

Zero-waste skincare doesn’t require perfection — nobody’s routine produces literally zero trash. Instead, it follows a simple hierarchy borrowed from the broader zero-waste movement:

  1. Refuse what you don’t need (extra steps, single-use samples, impulse buys)
  2. Reduce how much packaging and product you use overall
  3. Reuse containers, tools, and applicators
  4. Recycle what’s left, and only as a last resort
  5. Rot (compost) anything that’s genuinely biodegradable

Applied to skincare, that means favoring eco-friendly skincare products with minimal, recyclable, or refillable packaging, choosing multi-use formulas over single-use ones, and being honest about what your skin actually needs.

Why It’s Worth the Switch

Beauty packaging is one of the most persistent sources of plastic waste — much of it too small, too mixed-material, or too contaminated with product residue to be recycled through standard municipal programs. Brands are responding: more companies are now offering refill pouches, glass and aluminum containers, and biodegradable formulas instead of the plastic-heavy packaging that’s dominated the industry for decades. Choosing sustainable skincare isn’t just a personal statement anymore — it’s becoming the mainstream default.

Step 1: Audit Your Current Routine

Before buying anything new, take stock of what you already own.

  • Lay out every product you currently use
  • Note which ones you actually finish versus which ones sit half-used for months
  • Separate “needs” (cleanser, moisturizer, SPF) from “wants” (that seventh serum)

Finishing what you already have — even if it’s not “sustainable” — is more zero-waste than tossing it and buying green replacements. The most eco-friendly product is the one already sitting in your bathroom.

Step 2: Simplify Before You Swap

A shorter routine is inherently lower-waste. Most skin genuinely needs only:

  • A gentle cleanser
  • A moisturizer suited to your skin type
  • Daily SPF
  • One targeted treatment (if needed) — a retinoid, vitamin C, or exfoliating acid

Cutting a ten-step routine down to four or five well-chosen products reduces both packaging waste and how often you’re repurchasing.

Step 3: Swap Toward Low-Waste Packaging

Once you know what you actually use, start replacing it — as products run out, not all at once — with lower-waste alternatives:

  • Solid bars (cleansing bars, shampoo bars, moisturizer bars) skip plastic bottles almost entirely
  • Refillable skincare systems let you buy product without buying a new container every time
  • Glass and aluminum packaging recycles far more reliably than mixed-plastic tubes and pumps
  • Concentrated or waterless formulas (powders, balms) use less packaging per use since they’re not diluted with water

Step 4: Replace Disposable Tools

Some of the biggest hidden waste in skincare isn’t the product — it’s the accessories:

  • Swap cotton pads and makeup wipes for reusable, washable rounds
  • Trade plastic exfoliating poufs for a konjac sponge, washcloth, or natural loofah
  • Choose a bamboo or metal facial roller/gua sha instead of plastic tools
  • Use a reusable makeup remover cloth instead of single-use wipes

Step 5: Look for Genuine Sustainability Signals

“Eco-friendly” is an unregulated marketing term, so look past the packaging claims:

  • Third-party certifications (Leaping Bunny for cruelty-free, USDA Organic, EWG Verified)
  • Clear ingredient sourcing information, not just vague “natural” claims
  • Actual biodegradable or compostable packaging — not just packaging that’s technically recyclable but rarely accepted locally
  • Brands that publish real sustainability data rather than one glossy campaign

Step 6: Close the Loop

  • Recycle mindfully — rinse containers before recycling, and check whether your municipality actually accepts the material (many “recyclable” beauty packagings aren’t accepted curbside)
  • Return refill programs many brands now run in-store or by mail
  • Repurpose empty containers for travel-size decanting or storage
  • Compost genuinely compostable packaging inserts, like some cardboard or bamboo components

A Sample Zero-Waste Skincare Routine

StepLow-Waste Swap
CleanseSolid cleansing bar or oil cleanser in a glass bottle
Exfoliate (2–3x/week)Konjac sponge or biodegradable exfoliating bar
TreatConcentrated serum in a refillable glass dropper bottle
MoisturizeMoisturizer bar or cream in an aluminum jar
ProtectMineral SPF in a recyclable or refillable tube
Remove makeupReusable cotton rounds + oil cleanser

Common Mistakes to Avoid

  • Buying a whole new “sustainable” routine at once — this creates waste from the products you’re replacing. Transition gradually.
  • Assuming all plastic-free means zero-waste — glass and metal have their own environmental footprint from mining and manufacturing; reuse matters more than material alone.
  • Ignoring shipping packaging — a beautifully sustainable product shipped in excess plastic mailers undercuts the effort.
  • Chasing trends over needs — the most sustainable product is one you’ll actually use up.

FAQ: Zero-Waste Skincare

Is zero-waste skincare more expensive? Not necessarily. Solid bars and concentrated formulas often last longer per dollar than diluted liquid products, and refill systems are typically cheaper than buying new containers each time.

Can zero-waste skincare work for sensitive or acne-prone skin? Yes — sustainability and formulation are separate issues. Look for the same active ingredients and gentle, fragrance-free formulas you’d normally choose; just check the packaging and sourcing separately.

What’s the easiest first swap to make? Reusable cotton rounds and a solid cleansing bar are usually the simplest, lowest-commitment starting points.

Do refill pouches actually reduce waste? Yes — refill pouches use significantly less plastic by weight than a full rigid container, even though they’re not always curbside recyclable themselves.

The Bottom Line

A zero-waste skincare routine isn’t about buying a completely new, perfectly sustainable shelf overnight. It’s a gradual shift — using up what you have, simplifying your steps, and choosing better packaging as you naturally repurchase. Small, consistent swaps compound into a routine that’s genuinely lower-impact, without sacrificing the results you’re used to.

Categories
Clean/Green Beauty

Budget Beauty Dupes That Actually Work: Honest Picks Under $15

Budget Beauty Dupes That Actually Work: Honest Picks U

Walk into any beauty aisle and you’ll notice something interesting: some of the most talked-about “holy grail” products aren’t luxury brands at all. They’re drugstore staples that quietly outperform their pricier counterparts. This roundup focuses on categories where budget options consistently earn a reputation for real results — not hype.

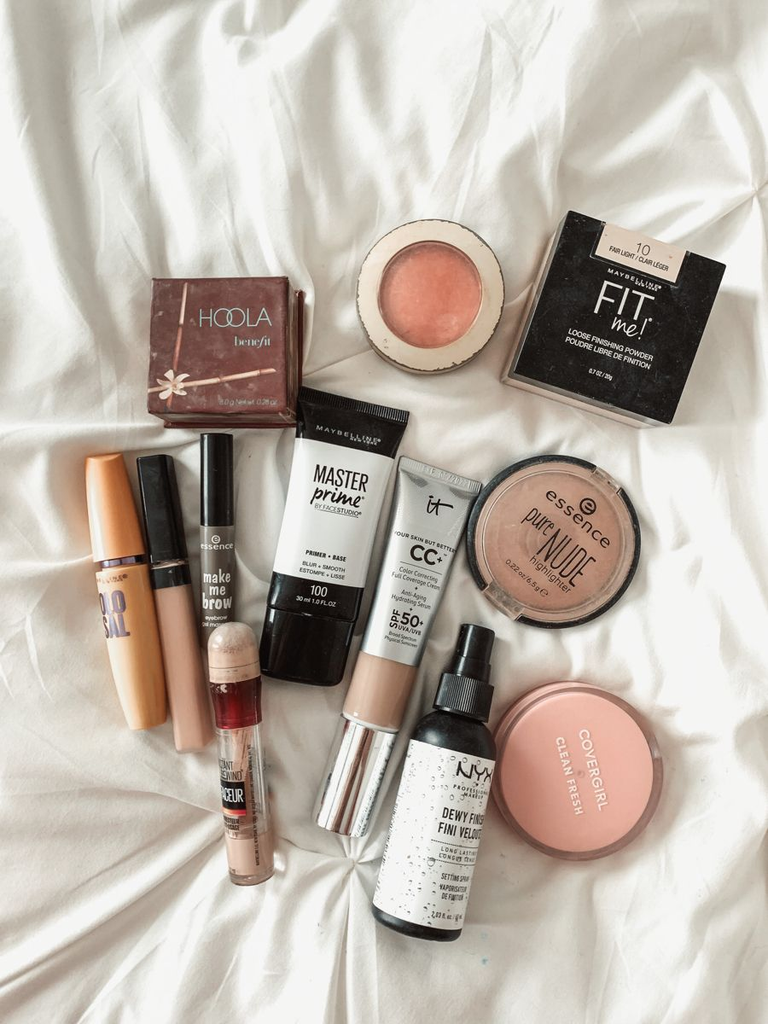
"Flatlay of affordable drugstore makeup products including foundation, concealer, and lip color, arranged on a neutral background — budget beauty essentials"

How to Actually Judge a Budget Beauty Product

Before diving into picks, here’s what separates a good budget dupe from a waste of money:

  • Ingredient overlap: Does it contain similar active ingredients to the luxury version (like niacinamide, hyaluronic acid, or dimethicone)?
  • Texture and finish: Does it apply and wear similarly, or does it feel noticeably cheaper?
  • Longevity: Does it hold up through a full day, or does it break down quickly?
  • Reviews across multiple sources: One glowing review means nothing. Look for consistent feedback across different skin tones, types, and climates.

Budget Beauty Categories Worth Exploring

Face Primer & Setting Products

Drugstore primers have come a long way. Many budget-friendly formulas now offer blurring and mattifying effects comparable to prestige brands, often using similar silicone-based bases.

Foundation & Concealer

This is one of the strongest categories for budget dupes. Several drugstore foundation lines are frequently compared to high-end counterparts for shade range and wear time, especially those built on similar buildable, medium-coverage formulas.

Setting Spray

A good setting spray doesn’t need to be expensive — most work through a simple combination of water, a light polymer, and sometimes a touch of glycerin. The formulas across price points are often nearly identical.

Skincare-Infused Makeup

Many budget brands now blend skincare ingredients like niacinamide or hyaluronic acid directly into foundations and tinted moisturizers — a trend that started in prestige beauty and has become widely accessible.

Brushes & Tools

Application tools are one of the easiest places to save money. A well-made synthetic brush from an affordable line can apply product just as smoothly as a $40 brush, since the difference often comes down to bristle density rather than brand name.

Red Flags to Watch For in Budget Products

Not every cheap product is a hidden gem. Watch out for:

  • Extremely short shelf life or fast separation — a sign of unstable formulation
  • Strong artificial fragrance — often used to mask lower-quality ingredients
  • Vague ingredient lists — transparency matters, regardless of price
  • Too-good-to-be-true claims — “instant wrinkle removal” is a red flag at any price point

How to Build a Budget Beauty Bag

Rather than buying one of everything, focus on a few high-impact categories first:

  1. Concealer — covers the most visible concerns (dark circles, blemishes)
  2. Setting spray or powder — extends wear time on everything else
  3. A neutral eyeshadow palette — versatile for everyday looks
  4. A tinted lip product — doubles as blush in a pinch

Starting with these four items alone can build a complete, functional makeup bag for well under $50.

Final Thoughts

The idea that good beauty products require a big price tag is outdated. Formulation technology has become far more accessible, and many affordable brands now compete directly with luxury lines — sometimes using nearly identical core ingredients. The real skill isn’t in spending more; it’s in knowing what to look for on the label and being willing to test before you commit to full-size purchases.

Categories
Makeup

5 Makeup Mistakes Beginners Make (And How to Fix Them)

I still remember the first time I tried to recreate a makeup tutorial I’d watched about ten times. Same products the girl used, same brushes, even the same order of steps written out on a sticky note next to my mirror. And somehow, my face still looked… off. Not bad exactly, just not right. A little patchy in some spots, a weird orange tint near my jaw, brows that looked like I’d drawn them on with a marker.

If that sounds familiar, take a breath — it’s not you. It’s almost never “you.” It’s usually one of a handful of small, fixable makeup mistakes that basically everyone makes when they’re new to this. I made all five of the ones below, more than once, before someone finally pointed them out to me (thanks, YouTube comment section).

So let’s go through the most common makeup mistakes and how to fix them, one by one. Consider this your beginner makeup tips cheat sheet — nothing complicated, just the stuff I wish someone had told me on day one.

1. Wearing the wrong foundation shade (or the wrong formula entirely)

This one’s a classic, and it’s probably the most common of all the foundation mistakes out there — usually the easiest one to spot on someone else before you catch it on yourself. Too light and you get that ghostly, almost gray look. Too dark and there’s a weird muddy line right where your face meets your neck. And even if the color’s fine, the wrong formula can wreck you too — a heavy, full-coverage foundation on oily skin will slide right off your T-zone by lunchtime.

Most of us test foundation on the back of our hand at the store. Which, in hindsight, makes no sense — your hand and your face are rarely the same shade.

Here’s basically how to apply foundation without mistakes, or at least avoid the biggest ones:

  • Swatch it on your jawline instead, and step outside or near a window if you can. Store lighting lies.
  • You’re looking for a shade that basically disappears into your skin, not one that sits on top like a layer.
  • Undertone matters more than the number on the bottle — warm, cool, neutral, whatever you are, match that first.
  • Stuck between two shades? Mix them. Don’t just pick the “safer” one and hope.
  • If you’re buying online, grab a sample first if the brand offers one. Trust me, it saves money in the long run.

2. Skipping skin prep because you’re in a rush

Woman applying moisturizer to prevent oily skin from overproducing oil

I get it — you’re already running late, and moisturizer feels like an optional extra step when foundation is sitting right there. But skipping it is basically asking for patchiness. Dry patches grab onto powder and look flaky, oily spots get shiny and let everything slide off.

What actually made a difference for me:

  • Moisturize every single time, even on oily skin days — just go lightweight and oil-free.
  • A primer that matches your skin type (hydrating if you’re dry, mattifying if you’re oily) smooths things out and genuinely helps makeup last longer.
  • Give it a minute to actually sink in before you start layering foundation on top. Rushing this step is what causes that weird pilling, rolly texture.

3. Not blending nearly enough

Harsh lines are the number one thing that gives away a rushed look — a hard edge along the jaw, a stripe of blush that never quite melted in, eyeshadow that looks pasted on instead of shaded. I used to think blending was basically done the second the product was on my face. It’s not. If you want to know how to blend makeup like a pro, this is really the whole secret: patience, not skill.

  • A damp makeup sponge is genuinely a game changer for foundation and concealer — it pushes product into the skin instead of leaving it sitting on top.
  • For eyeshadow, get an actual blending brush (not the little sponge applicator that comes in the palette — RIP to that thing) and use small circular motions to soften edges before adding your next color.
  • Don’t stop blending at your jaw. Take it down into your neck a little, and up toward the hairline too.
  • If you’re the type to stop early, set a timer for an extra two minutes on blending. It sounds silly but it works.
  • This applies to eyeliner too — one of the most common eyeliner mistakes beginners make is dragging a single hard line instead of building it with short strokes, which is what causes that harsh, uneven look.

4. Piling on way more product than you need

This was my biggest one, honestly. I thought more foundation meant more “finished.” It doesn’t — it just means more obvious, and it’s the fastest way to end up looking cakey or mask-like, especially with foundation, powder, or eyeshadow.

  • Build coverage in thin layers rather than going in heavy on the first pass.
  • Start with something like a pea-sized amount of foundation — you can always add more, but you can’t really take it away.
  • With powder, tap off the excess on your brush before it touches your face. Less is genuinely more here.
  • Same goes for eyeshadow — light hand first, build up the color gradually if you want it more intense.

5. Not paying attention to brow shape

Brows frame your whole face, so even small mistakes here get noticed more than you’d think — over-filled brows, a shape that doesn’t match your natural growth, or one brow that’s just… different from the other (we’ve all been there).

  • Map them out first: line a brush up from the side of your nose to find where your brow should start, and from the outer corner of your eye to find where it should end.
  • Use short, light strokes that mimic hair instead of solid lines — it reads way more natural.
  • Fill gaps instead of redrawing the whole brow from scratch.
  • Step back from the mirror before you decide you’re done. Small differences between your two brows are way easier to catch from a few feet away than up close.

Quick recap of common makeup mistakes and how to fix them

  • Wrong foundation shade/formula — test on your jawline in daylight, match your undertone
  • Skipping skin prep — moisturizer and primer, every time, no shortcuts
  • Not blending — use the right tools and don’t stop too early
  • Too much product — thin layers, build up slowly
  • Ignoring brow shape — map first, fill with light strokes, check symmetry from a distance

A few things people usually ask

Why does my makeup look cakey? Almost always one of three things: skipped skin prep, too much product at once, or a formula that’s too heavy for your skin type. Fix the prep, go lighter on application, and blend more than feels necessary.

How do I actually know if my foundation shade is right? Check your jawline in daylight. If it blends in without a visible line — not lighter, not darker than your neck — you’ve probably got it.

What’s the one mistake almost everyone makes as a beginner? Blending, hands down. It’s the one thing that makes even a simple, basic look either read as “done” or “unfinished.”

Why does my foundation oxidize and turn darker? This usually happens when a foundation’s formula reacts with your skin’s natural oils a little while after application. It’s more common with certain formulas on oily or combination skin. Letting your skin fully absorb moisturizer and primer before applying foundation, and choosing an oil-free formula if you’re prone to this, both help.

Do makeup mistakes actually age you? Some can. Heavy, cakey product tends to settle into fine lines and make them more noticeable, and harsh, unblended lines can look more aging than a soft, natural finish. Sticking to thin layers and good blending is the easiest way to avoid makeup mistakes that age you rather than flatter you.

One last thing

Nobody nails this on the first try, or the fifth, or honestly sometimes the fiftieth. Every mistake on this list is just part of learning — I made every single one of them, and most of us did. Pick one thing from this list to work on this week instead of trying to fix everything at once. You’ll be surprised how much of a difference just one small change makes.

What’s the mistake that took you the longest to figure out? I’d genuinely love to know — drop it in the comments.

Categories
Hair Care & Styling

How to Choose the Right Shampoo for Your Hair Type

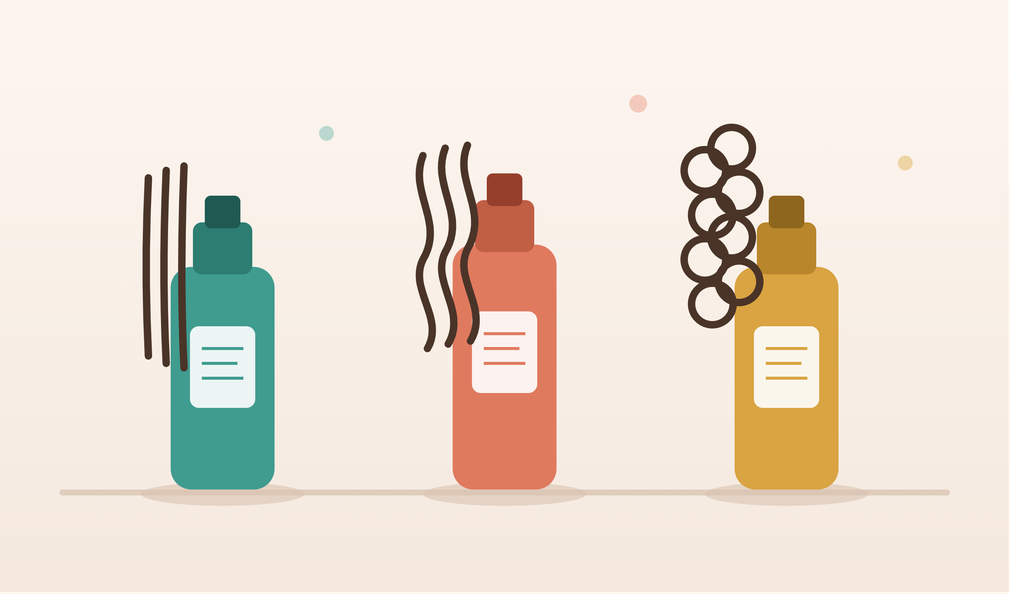
Three shampoo bottles in teal, coral, and amber, each paired with a different hair texture — straight, wavy, and curly — representing how to choose the right shampoo for your hair type

Ever bought a shampoo because the bottle looked nice, or because a friend swore by it, only to end up with limp, greasy hair by day two? You’re not alone. Most of us have a shelf full of half-used bottles that promised salon-perfect hair and delivered… nothing much.

Here’s the thing nobody tells you at the store: there’s no such thing as “the best shampoo.” There’s only the best shampoo for your hair. What works wonders for your friend’s thick, curly hair could leave yours looking flat, dry, or worse — it could even make hair fall and dandruff more stubborn than before.

So let’s fix that. In this guide, I’ll walk you through how to actually figure out your hair type, which ingredients to look for (and which to run from), and how to finally pick a shampoo that works with your hair instead of against it.

Why Your Hair Type Matters More Than the Brand

Here’s something a lot of people don’t realize: shampoo isn’t one-size-fits-all because hair itself isn’t one-size-fits-all. Every strand type reacts differently to cleansing agents, oils, and proteins.

Think about it this way — a shampoo built for fine, oily hair is designed to strip away excess oil fast. Put that same shampoo on curly hair, which is naturally drier, and you’ll end up with frizz and brittleness. Flip it around, and a rich, moisturizing shampoo made for dry hair will feel like a grease bomb on an oily scalp within a day.

So before you even think about brands or price tags, the real starting point is understanding your own hair and scalp.

Step 1: Figure Out Your Hair Type First

This sounds obvious, but most people skip it and just buy whatever’s trending. Take a minute to actually think about which of these sounds like you:

  • Oily hair — your scalp feels greasy by the second day (sometimes even the first), and your hair looks flat no matter how much you style it
  • Dry hair — it feels rough or straw-like, maybe your scalp feels tight after washing
  • Normal hair — you’re one of the lucky ones; oil production is balanced and hair behaves most days
  • Curly or textured hair — naturally prone to dryness and frizz, since your hair’s natural oils have a harder time traveling down those curls. A shampoo for curly hair without sulfates usually works best here
  • Color-treated hair — needs a gentler touch. Look specifically for the best shampoo for color-treated hair so you’re not fading your color down the drain
  • Fine or thin hair — heavy formulas will weigh it down; you want a lightweight shampoo for fine and thin hair that adds volume without the buildup
  • Dandruff-prone or sensitive scalp — this calls for a shampoo for sensitive scalp or a shampoo for dandruff and oily scalp with proper anti-fungal ingredients, not just a “gentle” label

And here’s a detail that trips a lot of people up: you can be a mix. Oily roots with dry, damaged ends is extremely common, especially if you color or heat-style your hair. If that’s you, treat your scalp and your lengths separately — shampoo for the roots, richer treatments for the ends.

Step 2: Match Ingredients to Your Hair Type

Once you know your type, this part gets a lot easier. Here’s a quick cheat sheet:

Hair TypeLook ForAvoid
Oily hairClarifying agents, tea tree oil, salicylic acidHeavy oils, silicones
Dry/frizzy hairGlycerin, shea butter, hyaluronic acid, argan oilSulfates, alcohol-based formulas
Curly hairSulfate-free, moisturizing, co-wash formulasHarsh sulfates, drying alcohols
Color-treated hairSulfate-free, UV protectants, color-lock formulasSulfates, clarifying shampoos (use sparingly)
Fine/thin hairLightweight volumizing formulas, biotinHeavy creams, thick conditioning shampoos
Dandruff-proneZinc pyrithione, ketoconazole, selenium sulfideOverly moisturizing formulas that trap flakes

Keep this table handy next time you’re standing in the shampoo aisle, squinting at ingredient lists.

Step 3: Learn to Actually Read the Label

Shampoo bottles love to throw around buzzwords. Here’s what they actually mean:

  • Sulfate-free — one of the real sulfate-free shampoo benefits is that it cleanses gently without stripping your natural oils, which is why it’s such a good fit for dry, curly, or color-treated hair
  • Paraben-free — simply means it skips certain preservatives some people prefer to avoid
  • pH-balanced — helps your scalp stay healthy and can noticeably cut down on frizz
  • Medicated or anti-dandruff — has active ingredients that treat flaking and itchiness, but don’t use it every single day; alternate with a regular shampoo two to three times a week
  • Anti-hair-fall formulas — if thinning or shedding is a concern, look for a shampoo for hair fall control with biotin, caffeine, or keratin in the ingredient list

A Few Ingredients Worth Avoiding

You don’t need to panic and avoid every sulfate or silicone on the market — plenty of people use them without issue. But if your hair is already dry, color-treated, or damaged, harsh sulfates (SLS/SLES) and high alcohol content will only make things worse. Heavy silicones can also build up over time, especially on fine hair, leaving it looking dull and weighed down. When in doubt, flip the bottle over and actually read the ingredients — not just the marketing on the front.

Step 4: How Often Should You Actually Wash Your Hair?

This is one of the most common questions I hear, and honestly, the answer depends entirely on your hair type:

  • Oily hair — every day or every other day
  • Normal hair — 2 to 3 times a week
  • Dry or curly hair — 1 to 2 times a week, with co-washing in between if needed
  • Color-treated hair — twice a week, and always with cool water to help lock in color

Wash too often and you strip your natural oils, which can actually push your scalp to produce even more oil to compensate. Wash too little and you’re looking at buildup and scalp irritation instead. If you’ve got curly hair and you’re torn on co-wash vs shampoo, co-washing — cleansing with conditioner only — on the days you skip shampoo can help your curls hold onto moisture.

Mistakes People Make All the Time

  1. Choosing a shampoo because it smells nice or the bottle looks pretty — instead of checking the ingredients
  2. Using anti-dandruff shampoo every day — it’s meant to be alternated, not used constantly, or it’ll dry out your scalp
  3. Skipping conditioner because your hair is oily — even oily hair needs conditioner, just keep it on the lengths and away from the roots
  4. Not rinsing properly — leftover shampoo residue is a sneaky cause of dull, buildup-heavy hair
  5. Switching shampoos every few weeks out of impatience — give a new formula at least 2 to 3 weeks before deciding it’s not working

Final Thoughts

Picking the right shampoo really isn’t about chasing trends or buying whatever’s going viral this month. It comes down to knowing your hair, understanding your scalp, and actually reading what’s in the bottle instead of trusting what’s printed on the front. Start with identifying your hair type, match it against the ingredients that work for you, and give it time. Small, consistent choices in your hair care routine tend to beat switching products every other month.

Frequently Asked Questions

Can I use the same shampoo for an oily scalp and dry ends? Yes, and it’s actually pretty common. Focus the shampoo on your scalp where the oil builds up, then use a hydrating conditioner or hair mask on your lengths and ends where the dryness is.

Is sulfate-free shampoo something everyone needs? Not necessarily. But if your hair is color-treated, curly, or already dry and damaged, it’s worth the switch — sulfates tend to strip moisture and fade color faster than you’d like.

How long before I actually see results from a new shampoo? Give it at least 3 to 4 weeks. Your hair growth cycle and scalp need time to adjust, so don’t judge a shampoo after just a couple of washes.

What’s the best shampoo for a sensitive scalp? Stick to fragrance-free, sulfate-free formulas with calming ingredients like aloe vera or oat extract. Skip anything loaded with dyes or strong essential oils.

Can a bad shampoo actually cause hair fall? Not directly, but a harsh or mismatched one can weaken your strands and irritate your scalp, which makes existing shedding look and feel worse. If hair fall is already a concern, a shampoo for hair fall control with biotin or caffeine can genuinely help support scalp health.

Which shampoo ingredients should I avoid completely? Honestly, not every sulfate or silicone deserves the bad reputation they get. But if your hair is dry, colored, or damaged, steer clear of high-sulfate and high-alcohol formulas — they’re the ones most likely to strip moisture you can’t afford to lose.