
I still remember the first time I tried to recreate a makeup tutorial I’d watched about ten times. Same products the girl used, same brushes, even the same order of steps written out on a sticky note next to my mirror. And somehow, my face still looked… off. Not bad exactly, just not right. A little patchy in some spots, a weird orange tint near my jaw, brows that looked like I’d drawn them on with a marker.
If that sounds familiar, take a breath — it’s not you. It’s almost never “you.” It’s usually one of a handful of small, fixable makeup mistakes that basically everyone makes when they’re new to this. I made all five of the ones below, more than once, before someone finally pointed them out to me (thanks, YouTube comment section).
So let’s go through the most common makeup mistakes and how to fix them, one by one. Consider this your beginner makeup tips cheat sheet — nothing complicated, just the stuff I wish someone had told me on day one.
1. Wearing the wrong foundation shade (or the wrong formula entirely)
This one’s a classic, and it’s probably the most common of all the foundation mistakes out there — usually the easiest one to spot on someone else before you catch it on yourself. Too light and you get that ghostly, almost gray look. Too dark and there’s a weird muddy line right where your face meets your neck. And even if the color’s fine, the wrong formula can wreck you too — a heavy, full-coverage foundation on oily skin will slide right off your T-zone by lunchtime.
Most of us test foundation on the back of our hand at the store. Which, in hindsight, makes no sense — your hand and your face are rarely the same shade.
Here’s basically how to apply foundation without mistakes, or at least avoid the biggest ones:
- Swatch it on your jawline instead, and step outside or near a window if you can. Store lighting lies.
- You’re looking for a shade that basically disappears into your skin, not one that sits on top like a layer.
- Undertone matters more than the number on the bottle — warm, cool, neutral, whatever you are, match that first.
- Stuck between two shades? Mix them. Don’t just pick the “safer” one and hope.
- If you’re buying online, grab a sample first if the brand offers one. Trust me, it saves money in the long run.
2. Skipping skin prep because you’re in a rush
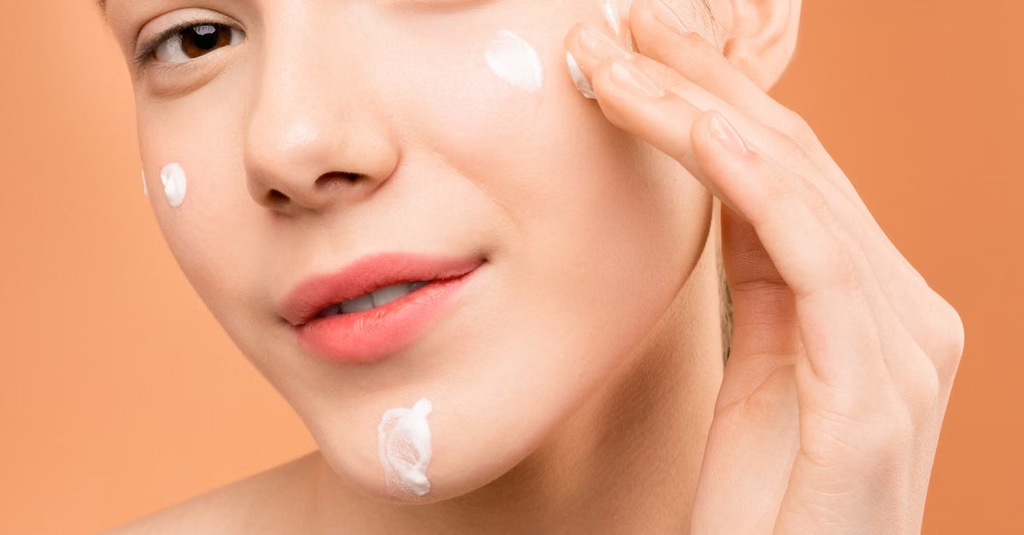
I get it — you’re already running late, and moisturizer feels like an optional extra step when foundation is sitting right there. But skipping it is basically asking for patchiness. Dry patches grab onto powder and look flaky, oily spots get shiny and let everything slide off.
What actually made a difference for me:
- Moisturize every single time, even on oily skin days — just go lightweight and oil-free.
- A primer that matches your skin type (hydrating if you’re dry, mattifying if you’re oily) smooths things out and genuinely helps makeup last longer.
- Give it a minute to actually sink in before you start layering foundation on top. Rushing this step is what causes that weird pilling, rolly texture.
3. Not blending nearly enough
Harsh lines are the number one thing that gives away a rushed look — a hard edge along the jaw, a stripe of blush that never quite melted in, eyeshadow that looks pasted on instead of shaded. I used to think blending was basically done the second the product was on my face. It’s not. If you want to know how to blend makeup like a pro, this is really the whole secret: patience, not skill.
- A damp makeup sponge is genuinely a game changer for foundation and concealer — it pushes product into the skin instead of leaving it sitting on top.
- For eyeshadow, get an actual blending brush (not the little sponge applicator that comes in the palette — RIP to that thing) and use small circular motions to soften edges before adding your next color.
- Don’t stop blending at your jaw. Take it down into your neck a little, and up toward the hairline too.
- If you’re the type to stop early, set a timer for an extra two minutes on blending. It sounds silly but it works.
- This applies to eyeliner too — one of the most common eyeliner mistakes beginners make is dragging a single hard line instead of building it with short strokes, which is what causes that harsh, uneven look.
4. Piling on way more product than you need
This was my biggest one, honestly. I thought more foundation meant more “finished.” It doesn’t — it just means more obvious, and it’s the fastest way to end up looking cakey or mask-like, especially with foundation, powder, or eyeshadow.
- Build coverage in thin layers rather than going in heavy on the first pass.
- Start with something like a pea-sized amount of foundation — you can always add more, but you can’t really take it away.
- With powder, tap off the excess on your brush before it touches your face. Less is genuinely more here.
- Same goes for eyeshadow — light hand first, build up the color gradually if you want it more intense.
5. Not paying attention to brow shape
Brows frame your whole face, so even small mistakes here get noticed more than you’d think — over-filled brows, a shape that doesn’t match your natural growth, or one brow that’s just… different from the other (we’ve all been there).
- Map them out first: line a brush up from the side of your nose to find where your brow should start, and from the outer corner of your eye to find where it should end.
- Use short, light strokes that mimic hair instead of solid lines — it reads way more natural.
- Fill gaps instead of redrawing the whole brow from scratch.
- Step back from the mirror before you decide you’re done. Small differences between your two brows are way easier to catch from a few feet away than up close.
Quick recap of common makeup mistakes and how to fix them
- Wrong foundation shade/formula — test on your jawline in daylight, match your undertone
- Skipping skin prep — moisturizer and primer, every time, no shortcuts
- Not blending — use the right tools and don’t stop too early
- Too much product — thin layers, build up slowly
- Ignoring brow shape — map first, fill with light strokes, check symmetry from a distance
A few things people usually ask
Why does my makeup look cakey? Almost always one of three things: skipped skin prep, too much product at once, or a formula that’s too heavy for your skin type. Fix the prep, go lighter on application, and blend more than feels necessary.
How do I actually know if my foundation shade is right? Check your jawline in daylight. If it blends in without a visible line — not lighter, not darker than your neck — you’ve probably got it.
What’s the one mistake almost everyone makes as a beginner? Blending, hands down. It’s the one thing that makes even a simple, basic look either read as “done” or “unfinished.”
Why does my foundation oxidize and turn darker? This usually happens when a foundation’s formula reacts with your skin’s natural oils a little while after application. It’s more common with certain formulas on oily or combination skin. Letting your skin fully absorb moisturizer and primer before applying foundation, and choosing an oil-free formula if you’re prone to this, both help.
Do makeup mistakes actually age you? Some can. Heavy, cakey product tends to settle into fine lines and make them more noticeable, and harsh, unblended lines can look more aging than a soft, natural finish. Sticking to thin layers and good blending is the easiest way to avoid makeup mistakes that age you rather than flatter you.
One last thing
Nobody nails this on the first try, or the fifth, or honestly sometimes the fiftieth. Every mistake on this list is just part of learning — I made every single one of them, and most of us did. Pick one thing from this list to work on this week instead of trying to fix everything at once. You’ll be surprised how much of a difference just one small change makes.
What’s the mistake that took you the longest to figure out? I’d genuinely love to know — drop it in the comments.