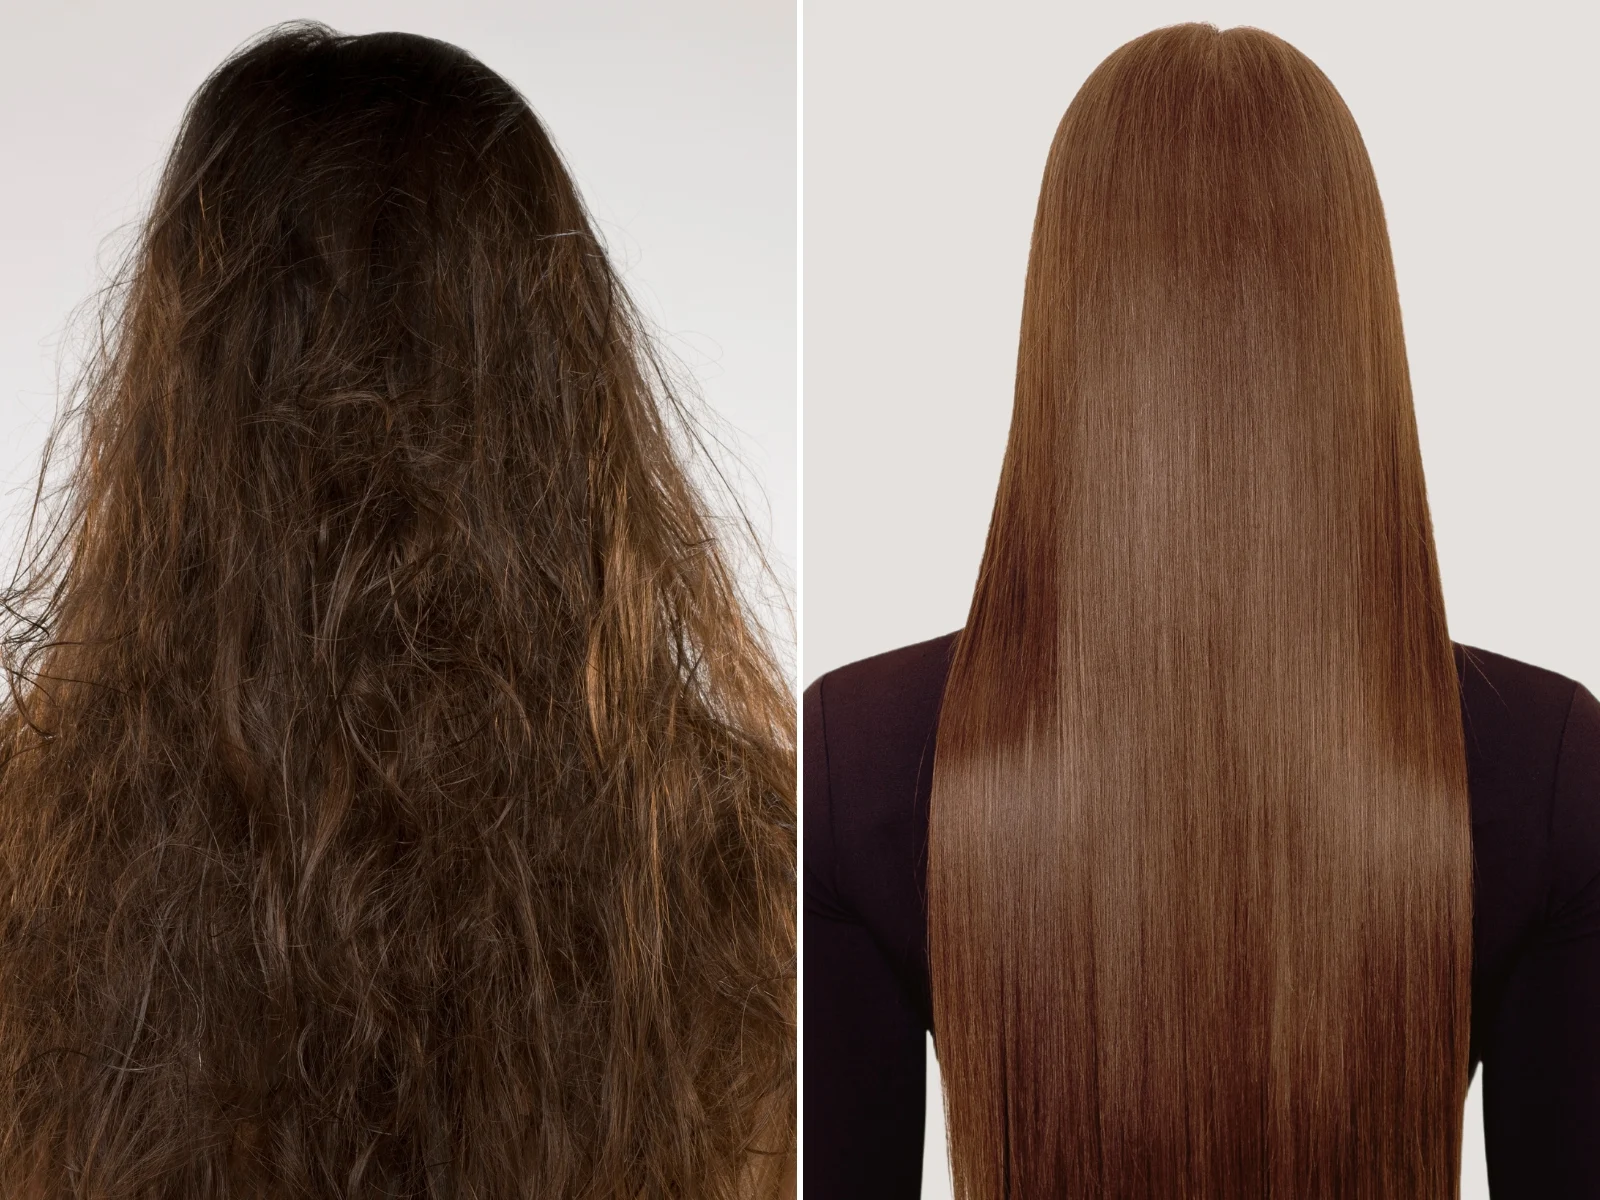
If you’ve ever styled your hair perfectly, stepped outside, and watched it puff up within minutes, you know how frustrating frizz is. The good news is that frizz is fixable. Once you understand why it happens, you can change your routine and see a real difference.
This guide explains the causes of frizzy hair and gives you nine practical fixes you can start using this week.
Why Is My Hair Frizzy?
Frizz happens when the outer layer of your hair (the cuticle) is raised and rough. Instead of lying flat, it absorbs moisture from the air, causing the strand to swell and stick out. The most common triggers are:
Dryness: Dry hair pulls in humidity to make up for missing moisture.
Heat damage: Flat irons and blow dryers roughen the cuticle over time.
Harsh shampoos: Strong sulfates can strip natural oils.
Rough towel drying: Rubbing creates friction and lifts the cuticle.
Chemical treatments: Bleaching and coloring make hair more porous.
Humidity: Damp air causes even healthy hair to swell.
9 Ways to Control Frizzy Hair
1. Switch to a hydrating, sulfate-free shampoo
Look for gentle cleansers that don’t strip your scalp. Wash 2 to 3 times a week rather than daily, unless your scalp is very oily.
2. Condition every wash, and focus on the ends
Apply conditioner from mid-length to ends, leave it for 2 to 3 minutes, and rinse with cool water. Cool water helps the cuticle lie flatter.
3. Use a deep conditioning mask weekly
A hair mask with ingredients like shea butter, argan oil, or coconut oil restores moisture. Leave it on for 10 to 20 minutes once a week.
4. Stop rubbing your hair with a towel
Gently squeeze water out with a microfiber towel or an old cotton T-shirt. This one habit noticeably reduces frizz.
5. Apply a leave-in conditioner or serum on damp hair
Products applied to damp hair lock in moisture before frizz forms. Use a pea-sized amount of serum on the ends, not the roots.
6. Use the best oil for frizzy hair
Lightweight oils like argan or jojoba seal moisture without making hair greasy. Use a few drops on dry ends. Heavier oils like coconut oil suit thick or coarse hair but can weigh down fine hair.
7. Lower the heat, and always use a heat protectant
Keep tools at the lowest effective temperature and never style bone-dry hair without a protectant. Let hair air-dry about 70% before blow-drying.
8. Sleep on a silk or satin pillowcase
Cotton creates friction overnight. Silk or satin lets hair glide, reducing breakage and morning frizz. A loose braid or bun helps too.
9. Get regular trims
Split ends fray upward and create frizz. A trim every 8 to 12 weeks keeps ends healthy.
Frizzy Hair Routine at a Glance
Step
What to do
How often
Shampoo
Gentle, sulfate-free
2 to 3 times a week
Condition
Mid-lengths to ends
Every wash
Hair mask
Deep moisture treatment
Weekly
Leave-in / serum
On damp hair
After every wash
Trim
Remove split ends
Every 8 to 12 weeks
How to Control Frizz in Humid Weather
Humidity is the hardest test for frizzy hair. Use an anti-humidity or anti-frizz serum, avoid brushing dry hair, and choose styles like braids or low buns that limit exposure. Carry a small serum for touch-ups, and skip heavy brushing during the day.
Frequently Asked Questions
Can frizzy hair be permanently fixed? Frizz caused by dryness or damage can be greatly reduced with the right routine, though naturally wavy or curly hair will always be a bit more prone to it.
Does coconut oil help with frizz? It can for thick, coarse, or very dry hair, but it may weigh down fine hair. Use it sparingly.
Why is my hair frizzy even after conditioning? Common causes are product buildup, heat damage, or using the wrong products for your hair type. A clarifying shampoo once or twice a month can help.
Should I brush frizzy hair? Detangle gently with a wide-tooth comb, ideally on damp hair with conditioner in it. Avoid brushing dry hair.
Final Thoughts
Frizz control isn’t about one miracle product. It’s about consistent moisture, less friction, and less heat. Start with two or three changes from this list, and add more as you see results.
If your frizz comes with heavy shedding or scalp irritation, consider seeing a dermatologist or trichologist.
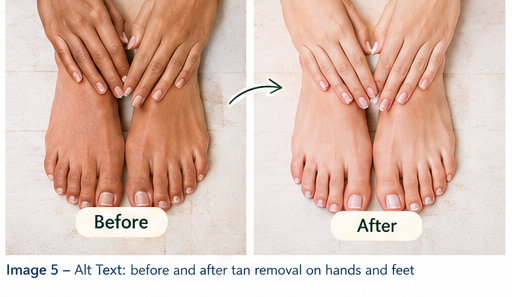
Have you noticed that your hands or feet look darker than the rest of your body after spending time outdoors?
You’re not alone. Hands and feet are among the most exposed parts of the body, yet many people remember to apply sunscreen to their face and forget about their hands, wrists, feet and ankles.
The result can be uneven skin tone, visible tan lines and darker-looking hands and feet.
The good news is that a tan can gradually fade as your skin naturally renews itself. The key is to combine sun protection, gentle skincare and consistency rather than relying on harsh scrubs or quick-fix remedies.
What Causes Tan on Hands and Feet?
A tan develops when the skin responds to ultraviolet radiation by increasing melanin production. This is why exposed areas can become darker after repeated sun exposure.
Hands and feet can be particularly noticeable because they are often exposed during:
Walking outdoors
Travelling
Driving or riding a two-wheeler
Shopping
Daily commuting
Outdoor sports
Wearing sandals or open footwear
Another common problem is that people apply sunscreen to their face but forget their hands and feet.
How to Remove Tan From Hands and Feet
There isn’t a safe overnight method that can instantly erase a tan.
Instead, follow a simple routine.
1. Protect Your Hands and Feet From the Sun
Prevention is the most important part of tan care.
Apply a broad-spectrum sunscreen to exposed hands, wrists, feet and ankles whenever they will be exposed to the sun.
If you’re outdoors for an extended period, reapply according to the sunscreen’s directions.
You can also use physical protection such as:
Full-sleeve clothing
Gloves when appropriate
Covered footwear
Socks
Shade or umbrellas
If you continue getting significant UV exposure without protection, your tan may continue to develop even while you’re treating uneven tone.
2. Exfoliate Gently
Gentle exfoliation can help remove dead surface skin and improve the appearance of uneven texture.
However, aggressive scrubbing isn’t the answer.
Avoid rubbing your hands or feet until the skin becomes red or irritated. Irritation can make pigmentation problems more difficult to manage.
Depending on your skin and the product, you might use a gentle chemical exfoliant occasionally rather than a rough physical scrub.
Start slowly and follow the product’s instructions.
3. Moisturize Your Hands and Feet
Don’t forget hydration.
Hands and feet can become dry from frequent washing, soaps, weather and environmental exposure.
Apply moisturizer after bathing and whenever your skin feels dry.
Ingredients commonly found in moisturizers include:
Glycerin
Ceramides
Hyaluronic acid
Panthenol
Shea butter
Squalane
Well-moisturized skin also tends to feel smoother and more comfortable.
4. Consider Brightening Ingredients
If uneven pigmentation remains after reducing sun exposure, skincare products containing certain brightening ingredients may help improve the appearance of uneven tone over time.
Ingredients you may see in body-care products include:
Niacinamide
Niacinamide is widely used in skincare and may help improve the appearance of uneven skin tone.
Alpha Arbutin
Alpha arbutin is another ingredient used in products designed to address the appearance of pigmentation.
Vitamin C
Vitamin C is commonly used in brightening skincare routines and antioxidant formulations.
The important thing is not to combine several strong products at once.
Introduce one product at a time and patch test when appropriate.
5. Don’t Forget Your Feet
Many people remember their hands but forget their feet.
If you regularly wear sandals or open shoes, your feet can receive plenty of sun exposure.
Apply sunscreen to exposed areas of your feet, including:
Toes
Tops of feet
Ankles
Exposed sides of feet
Pay special attention to areas where sandal straps create noticeable tan lines.
What About Home Remedies for Tan?
You’ll find many online recommendations involving lemon juice, baking soda, toothpaste and harsh scrubs.
Be careful.
Natural doesn’t automatically mean safe for your skin.
Ingredients such as lemon juice can irritate some people’s skin, particularly when combined with sun exposure.
Instead of trying a harsh DIY remedy, a gentle skincare routine is a more predictable approach.
How Long Does It Take for a Tan to Fade?
There isn’t one exact timeline.
It depends on:
How much UV exposure you received
How recently the tanning occurred
Your natural skin pigmentation
Whether you continue getting sun exposure
Your skincare routine
Whether the darkening is actually tanning or another pigmentation problem
Recent Indian skincare guidance on hands and feet suggests that consistent protection and gentle care may require several weeks rather than a few days to show visible changes.
So don’t judge your routine after three days.
Consistency matters more.
Simple Tan-Care Routine
Morning
Cleanse → Moisturize → Sunscreen
Evening
Cleanse → Gentle treatment if appropriate → Moisturize
Once or twice a week
Use a gentle exfoliating product if your skin tolerates it.
You don’t need to exfoliate every day.
5 Mistakes That Can Make Tan Care Worse
1. Scrubbing too hard
Aggressive scrubbing can irritate your skin.
2. Forgetting sunscreen
Without UV protection, you’re constantly adding new sun exposure.
3. Using too many brightening products
More products don’t necessarily mean faster results.
4. Using harsh DIY remedies
Lemon, baking soda and other irritating kitchen ingredients aren’t necessary for a good skincare routine.
5. Expecting overnight results
A tan doesn’t need to disappear in one day.
Give your skin time.
How to Prevent Tan on Hands and Feet
Prevention is easier than repeatedly trying to correct tanning.
Make these habits part of your routine:
Apply sunscreen to exposed hands and feet
Reapply when required
Cover your skin when practical
Avoid unnecessary prolonged sun exposure
Moisturize regularly
Don’t over-exfoliate
And remember: your hands need sunscreen too.
Frequently Asked Questions
Can I remove tan from my hands naturally?
A tan generally fades gradually as the skin renews itself. Protecting the skin from further UV exposure and maintaining a gentle skincare routine are more useful than aggressive DIY treatments.
Why are my hands darker than my face?
Hands are often exposed to sunlight while receiving less sunscreen and skincare than the face. Repeated UV exposure can therefore make the difference in tone more noticeable.
Can sunscreen prevent tanning?
Sunscreen helps protect exposed skin from UV radiation, but no sunscreen should be treated as an excuse for unlimited sun exposure. Use sunscreen as directed and combine it with shade and protective clothing when appropriate.
Can I exfoliate tanned hands every day?
Daily exfoliation isn’t necessary and may irritate your skin. Follow the instructions of the exfoliating product you use.
When should I see a dermatologist?
If pigmentation is persistent, rapidly changing, patchy, painful, itchy or doesn’t seem related to sun exposure, consider getting professional advice rather than assuming it is simply a tan.
Final Thoughts
If your hands and feet have become darker after spending time outdoors, don’t reach immediately for a harsh scrub.
Dark underarms are a common skincare concern, but they’re often misunderstood.
Many people assume darker underarms mean poor hygiene. In reality, underarm skin can darken for several reasons, including friction, shaving or hair removal, irritation from products, post-inflammatory pigmentation and certain medical conditions.
The good news is that you don’t need to scrub your skin aggressively to care for the area.
A gentle routine and identifying the reason for the darkening are much better places to start.
Why Are My Underarms Dark?
There isn’t one single cause.
1. Friction
Underarms naturally experience friction from movement and clothing.
Tight clothing can increase rubbing and irritation, which may contribute to pigmentation over time.
2. Shaving
Frequent shaving can irritate the skin.
Repeated irritation may contribute to post-inflammatory hyperpigmentation, making the area look darker.
3. Hair Removal
Waxing, plucking and other hair-removal methods can sometimes cause irritation or inflammation.
If your skin repeatedly becomes irritated after hair removal, the resulting pigmentation can become more noticeable.
4. Deodorants and Fragrance
Some people are sensitive to ingredients in deodorants, antiperspirants or fragranced products.
If a product causes burning, itching, redness or irritation, stop using it and consider a gentler alternative.
5. Post-Inflammatory Hyperpigmentation
When skin becomes irritated or inflamed, pigmentation can remain after the irritation has disappeared.
This is known as post-inflammatory hyperpigmentation.
Is It Normal to Have Dark Underarms?
Underarm skin doesn’t have to match the exact shade of the surrounding skin.
The area is naturally exposed to:
Friction
Sweat
Hair removal
Deodorants
Clothing
Moisture
So some variation in colour can be completely normal.
The goal of skincare shouldn’t be to make your underarms an unrealistic “perfect” colour.
Instead, focus on healthy, comfortable skin and reducing avoidable irritation.
Simple Underarm Skincare Routine
A simple routine is usually better than a complicated one.
Step 1: Clean Gently
Wash your underarms with a gentle cleanser or body wash.
You don’t need to scrub aggressively.
The underarm area is sensitive, and excessive rubbing can create more irritation.
Step 2: Moisturize
If your underarm skin feels dry or irritated, use a gentle moisturizer.
Look for ingredients such as:
Ceramides
Glycerin
Panthenol
Squalane
A moisturizer can help keep the skin comfortable and reduce dryness.
Step 3: Reduce Friction
Take a look at your clothing.
If tight sleeves constantly rub against your underarms, choosing more comfortable clothing may help reduce repeated irritation.
This is a simple change, but addressing the cause is often more useful than adding another brightening cream.
Step 4: Be Gentle When Shaving
If you shave your underarms:
Use a clean, sharp razor
Avoid dry shaving
Use a suitable shaving product
Don’t repeatedly pass the razor over the same area
Avoid shaving irritated skin
If shaving repeatedly causes bumps or irritation, consider discussing alternative hair-removal options with a professional.
What Ingredients Can Be Used for Underarm Pigmentation?
Some skincare ingredients are commonly used for uneven skin tone.
Niacinamide
Niacinamide is widely used in skincare and may be a gentler option for improving the appearance of uneven pigmentation.
Alpha Arbutin
Alpha arbutin is another ingredient found in products targeting the appearance of pigmentation.
Azelaic Acid
Azelaic acid is used in skincare for several concerns, including uneven pigmentation and acne-related marks.
However, underarm skin can be sensitive.
Don’t immediately combine several active ingredients.
Patch test where appropriate and stop if a product causes significant irritation.
What You Should NOT Put on Dark Underarms
Avoid aggressive DIY “whitening” methods.
❌ Lemon juice
It can irritate the skin.
❌ Baking soda
Its use on sensitive skin can cause irritation.
❌ Rough scrubs
Scrubbing harder doesn’t necessarily make pigmentation disappear.
❌ Bleaching products
Avoid using household bleach or inappropriate chemical products on your skin.
❌ Unregulated whitening creams
Be particularly cautious with products promising extremely fast results.
Some sources warn about potentially harmful or undeclared ingredients in certain skin-lightening products.
Can Deodorant Cause Dark Underarms?
It can contribute to irritation in some people.
If you notice that your underarms become itchy, red, burning or uncomfortable after using a particular deodorant, consider stopping it.
You can try a fragrance-free or sensitive-skin formulation instead.
However, don’t assume deodorant is always the cause. Underarm pigmentation can have multiple causes.
How to Prevent Dark Underarms
Prevention starts with reducing repeated irritation.
Try these habits:
Wear comfortable clothing
Avoid clothing that constantly rubs your underarms.
Use gentle products
Choose products that don’t cause burning or itching.
Improve shaving technique
Avoid dry shaving and repeated razor passes.
Moisturize
Keep irritated or dry skin comfortable with an appropriate moisturizer.
Don’t scrub aggressively
More friction can mean more irritation.
Patch test new products
Especially when trying an active ingredient for the first time.
When Should You See a Dermatologist?
Not every case of dark underarms is simply a cosmetic issue.
If your underarms suddenly become darker, develop a thick or velvety texture, or the pigmentation is also appearing around areas such as the neck or groin, consider speaking with a doctor.
A condition called acanthosis nigricans can cause dark, thickened skin in body folds and may sometimes be associated with underlying metabolic conditions.
You should also seek professional advice if you have:
Persistent itching
Significant redness
Pain
A rash
Rapid changes in pigmentation
Thickened or velvety skin
Pigmentation that doesn’t improve after removing obvious irritants
How Long Does It Take to Improve Dark Underarms?
There is no guaranteed timeline.
If irritation is contributing to the pigmentation, stopping the trigger is an important first step.
Pigmentation can fade slowly rather than disappearing in a few days.
This is why a consistent, gentle routine is more realistic than products promising instant results.
Introduce it gradually according to the product’s instructions.
Don’t combine several acids or brightening ingredients just to speed up the process.
Frequently Asked Questions
Why are my underarms darker than the rest of my skin?
Common contributors include friction, shaving, hair removal, irritation from products and post-inflammatory pigmentation. Some medical conditions can also cause underarm darkening.
Does shaving make underarms darker?
Frequent or irritating shaving can contribute to skin irritation, which may lead to post-inflammatory pigmentation.
Can I use lemon to lighten dark underarms?
It’s better to avoid lemon juice on sensitive underarm skin because it can cause irritation.
Should I scrub dark underarms?
No aggressive scrubbing is necessary. Repeated friction may worsen irritation.
Can moisturizer help dark underarms?
Moisturizer won’t magically remove pigmentation, but keeping the skin comfortable and reducing dryness can support a gentler skincare routine.
Can dark underarms be caused by a medical condition?
Yes. Certain conditions, including acanthosis nigricans, can cause darker, thicker or velvety skin in body folds. If the change is sudden or unusual, consult a healthcare professional.
Final Thoughts
Dark underarms don’t automatically mean that your skin is dirty.
Instead of scrubbing harder or searching for an overnight whitening solution, look at the everyday causes first.
Reduce friction. Be gentle with hair removal. Choose products carefully. Moisturize. Avoid harsh DIY remedies.
And if the pigmentation is sudden, persistent or accompanied by thickened skin or other symptoms, get professional advice.
Healthy skincare is about caring for your skin—not trying to force it to look a certain way.
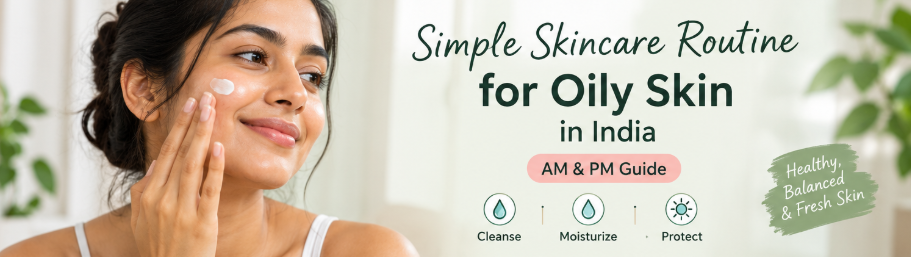
Does your face start looking shiny just a few hours after washing it? Do you struggle with clogged pores, frequent breakouts, or makeup that seems to disappear by lunchtime?
If you have oily skin, finding the right skincare routine can feel confusing. You may be tempted to wash your face repeatedly or use harsh products to remove every bit of oil.
But oily skin still needs hydration and protection.
The goal isn’t to remove every trace of oil. Instead, a good skincare routine for oily skin should gently cleanse the skin, provide lightweight hydration, protect it from the sun, and avoid unnecessary irritation.
India’s heat, humidity, dust, pollution and strong sun exposure can make managing oily skin even more challenging.
The good news is that your routine doesn’t need to contain ten different products.
A simple, consistent routine can be enough.
What Is Oily Skin?
Oily skin occurs when the sebaceous glands produce more sebum than your skin needs.
Sebum is an oily substance produced naturally by the skin. It helps keep the skin moisturized and supports the skin barrier.
However, excess sebum can contribute to a shiny appearance and may be associated with clogged pores and acne in some people.
Common signs of oily skin include:
A shiny appearance, especially around the forehead, nose and chin
Enlarged-looking pores
Frequent clogged pores
Blackheads or whiteheads
Makeup becoming oily quickly
Occasional acne or breakouts
Your skin can also be oily and dehydrated at the same time. That’s why trying to dry out your skin completely isn’t necessarily the answer.
Night: Cleanser → Treatment if needed → Moisturizer
Let’s look at each step.
Step 1: Cleanse Your Face Gently
Start your morning with a gentle cleanser.
A cleanser helps remove excess oil, sweat and impurities from your skin.
If your skin becomes very oily during the day, you might think that a strong cleanser will solve the problem. However, overly aggressive cleansing can leave your skin feeling dry or irritated.
Look for a cleanser that is:
Gentle
Suitable for oily or combination skin
Non-comedogenic when possible
Comfortable to use without leaving your skin extremely tight
You generally don’t need to scrub your face aggressively.
Tip: Wash with lukewarm water rather than very hot water.
Step 2: Use a Lightweight Moisturizer
This is the step many people with oily skin skip.
That’s a mistake.
Oily skin still needs moisture.
Instead of choosing a very heavy cream, look for a lightweight moisturizer with a texture that feels comfortable on your skin.
Good options can include:
Gel moisturizers
Lightweight lotions
Oil-free formulations
Non-comedogenic moisturizers
Ingredients commonly found in lightweight hydrating products include glycerin, hyaluronic acid and panthenol.
The right moisturizer should leave your skin comfortable rather than excessively greasy.
Step 3: Never Skip Sunscreen
Sunscreen is one of the most important parts of a daytime skincare routine.
This is especially relevant in India, where UV exposure can be significant throughout the year.
For oily skin, look for a sunscreen that feels comfortable enough for daily use.
You may prefer:
Lightweight sunscreen
Gel sunscreen
Fluid sunscreen
Non-comedogenic sunscreen
Choose a broad-spectrum sunscreen with SPF 30 or higher and follow the product’s directions for application and reapplication.
Don’t skip sunscreen just because your skin is oily.
Your Morning Routine for Oily Skin
Here’s a simple AM routine:
1. Gentle cleanser
Remove excess oil and overnight buildup.
2. Lightweight moisturizer
Keep your skin hydrated without a heavy feel.
3. Sunscreen
Protect your skin from UV exposure.
That’s it.
You don’t need to add five serums just because they’re trending on social media.
What About Serums for Oily Skin?
Serums aren’t mandatory.
However, certain ingredients can be useful depending on your skin concerns.
Niacinamide
Niacinamide is a popular skincare ingredient that can be found in products designed for oily and acne-prone skin.
It is commonly used in skincare because of its role in supporting the skin barrier and improving the appearance of uneven skin.
Salicylic Acid
Salicylic acid is a beta hydroxy acid that can help exfoliate inside pores.
It is commonly used in products targeting:
Blackheads
Whiteheads
Clogged pores
Acne-prone skin
However, more isn’t always better.
If you’re new to salicylic acid, introduce it gradually and follow the product instructions.
If your skin becomes irritated, reduce use or stop the product.
Night Skincare Routine for Oily Skin
Your nighttime routine can be even simpler.
Step 1: Cleanse
Remove sunscreen, makeup, sweat and daily buildup.
If you’re wearing makeup, use an appropriate makeup-removing step before your cleanser.
Step 2: Treatment
If you use an active ingredient such as salicylic acid, use it according to the product directions.
Don’t combine multiple strong treatments simply because you want faster results.
Step 3: Moisturizer
Finish with a lightweight moisturizer.
Your skin continues to lose water while you sleep, so moisturizing remains useful even when your skin produces plenty of oil.
Best Ingredients for Oily Skin
When choosing skincare products, understanding ingredients can be more useful than choosing products based only on marketing claims.
Ingredient
Common skincare purpose
Niacinamide
Supports skin barrier and helps improve appearance of uneven skin
Salicylic acid
Helps exfoliate pores
Glycerin
Hydration
Hyaluronic acid
Hydration
Panthenol
Moisturizing and soothing formulations
Zinc oxide
Commonly used in mineral sunscreens
Ceramides
Support the skin barrier
Remember that individual skin can react differently to products.
Always follow the instructions on the product you’re using.
Oily Skin Care Tips for Indian Weather
Indian weather can make oily skin feel even oilier.
Here are some practical tips.
1. Don’t Wash Your Face Every Time It Looks Shiny
Shine doesn’t automatically mean your face is dirty.
Over-cleansing can cause dryness and irritation.
Stick to a reasonable cleansing routine and use a gentle cleanser.
2. Choose Lightweight Products
During hot and humid weather, you may prefer lightweight moisturizers and sunscreens that feel comfortable on the skin.
3. Keep Your Routine Simple
You don’t need to use every trending skincare product.
A simple routine that you can follow consistently is often easier to maintain.
4. Don’t Forget Sunscreen
Cloudy weather doesn’t mean UV exposure disappears.
Make sunscreen part of your daily routine.
5. Change Pillowcases Regularly
Your pillowcase comes into contact with your face for hours.
Keeping bedding clean is a simple hygiene habit that can complement your skincare routine.
Common Skincare Mistakes for Oily Skin
Mistake 1: Using Very Harsh Cleansers
A cleanser that leaves your skin extremely tight isn’t necessarily doing a better job.
Mistake 2: Skipping Moisturizer
Oily skin still needs hydration.
Mistake 3: Using Too Many Actives
Combining several exfoliating or treatment products can increase the chance of irritation.
Mistake 4: Picking Your Pimples
Picking or squeezing breakouts can increase irritation and may contribute to marks or scarring.
Mistake 5: Skipping Sunscreen
Acne marks and uneven pigmentation can become more noticeable with UV exposure.
Mistake 6: Changing Products Every Week
Give your routine time to work unless a product is causing irritation or another significant reaction.
Oily Skin vs. Combination Skin
Sometimes people mistake combination skin for oily skin.
Oily skin: Most areas of the face tend to produce excess oil.
Combination skin: Some areas, often the T-zone, are oily while other areas may feel normal or dry.
Knowing your skin type can help you choose products more appropriately.
Your skin type can also change with weather, age, hormones and other factors.
A Simple Weekly Routine
You don’t need to exfoliate every day.
A basic weekly routine could look like this:
Day
Routine
Monday
Basic AM + PM routine
Tuesday
Basic AM + PM routine
Wednesday
Basic routine + appropriate treatment
Thursday
Basic AM + PM routine
Friday
Basic AM + PM routine
Saturday
Basic routine + appropriate treatment
Sunday
Basic AM + PM routine
This is only a framework, not a requirement.
The right frequency for an active ingredient depends on the specific product and your skin’s tolerance.
Frequently Asked Questions
What is the best skincare routine for oily skin?
A simple routine can include a gentle cleanser, lightweight moisturizer and sunscreen in the morning. At night, cleanse again, use an appropriate treatment if needed, and moisturize.
Should oily skin use moisturizer?
Yes. Oily skin still needs hydration. A lightweight moisturizer may feel more comfortable than a heavy cream.
Is sunscreen necessary for oily skin?
Yes. Oily skin doesn’t protect you from UV exposure. Choose a sunscreen with a texture you can comfortably use every day.
How often should oily skin be washed?
Most people don’t need to repeatedly wash their face throughout the day. Over-cleansing can cause dryness and irritation.
Is salicylic acid good for oily skin?
Salicylic acid is commonly used in skincare products for oily and acne-prone skin because it can help exfoliate pores. Introduce it gradually and follow product directions.
Can oily skin become dehydrated?
Yes. Oil production and skin hydration are different things. Oily skin can still lack sufficient water and feel tight or uncomfortable.
Final Thoughts
Having oily skin doesn’t mean you need to fight your skin every day.
Instead of trying to remove every trace of oil, focus on creating a balanced routine:
Cleanse gently. Moisturize consistently. Use sunscreen every morning. Choose active ingredients carefully. Keep your routine simple.
Most importantly, pay attention to how your skin responds.
Skincare isn’t about having the biggest collection of products. It’s about finding a routine that works for your skin and your lifestyle and sticking with it consistently.
If you have persistent, painful or severe acne, it’s worth speaking with a dermatologist rather than relying only on cosmetic skincare products.
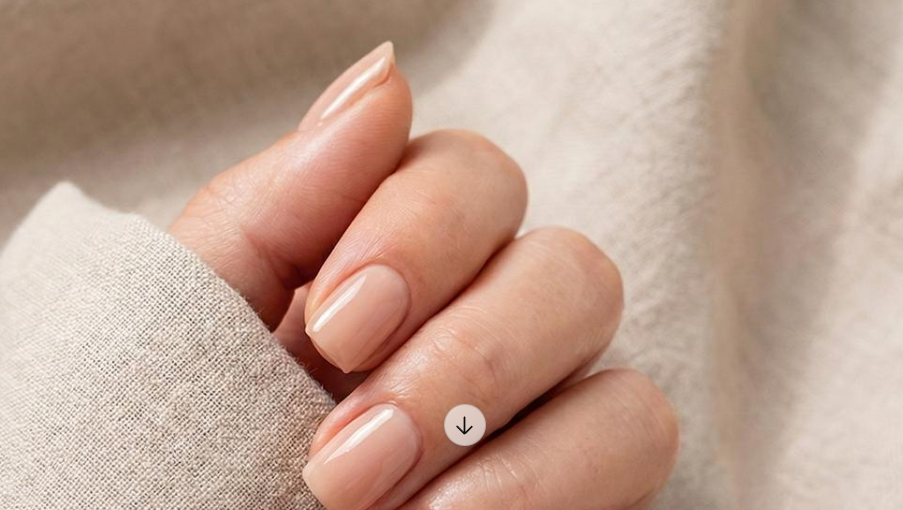
Press-on nails have become an easy way to get a polished manicure at home without spending hours at a salon. From chrome and glazed finishes to French tips and short almond shapes, press-ons now come in styles for everyday wear as well as special occasions. Recent Indian nail-trend coverage has highlighted chrome, coloured French tips and other press-on styles as popular looks.
But there’s one common problem: press-on nails can start lifting or falling off sooner than expected.
The good news is that your application technique makes a big difference.
Here’s how to make press-on nails last longer while keeping your natural nails healthy.
What Are Press-On Nails?
Press-on nails are artificial nail tips designed to attach to your natural nails using either nail adhesive or adhesive tabs.
They are available in many different:
Shapes
Lengths
Colours
Finishes
Nail-art designs
Popular 2026 styles include milky neutrals, chrome, cat-eye finishes, jelly effects, micro French tips and small decorative details.
Unlike acrylic or builder-gel extensions, press-ons can be applied at home without necessarily requiring a salon appointment.
How to Make Press-On Nails Last Longer
1. Start With Clean, Dry Nails
This is one of the most important steps.
Before applying your press-ons, remove old nail polish and wash your hands. Your nails should be completely dry before application.
Avoid applying press-ons immediately after a shower or soaking your hands because moisture can interfere with adhesion.
Quick preparation:
Clean → Dry → Prepare → Apply
Don’t skip the preparation step just because you want to get your manicure done quickly.
2. Choose the Correct Nail Size
A press-on nail should fit your natural nail without sitting on the surrounding skin.
If the artificial nail is too large, it may catch on clothing or objects.
If it is too small, it may leave part of your natural nail exposed and can feel uncomfortable.
Before applying adhesive, place each press-on against your natural nail and check the fit.
If you’re between two sizes, choose the one that fits your nail better and gently file the artificial nail if the manufacturer allows it.
3. Gently Prepare the Nail Surface
A clean nail surface helps the adhesive make better contact.
You can gently remove surface oils according to the instructions supplied with your press-on nail kit.
Don’t aggressively buff your natural nails.
Dermatologists warn that artificial nail application can involve filing that makes natural nails thinner and weaker, so unnecessary filing should be avoided.
The goal is better adhesion without damaging the natural nail underneath.
4. Apply the Adhesive Correctly
If you’re using nail glue, follow the instructions that come with the product.
Apply an appropriate amount rather than flooding the entire nail with adhesive.
Place the press-on close to the cuticle area without putting it directly onto the surrounding skin.
Then press it firmly into place.
Hold it according to the adhesive manufacturer’s instructions.
Don’t immediately start using your hands.
Give the adhesive enough time to set.
5. Avoid Water Immediately After Application
One of the easiest ways to improve the longevity of your manicure is to avoid unnecessary water exposure immediately after applying your press-ons.
Try to apply your nails when you know you won’t need to:
Wash dishes
Take a long shower
Go swimming
Clean the house
soon afterward.
Give your manicure time to settle before exposing it to prolonged water.
6. Wear Gloves While Cleaning
Household cleaning can be rough on both your natural nails and artificial nails.
When washing dishes or using cleaning products, wear protective gloves.
This can help reduce prolonged exposure to water and chemicals.
It’s also a good general nail-care habit.
7. Don’t Use Your Nails as Tools
This is one of the biggest mistakes people make.
Don’t use your press-on nails to:
Open cans
Scratch labels
Peel stickers
Open packages
Scrape surfaces
Pry objects apart
Even if the press-on feels strong, putting pressure on the tip can cause it to lift or break.
Think of your press-ons as beauty accessories, not tools.
8. Choose Shorter Nails for Everyday Wear
Long nails can create a dramatic look, but shorter shapes can be easier to manage for everyday activities.
If you type frequently, work with your hands, play sports or do household tasks, consider:
Short almond
Squoval
Short square
Short oval
Shorter press-ons can also be a practical choice if you’re new to wearing artificial nails.
Current 2026 press-on trends include shorter wearable shapes alongside longer statement styles.
9. Don’t Pick or Peel Them Off
When a press-on begins lifting, it can be tempting to pull it off immediately.
Don’t.
Pulling or peeling artificial nails can also remove or damage layers of your natural nail.
The American Academy of Dermatology warns that picking and aggressive removal practices can contribute to nail damage, particularly with artificial and gel nails.
Instead, follow the removal instructions for your particular press-on system.
10. Give Your Natural Nails a Break
You don’t need to wear artificial nails continuously.
If your natural nails become:
Thin
Brittle
Peeling
Painful
Sensitive
take a break from artificial nail products.
Dermatologists recommend giving nails time without artificial nails, especially when there are signs of damage.
During the break, focus on basic care such as moisturizing your hands and nails.
How Long Do Press-On Nails Last?
The answer depends on several factors:
Type of adhesive
Nail preparation
Product quality
Nail size and fit
Water exposure
Your daily activities
How carefully they’re applied
Rather than expecting every set to last exactly the same amount of time, focus on proper preparation and application.
A manicure that’s correctly fitted and applied is less likely to lift prematurely.
Press-On Nails vs Salon Nails
Feature
Press-On Nails
Salon Extensions
Application
Usually at home
Usually salon
Time
Relatively quick
Usually longer
Design choices
Very broad
Very broad
Removal
Depends on product
Usually professional/product-specific
Cost
Often lower per application
Usually higher
Customization
Limited by set
Highly customizable
Maintenance
Can be replaced easily
Requires maintenance/fills
Neither option is automatically right for everyone.
If protecting your natural nails is your priority, how the nails are applied and removed matters more than simply choosing “press-on” or “salon.”
Are Press-On Nails Better Than Acrylic Nails?
Not necessarily.
Both can cause problems if applied or removed incorrectly.
The American Academy of Dermatology notes that artificial nails can contribute to thin, brittle and dry nails, particularly with repeated application and touch-ups.
Press-ons can be convenient because you can wear them for specific occasions rather than maintaining a salon extension continuously.
For healthy nails, moderation and careful removal are important.
How to Remove Press-On Nails Safely
Don’t rip them off.
Instead:
Follow the removal instructions for your adhesive.
Don’t force a nail that isn’t ready to come off.
Avoid scraping your natural nail aggressively.
Clean your nails after removal.
Moisturize your nails and surrounding skin afterward.
If you’re using a gel system rather than conventional press-ons, removal is different. The AAD specifically warns against picking or filing gel polish off because this can damage the nail.
What to Do After Removing Press-On Nails
Once your press-ons are removed, give your natural nails some attention.
Simple recovery routine
Step 1: Wash your hands gently.
Step 2: Apply moisturizer to your hands.
Step 3: Massage moisturizer around your cuticles.
Step 4: Keep your nails at a manageable length.
Step 5: Avoid immediately applying another set if your nails look damaged.
You don’t need a complicated collection of nail products.
7 Common Press-On Nail Mistakes
Avoid these mistakes if you want your manicure to last longer:
❌ Applying press-ons to wet nails
❌ Choosing the wrong size
❌ Using too much adhesive
❌ Applying nails directly onto the surrounding skin
❌ Washing dishes immediately after application
❌ Using your nails as tools
❌ Pulling off lifting nails
Small changes to your application routine can make your manicure much easier to maintain.
Best Press-On Nail Styles to Try in 2026
If you’re looking for a new design, current trend coverage points toward several wearable options.
🤍 Milky Nails
Soft, sheer and clean-looking.
✨ Chrome Nails
Reflective finishes remain popular for a more eye-catching manicure.
🌸 Minimal Floral Nails
Tiny floral details can add nail art without making the manicure look overly busy.
🐱 Cat-Eye Nails
Magnetic shimmer creates a dimensional effect that changes with the light.
🤍 Micro French Tips
A smaller, more modern take on the classic French manicure.
Frequently Asked Questions
How can I make press-on nails stay on longer?
Prepare clean, completely dry nails, choose the correct size, apply the adhesive correctly, avoid excessive water immediately afterward and don’t use your nails as tools.
Why do my press-on nails keep falling off?
Common reasons include poor nail preparation, incorrect sizing, excess moisture, insufficient adhesive or putting too much pressure on the nails.
Can press-on nails damage natural nails?
They can contribute to nail damage if they are applied, maintained or removed improperly. Repeated artificial nail use can leave natural nails thin, brittle or dry.
How do I remove press-on nails without damaging my nails?
Follow the instructions for the specific adhesive system and avoid ripping, picking or aggressively scraping the artificial nail away.
Are short press-on nails better for beginners?
Shorter styles can be easier to manage for everyday activities, especially if you’re new to wearing artificial nails.
Final Thoughts
Press-on nails can be an easy way to change your manicure without booking a salon appointment.
But the secret to a better manicure isn’t simply finding the strongest glue.
It’s about proper preparation, correct sizing, careful application, protecting your nails during daily activities and gentle removal.
If your natural nails become persistently thin, brittle, painful or discolored, take a break from artificial nails and consider speaking with a dermatologist.
A beautiful manicure should complement healthy nails—not hide damaged ones.
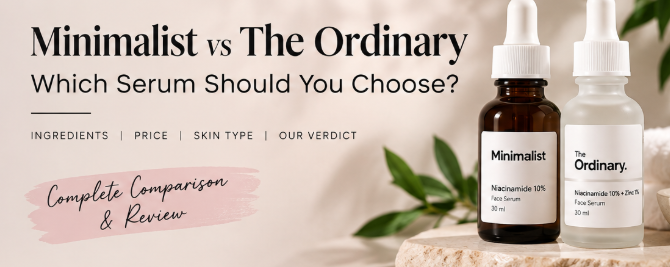
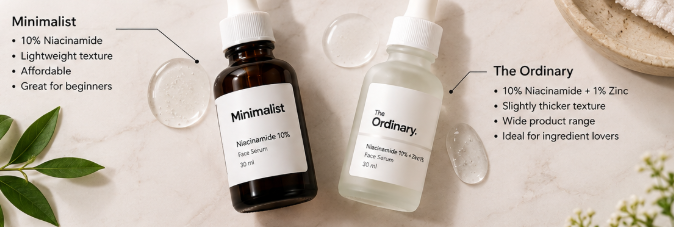
Choosing the right skincare serum can be confusing, especially when two popular brands offer products with similar ingredients and benefits. Minimalist and The Ordinary are both well-known for ingredient-focused skincare, but their products, formulas, textures, pricing, and suitability can differ.
If you’re trying to decide between the two, this Minimalist vs The Ordinary comparison will help you understand what to look for before buying.
Quick answer: Neither brand is automatically the right choice for everyone. The better option depends on your skin type, preferred ingredients, texture, budget, and how simple you want your skincare routine to be.
Minimalist vs The Ordinary: At a Glance
Feature
Minimalist
The Ordinary
Product focus
Ingredient-focused skincare
Ingredient-focused skincare
Price positioning
Generally accessible
Generally accessible to mid-range
Product variety
Skincare-focused range
Wide ingredient-focused range
Beginner-friendly options
Yes
Yes, but some formulas require more research
Best for
Simple, targeted routines
Ingredient-focused experimentation
Availability in India
Widely available
Widely available through major beauty retailers
What Makes Minimalist Popular?
Minimalist has built its reputation around straightforward skincare products that highlight their key active ingredients.
The brand appeals particularly to consumers who want to understand what ingredients are in their skincare products and what those ingredients are intended to do.
For beginners, this ingredient-focused approach can make it easier to search for products according to a specific skincare goal.
Pros of Minimalist
Ingredient-focused product selection
Accessible price points for many products
Several products designed around specific skincare concerns
Easy to build a simple routine
Strong presence in the Indian beauty market
Things to Consider
Not every active ingredient is suitable for every skin type. A higher concentration of an ingredient isn’t automatically better, and introducing several active products at once can make it difficult to identify what is causing irritation.
What Makes The Ordinary Popular?
The Ordinary is known for its minimalist packaging and ingredient-focused approach.
Its range includes individual active ingredients and formulations designed around different skincare concerns. This makes the brand particularly interesting for people who enjoy researching ingredients and creating a customized routine.
Pros of The Ordinary
Large ingredient-focused range
Many targeted formulations
Straightforward product positioning
Useful for people who enjoy customizing their routine
Strong international brand recognition
Things to Consider
The large product range can be overwhelming for beginners. Some products also require you to understand how different active ingredients fit together in a skincare routine.
Minimalist vs The Ordinary: Which Is Better for Beginners?
If you’re completely new to skincare, don’t choose a serum simply because it has the highest concentration or the most impressive-looking ingredient list.
Instead, start with one product that matches your specific goal.
For example:
Oily skin: Look for lightweight, non-heavy formulas.
Dry skin: Consider hydrating ingredients and barrier-supporting products.
Uneven-looking skin: Look for ingredients commonly used for brightening and pigmentation concerns.
Sensitive skin: Keep your routine simple and introduce new actives gradually.
A basic routine can often be more useful than buying several serums at once.
Minimalist vs The Ordinary for Niacinamide
Niacinamide is one of the most popular ingredients in modern skincare because it is used in formulations targeting several common concerns, including excess oil and uneven-looking skin.
When comparing a Minimalist vs The Ordinary niacinamide serum, don’t look only at the percentage printed on the bottle.
Consider:
The complete ingredient list
Your skin type
The product texture
How the product fits into your existing routine
Whether you’re already using other active ingredients
The best serum is one that you can comfortably incorporate into a consistent routine.
Which Brand Is More Affordable?
Price can change depending on the product, seller, promotions, bottle size, and availability.
Instead of comparing only the sticker price, calculate the cost per ml.
For example:
Cost per ml = Product price ÷ Product volume
This gives you a more meaningful comparison between products with different bottle sizes.
Also check whether you’re comparing the same type of formulation. A 30 ml serum and a 60 ml serum shouldn’t be compared purely on their final selling price.
Which One Should You Buy?
The answer depends on what you want from your skincare routine.
Choose Minimalist if:
You prefer a straightforward skincare routine.
You want products that are easy to understand.
You’re shopping primarily within the Indian skincare market.
You want targeted products for particular skincare concerns.
Consider The Ordinary if:
You enjoy researching skincare ingredients.
You want a broad selection of ingredient-focused products.
You like building a more customized skincare routine.
You are comfortable learning how different actives work together.
Don’t Choose a Serum Based Only on Reviews
Online reviews can be useful, but skincare is highly individual.
One person’s favorite serum may cause irritation for someone else. Reviews should therefore be used to understand things such as:
Texture
Absorption
Packaging
Fragrance
Ease of application
Value for money
Experience over time
They should not be treated as proof that a product will produce the same result for every person.
How to Test a New Skincare Product
When introducing a new skincare product, start slowly.
Apply a small amount according to the product instructions and monitor how your skin responds. Avoid introducing several new active products simultaneously because it can make it difficult to identify which product is responsible if irritation occurs.
If you have persistent or severe skin concerns, consider speaking with a qualified dermatologist instead of relying solely on online product reviews.
Final Verdict: Minimalist vs The Ordinary
There isn’t one universally correct choice between Minimalist and The Ordinary.
Both brands offer ingredient-focused skincare, but the right product depends on your skin type, skincare goal, budget, routine, and ingredient preferences.
If you’re a beginner, focus less on finding the “perfect” brand and more on creating a simple routine that you can use consistently.
Before purchasing, compare the ingredients, concentration, product size, price per ml, texture, and suitability for your skin type.
That approach will help you make a more informed skincare purchase than choosing a product simply because it is trending online.
Frequently Asked Questions
Is Minimalist better than The Ordinary?
Neither brand is automatically better for everyone. The right choice depends on your skin type, skincare concerns, preferred ingredients, formula, and budget.
Is Minimalist good for beginners?
Minimalist offers several ingredient-focused products that can fit into beginner routines. Beginners should still introduce active ingredients gradually.
Is The Ordinary good for Indian skin?
The Ordinary products can be used by people with different skin types, including people in India. However, suitability depends on the individual product and your skin’s needs.
Which is better for oily skin, Minimalist or The Ordinary?
There is no universal answer. Compare the specific products, their textures, ingredients, and how they fit your existing routine rather than comparing the brands as a whole.
Can I use Minimalist and The Ordinary together?
Some products may be compatible, but combining multiple active ingredients can increase the risk of irritation. Check the individual product instructions and avoid creating an unnecessarily complicated routine.
What should I check before buying a skincare serum?
Check the ingredients, concentration, product size, price per ml, intended use, skin-type suitability, and how the product fits into your existing skincare routine.
Meta description: Learn how to start a clean beauty routine for beginners, read skincare labels, choose products thoughtfully, and build more sustainable beauty habits on a budget.
Clean beauty has become a popular topic for people who want to understand what goes into their skincare products and how their beauty habits affect the environment. But with so many products labelled natural, green, pure, and eco-friendly, getting started can feel confusing.
The good news? You do not need an expensive collection of products or a completely new bathroom cabinet to begin making thoughtful beauty choices.
A beginner-friendly clean beauty routine can start with a few practical steps: understanding your skin’s needs, reading ingredient lists, avoiding unnecessary purchases, and considering packaging and sourcing when choosing products.
In this guide, you will learn how to build a simple, affordable clean beauty routine, identify vague marketing claims, and make more informed skincare decisions.
What Is Clean Beauty?
Clean beauty is a broad term used by brands and consumers to describe beauty products that emphasize ingredient transparency, particular formulation preferences, or other values such as sustainability and ethical sourcing.
However, clean beauty does not have one universally accepted definition. Different brands and retailers may use different standards, so the word alone does not tell you whether a product is safe, effective, sustainable, or suitable for your skin.
Natural ingredients are not automatically safer than synthetic ingredients. A product’s suitability depends on its formula, concentration, intended use, quality, and how your skin responds.
Instead of relying only on a label, focus on information you can check: the full ingredient list, directions, manufacturer details, relevant certifications, and evidence supporting any special claims.
1. Start With a Simple Skincare Routine
One of the easiest ways to make your beauty routine more affordable and less wasteful is to avoid buying products you do not need.
A basic routine can be enough to establish consistent skincare habits.
Morning routine
Step 1: Cleanse gently. Use a gentle cleanser if your skin needs it. Depending on your skin and morning routine, rinsing with water may be sufficient.
Step 2: Moisturize. Choose a moisturizer that suits your skin type and feels comfortable to use consistently.
Step 3: Apply sunscreen. Use broad-spectrum sunscreen with SPF 30 or higher and follow the product directions. Reapply as directed, particularly when spending time outdoors.
Evening routine
Step 1: Remove makeup and sunscreen. Use a suitable makeup remover or cleanser to remove the day’s products.
Step 2: Cleanse. Clean your face gently without harsh scrubbing.
Step 3: Moisturize. Apply a moisturizer that supports your skin’s comfort and hydration.
You can add other products later if you have a specific skincare goal. Introduce new products gradually so that you can identify irritation or other unwanted reactions.
2. Learn to Read Skincare Ingredient Labels
A product’s front label may emphasize words such as botanical, pure, green, or clean. The ingredient list gives you more useful information about what the product actually contains.
When shopping, look for the complete ingredient list and check whether the product provides clear instructions and manufacturer information.
What should beginners look for?
Ingredients and their stated functions, where available.
Clear directions for use and appropriate warnings.
Fragrance information, particularly if you know your skin is sensitive to fragrance.
Relevant, verifiable certifications when a brand makes ethical or environmental claims.
Packaging and product information that help you understand how to use and dispose of the product.
Do not assume that a short ingredient list is automatically better, or that a long list is automatically worse. Preservatives, for example, can serve an important role in protecting water-containing cosmetic products from microbial contamination.
If you have a known allergy or sensitivity, check the full ingredient list and seek professional advice when needed.
3. Understand Clean Beauty vs Natural Beauty
The terms clean beauty and natural beauty are often used together, but they do not necessarily mean the same thing.
Natural beauty usually emphasizes ingredients or materials derived from nature. Clean beauty often emphasizes a brand’s chosen ingredient standards, transparency, or formulation philosophy.
Neither term by itself guarantees that a product is safer, more effective, or better for the environment.
A plant-derived ingredient can still cause irritation or an allergic reaction. A synthetic ingredient can have a useful, well-understood function in a cosmetic formula.
The practical takeaway is to evaluate the finished product and the evidence behind its claims rather than assuming that natural always means harmless.
4. Choose Affordable Clean Beauty Products
Building a thoughtful routine does not mean replacing everything you already own.
Start by using products you already tolerate and enjoy. When something runs out, consider what you actually need before purchasing a replacement.
Budget-friendly shopping tips
Buy for a specific purpose. A cleanser, moisturizer, and sunscreen may be all you need for a basic routine.
Compare the amount of product. A lower price does not always mean better value. Consider the quantity, directions, and how often you will use it.
Avoid buying every trending ingredient. More products can mean more spending, more packaging, and more opportunities for irritation.
Look for transparent product information. Choose brands that provide ingredient lists, contact information, and specific explanations of their claims.
Use products as directed. Do not use more than recommended in the hope of getting faster results.
5. Make Your Beauty Routine More Eco-Friendly
Green beauty also involves thinking about waste, packaging, and how products are made and used.
You do not need to pursue a zero-waste lifestyle to make practical changes. Small, realistic habits can help reduce unnecessary consumption.
Try these lower-waste beauty habits
Finish products before buying replacements when they remain suitable for use.
Choose product sizes you are likely to use before they expire.
Recycle packaging only when local facilities accept that material.
Consider refill systems when they are genuinely practical and hygienic.
Avoid buying products simply because their packaging looks sustainable.
Use reusable tools where appropriate and clean them according to their instructions.
Remember that packaging is only one part of a product’s environmental footprint. Ingredients, manufacturing, transport, product longevity, and disposal can also matter.
6. Learn to Spot Greenwashing
Greenwashing refers to marketing that creates a misleading impression about a product’s environmental benefits or sustainability.
Beauty packaging may use green colours, leaves, nature imagery, or broad claims such as eco-friendly and planet-safe. These design choices are not proof of environmental performance.
Questions to ask before buying
Is the claim specific? A statement such as “the bottle contains 50% recycled plastic” is more concrete than simply saying “green packaging,” provided the claim can be verified.
Is there evidence? Look for accessible details explaining what the brand means and how the claim is supported.
Does the claim apply to the whole product? A recyclable bottle does not automatically mean every part of the packaging is recyclable or that the entire product is sustainable.
Is a certification relevant? Check what a certification actually covers, who issues it, and whether it applies to the product or only one aspect of the company.
Does the marketing use fear? Claims that ordinary cosmetic ingredients are all toxic or that natural products are always harmless oversimplify ingredient safety.
Being a thoughtful beauty shopper means asking questions without assuming that every natural or conventional product is automatically good or bad.
7. Be Careful With DIY Natural Skincare
Homemade skincare can look appealing because it uses familiar ingredients, but kitchen ingredients are not automatically suitable for facial skin.
Lemon juice, abrasive scrubs, essential oils, and other concentrated or acidic ingredients may irritate skin. Homemade water-based mixtures can also become contaminated when they are not prepared and stored appropriately.
For a beginner, properly formulated products with clear directions are often easier to use consistently than experimental mixtures.
If you decide to try a new cosmetic product, follow its directions and patch-test as appropriate. Stop using it if you develop irritation or discomfort.
For persistent skin problems, consult a qualified healthcare professional rather than relying on homemade remedies.
8. Build a Sustainable Beauty Shopping Checklist
Before purchasing a new product, ask yourself:
Do I actually need this product?
Does it suit my skin and my routine?
Can I check the complete ingredient list?
Are the brand’s safety, ethical, or environmental claims specific and supported?
Is the packaging practical for my needs and local disposal options?
Can I afford to replace it when it runs out?
These questions help you make decisions based on your needs and values instead of packaging trends or pressure to buy more.
9. A Simple Seven-Day Clean Beauty Reset
You do not need to transform your routine overnight. Use this gentle seven-day plan to become more aware of your habits.
Day 1: Review the products you currently use.
Day 2: Check ingredient lists and directions on your everyday skincare products.
Day 3: Identify products you use regularly and those you rarely reach for.
Day 4: Organize your routine around the basics: cleansing, moisturizing, and sun protection.
Day 5: Review packaging and find out what your local recycling service accepts.
Day 6: Make a shopping list based on genuine needs rather than trends.
Day 7: Choose one realistic habit to continue, such as finishing suitable products before replacing them.
The purpose of this reset is to build awareness and consistency, not to throw away everything you own.
Conclusion
A clean beauty routine for beginners does not have to be expensive, complicated, or built around perfect packaging.
Start with a simple skincare routine, learn to read ingredient labels, choose products that suit your skin, and look for evidence behind environmental claims. Use what you already have when appropriate, avoid unnecessary purchases, and make sustainable changes that fit your lifestyle.
Clean and green beauty should be about informed choices rather than fear or perfection. A thoughtful routine is one you understand, can afford, and can maintain.
What is one clean beauty habit you want to try first? Share it in the comments and explore more beauty and wellness guides on our blog.
Discover traditional Assamese beauty rituals, from the cultural significance of maah-halodhi to rice water hair care and jetuka mehendi. Explore the heritage, ingredients, and gentle self-care inspiration behind Assam’s regional beauty traditions.
Beauty traditions are more than skincare routines. They can reflect a region’s climate, natural resources, festivals, family customs, and cultural identity.
In Assam, a state in Northeast India, traditional beauty practices include the use of household ingredients, plant-based preparations, and rituals associated with important celebrations. These practices have been passed down through generations, although the exact ingredients and methods can vary between communities and families.
From the turmeric and lentil paste associated with Bihu to traditional hair-oiling practices, Assamese beauty heritage offers an interesting perspective on how culture and personal care can come together.
In this guide, we explore several traditional Assamese beauty rituals, their cultural context, and ways to approach natural ingredients thoughtfully in a modern self-care routine.
1. Maah-Halodhi: The Traditional Turmeric and Lentil Ritual
One of the recognizable Assamese beauty traditions is maah-halodhi, a preparation made with black lentils, known as maah, and turmeric, known as halodhi.
The ritual is associated with Bihu celebrations, particularly Manuh Bihu, when traditional bathing and cleansing customs hold cultural significance.
The combination of lentils and turmeric is also discussed in connection with traditional body care. Its importance, however, goes beyond the ingredients themselves: it represents a connection with family customs, seasonal celebrations, and inherited knowledge.
Why is maah-halodhi culturally significant?
It connects beauty and personal care with Assamese festival traditions.
It reflects the use of familiar household ingredients in traditional practices.
It illustrates how rituals can be shared across generations.
A traditional ritual should not automatically be treated as a medically proven skincare treatment. Modern skin types and sensitivities differ, so anyone considering a turmeric or lentil preparation should be cautious, avoid harsh scrubbing, and test products appropriately.
2. Rice Water: A Traditional Hair-Care Ingredient
Rice water has a place in traditional hair-care conversations across parts of Asia, including Northeast India. It is also discussed in modern accounts of Assamese beauty practices.
Rice water is the starchy liquid left after soaking or cooking rice. Some people use it as a hair rinse, while others prefer commercially formulated products containing rice-derived ingredients.
How is rice water used in hair care?
A simple, cautious approach is to use a freshly prepared, clean rice-water rinse occasionally:
Rinse a small amount of rice with clean water.
Collect the water from a subsequent brief soak.
Apply a small amount to damp hair, avoiding the eyes.
Leave it on briefly, then rinse thoroughly with clean water.
Do not assume that fermented rice water is automatically safer or more effective. Homemade mixtures can become contaminated, and there is limited scientific evidence that rice water directly causes hair growth.
Some people may find rice-derived products helpful for the feel or manageability of their hair, while others may experience dryness, buildup, or irritation. Stop using a preparation if it causes discomfort.
3. Mustard Oil and Traditional Hair Oiling
Mustard oil is familiar in many Eastern Indian household traditions, including Assamese personal-care practices. Oil application can also have a ceremonial role in Assamese weddings, where Tel Diya is described as part of the bride’s preparation.
Hair oiling is often associated with family care and relaxation. It can be a way to slow down, massage the scalp gently, and maintain a familiar personal-care routine.
A modern approach to hair oiling
If you enjoy oiling your hair:
Choose an oil that suits your scalp and hair type.
Use a small amount rather than saturating the scalp.
Massage gently without scratching or pulling.
Wash the oil out if it causes itching, discomfort, or excessive buildup.
Mustard oil is not suitable for everyone. It can irritate sensitive skin, so it is sensible to avoid applying it to inflamed or broken skin and to stop if a reaction occurs.
4. Jetuka Mehendi: A Cultural Beauty Tradition
Jetuka, commonly associated with henna, holds a place in Assamese cultural traditions, including Bihu celebrations.
The plant, Lawsonia inermis, is known for producing a natural dye used to decorate hands and other areas of the body. Its use connects personal adornment with regional identity, celebrations, and artistic expression.
What makes jetuka special?
Jetuka is an example of how beauty can be connected with more than appearance. Applying decorative designs can be a social activity, a celebration of tradition, and a way of expressing cultural belonging.
If you use henna, choose a clearly labelled product from a reputable source. Avoid so-called black henna products that may contain undeclared or harmful additives, and patch-test appropriately before use.
5. Traditional Assamese Herbal Skincare
Assam has a documented history of using plants in traditional skin care and herbal preparations.
A scientific ethnobotanical study published in the Journal of Ethnopharmacology in 2006 documented 85 plants belonging to 49 families used by Assamese people for skin-related purposes and cosmetics. The study recorded traditional uses, not proof that every preparation is effective or safe by modern clinical standards.
This research highlights the diversity of regional knowledge and the importance of documenting it carefully.
How to approach herbal skincare today
Traditional ingredients can be interesting subjects for learning, but natural does not always mean gentle.
For a modern skincare routine:
Use products with clear ingredient labels.
Introduce new products one at a time.
Patch-test products according to their directions.
Avoid applying unknown plant extracts or mixtures to irritated skin.
Use a gentle cleanser, moisturizer, and sunscreen suited to your skin.
If you have persistent acne, a rash, or another skin concern, consult a qualified healthcare professional rather than relying on an untested home remedy.
6. Assamese Wedding Beauty Rituals
Wedding customs provide another window into the relationship between beauty, family, and cultural heritage.
Accounts of Assamese wedding traditions describe practices such as Tel Diya, involving the application of oil, and turmeric-related preparations used during pre-wedding ceremonies.
These customs may differ between communities and households. They should not be presented as universal practices followed by every Assamese bride.
Their cultural significance lies partly in the participation of family members and the way personal care becomes part of a shared celebration.
7. Bringing Regional Beauty Inspiration Into a Modern Routine
You do not need to recreate every traditional ritual to appreciate its cultural value. Instead, you can take inspiration from the broader principles of simplicity, mindful care, and respect for heritage.
Here is an example of a gentle routine inspired by those principles:
Morning
Cleanse with a gentle cleanser.
Apply a moisturizer suited to your skin.
Finish with broad-spectrum sunscreen.
Evening
Remove makeup and sunscreen.
Cleanse gently.
Apply moisturizer.
If you enjoy hair oiling, make it an occasional hair-care step rather than a treatment for a medical scalp condition.
Occasionally
Explore regional beauty history, learn about the ingredients used in traditional practices, or try a properly formulated product inspired by familiar ingredients.
The goal is not to promise flawless skin or instant hair growth. It is to make personal care enjoyable, informed, and respectful of the traditions that inspire it.
8. Why Assamese Beauty Heritage Deserves to Be Celebrated
Regional beauty practices preserve stories about family, food, plants, festivals, and everyday life.
Assamese traditions such as maah-halodhi, jetuka, and ceremonial oil application demonstrate how personal care can be woven into cultural identity. They also remind us that beauty does not have to be defined by a single global trend.
When exploring these traditions, it is important to recognize regional diversity, respect the communities that preserve the practices, and distinguish cultural knowledge from scientifically established skincare claims.
Conclusion
Traditional Assamese beauty rituals offer a fascinating look at the relationship between culture and self-care. From maah-halodhi during Bihu to rice water, mustard oil, jetuka mehendi, and wedding customs, these practices reflect a rich regional heritage.
You can appreciate this heritage while making thoughtful choices about modern skincare and hair care. Learn about the tradition, respect its cultural context, and choose ingredients and products that are appropriate for your own needs.
Which Assamese beauty tradition would you like to learn more about? Share your thoughts in the comments and explore more regional beauty stories on our blog.
Looking after your beauty does not have to mean spending a fortune on expensive skincare products, luxury makeup, or frequent salon appointments. You can create a simple and enjoyable beauty routine while keeping your spending under control.
If you love skincare, makeup, and haircare but want to save money, you are in the right place. With a little planning, smart shopping, and a few consistent habits, you can make your beauty routine more affordable without buying every new product that appears on social media.
In this guide, we will explore 15 affordable beauty tips, beginner-friendly skincare and makeup routines, budget-conscious haircare ideas, and simple ways to avoid wasting money on products you do not need.
Whether you are a student, a beginner, or simply trying to spend less, these beauty tips can help you build a routine that fits your lifestyle and budget.
What does beauty on a budget mean?
Beauty on a budget means taking care of your appearance and personal grooming while making thoughtful choices about how much you spend.
It is not about buying the cheapest possible product or avoiding every beauty purchase. It is about understanding what you actually need, choosing products that suit you, and avoiding unnecessary expenses.
A budget-friendly beauty routine can include:
A simple skincare routine with a few suitable essentials.
Affordable makeup products that you enjoy using.
Basic haircare habits that fit your hair type.
At-home grooming when appropriate.
Careful shopping and avoiding impulse purchases.
The idea is simple: spend intentionally, use what you buy, and create habits that you can maintain.
15 affordable beauty tips to save money
1. Keep your skincare routine simple
You do not need a shelf full of products to begin caring for your skin. Start with a gentle cleanser, a suitable moisturizer, and broad-spectrum sunscreen for daytime use.
Add other products only when you have a specific need and understand how to use them. A simple routine can help reduce unnecessary spending and make daily skincare easier to maintain.
Money-saving tip: Finish products you already own before buying replacements, provided they are safe to use and have not expired.
2. Build a small makeup collection
Instead of buying every trending makeup product, focus on versatile essentials that fit your routine.
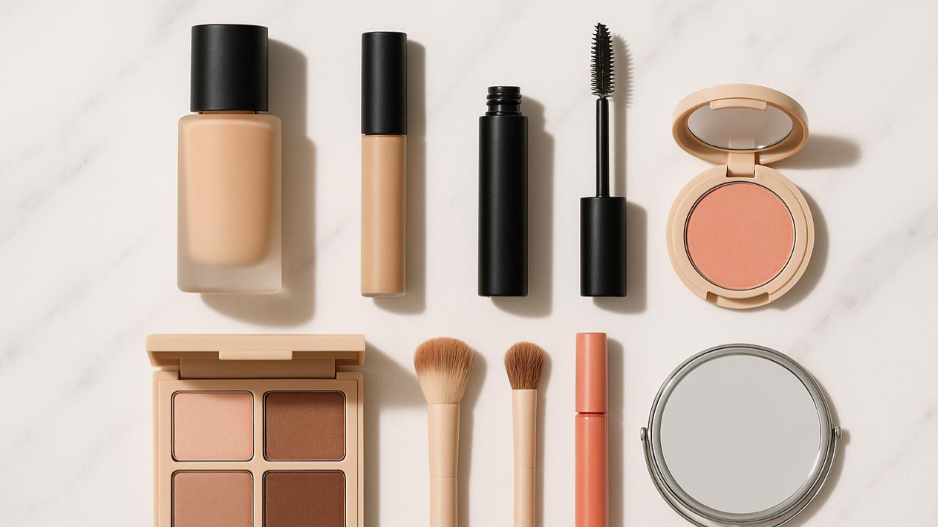
A basic collection might include a base product, concealer if needed, blush, mascara, and a lip colour you enjoy. You can expand your collection gradually as you discover what works for you.
Money-saving tip: Choose products you can use regularly rather than buying something just because it is popular online.
3. Make the most of your existing products
Before purchasing another serum, moisturizer, or lipstick, check what you already have.
Organize your products by category and keep track of their opening dates and expiry information. Use products according to their instructions, and do not continue using anything that has changed noticeably or causes irritation.
Money-saving tip: A quick inventory can help prevent duplicate purchases.
4. Follow a haircare routine that suits your hair
You do not necessarily need several hair masks, oils, and styling products. Start with a shampoo and conditioner that suit your scalp and hair.
Handle wet hair gently, detangle carefully, and limit unnecessary heat styling if it contributes to dryness or breakage.
Money-saving tip: Learn which products you use consistently before investing in additional treatments.
5. Set a monthly beauty budget
Decide how much you can comfortably spend on beauty each month. Divide your budget into categories such as skincare, makeup, haircare, and grooming.
Keep essential replacements separate from optional purchases. If you have already reached your budget, consider postponing nonessential shopping until the next month.
Money-saving tip: A written budget can make impulse purchases easier to recognize.
6. Compare prices before buying
Check the price of a product across reputable retailers before making a purchase. Look at the quantity, ingredients, delivery fees, and return policy rather than comparing the headline price alone.
Money-saving tip: Calculate the price per gram or millilitre when comparing different sizes, but only buy a larger size if you are likely to use it before expiry.
7. Avoid impulse buying
Beauty trends can make it tempting to buy products immediately. Before checking out, ask yourself whether the product meets a real need, suits your preferences, and fits your budget.
Consider waiting a day or two before buying nonessential items.
Money-saving tip: Keep a wishlist and review it before shopping instead of buying everything at once.
8. Take care of your makeup tools
Clean reusable makeup brushes and sponges regularly according to their material and care instructions. Let them dry thoroughly before storing them.
Taking care of your tools can help you get more use out of them and maintain good hygiene.
Money-saving tip: Replace tools when they become damaged or cannot be cleaned properly, rather than replacing them just for a new style.
9. Learn a simple everyday makeup look
Practising one easy makeup routine can help you use your products more confidently.
Try a lightweight base, a little blush, groomed eyebrows, mascara, and a comfortable lip product. Adjust the routine to suit your preferences and the occasion.
Money-saving tip: Practise with the products you already own before buying more shades or formulas.
10. Try simple hairstyles at home
Learn a few easy hairstyles such as a low bun, ponytail, braid, or half-up style. These options can help you change your look without needing a new styling product for every occasion.
Money-saving tip: Use accessories you already own and avoid hairstyles that pull uncomfortably on your hair.
11. Organize your beauty products
Keep your products in one organized place. Separate everyday essentials from occasional-use items, and check expiry dates and product instructions.
An organized collection makes it easier to see what you own and find products before purchasing replacements.
Money-saving tip: Create a small “use next” section for products that should be finished soon, following their storage and expiry guidance.
12. Make sun protection part of your routine
Include broad-spectrum sunscreen in your daytime skincare routine. Choose a product that suits your skin and that you can apply as directed.
Protective clothing, shade, and other sun-safe habits can also be useful parts of your routine.
Money-saving tip: Choose sunscreen based on suitable protection, comfort, and your ability to use it consistently—not packaging alone.
13. Keep at-home grooming simple and safe
Some basic grooming tasks, such as brushing your hair, filing a nail carefully, or applying moisturizer, can be done at home with suitable tools.
Avoid risky procedures, harsh DIY treatments, or attempting professional treatments without the necessary training.
Money-saving tip: Do simple tasks yourself when appropriate, but seek professional help when safety or skill is important.
14. Read labels and understand what you are buying
Check the ingredient list, directions, quantity, expiry information, and suitability for your needs.
Be cautious about exaggerated claims, particularly promises of instant or guaranteed results. If you have sensitive skin, introduce new products carefully.
Money-saving tip: Choose products for their purpose and suitability instead of paying extra for claims you cannot verify.
15. Build sustainable self-care habits
Beauty can also include everyday habits such as getting adequate sleep, maintaining personal hygiene, eating a varied diet, and making time to relax.
These habits do not require buying a new beauty product. Focus on routines that support your general well-being rather than chasing unrealistic appearance standards.
Money-saving tip: Make time for simple habits you can maintain instead of feeling pressured to purchase every wellness trend.
3. A simple budget-friendly beauty routine
You can organize your beauty routine around a few everyday steps instead of creating a complicated schedule.
Morning routine
Cleanse gently, or rinse with water if that suits your skin.
Apply a suitable moisturizer.
Apply broad-spectrum sunscreen according to its directions.
If desired, add a simple makeup look using products you already own.
Evening routine
Remove makeup and sunscreen gently.
Cleanse your face using a suitable cleanser.
Apply moisturizer.
Use any additional treatment only if it is appropriate for your skin and routine.
This is a general routine, not a personalized treatment plan. Adjust it to your skin’s needs and the instructions for your products.
4. How to plan a beauty budget in India
A budget works best when it reflects your own spending limit. Instead of assuming everyone needs the same products or amount of money, begin with what you can comfortably afford.
Create your own monthly beauty budget
Enter your planned spending in rupees. This calculator helps you organize a budget; it does not estimate product prices.Monthly spending limit (₹)Skincare (₹)Makeup (₹)Haircare (₹)Other grooming and self-care (₹)
Planned spending
₹1,000
Monthly limit
₹1,000
Remaining budget
₹0
You are within your planned limit. Keep some flexibility for essential replacements or unexpected needs. Copy my budget
5. Smart beauty shopping tips
Before purchasing a beauty product, use this quick checklist:
Check whether you already own something that serves the same purpose.
Compare the total cost, including delivery charges.
Read the product description and ingredient list.
Check the seller’s authenticity, return policy, and expiry information.
Consider trying a smaller size first when available and appropriate.
Avoid buying more than you can reasonably use.
Be cautious about products making unrealistic promises.
Keep essential products within your budget before spending on optional extras.
A discount is only useful if the product is something you actually need and can safely use.
6. Common budget beauty mistakes to avoid
Trying to save money should not mean compromising on basic product safety or buying things that do not suit you.
Mistake
A more practical approach
Buying every trending product
Choose products based on your needs and preferences.
Purchasing too many products at once
Introduce products gradually and assess whether you need them.
Choosing a product only because it is cheap
Consider suitability, ingredients, quality, and instructions.
Ignoring expiry dates
Check packaging and discard products that are expired or contaminated.
Using harsh DIY treatments
Avoid potentially irritating ingredients and unverified beauty hacks.
Buying large sizes without trying them
Consider smaller sizes first if available.
Skipping sunscreen to save money
Include suitable sun protection in your daytime routine.
Expecting instant transformations
Set realistic expectations and avoid products promising guaranteed results.
7. Affordable beauty habits you can practise at home
You can make your daily routine feel special without turning every activity into a shopping trip.
Here are a few simple ideas:
Set aside a few minutes to brush and style your hair.
Keep your nails clean and file them gently when needed.
Use a moisturizer that already suits your skin.
Practise a simple hairstyle or makeup technique using your existing products.
Organize your beauty space so everyday essentials are easy to find.
Take time to relax, get adequate sleep, and maintain regular personal hygiene.
Avoid harsh homemade face masks, lemon juice on the skin, abrasive scrubs, or other unverified treatments. Natural ingredients are not automatically safe for every skin type.
8. Frequently asked questions about beauty on a budget
1. How can I look beautiful on a low budget?
Focus on personal grooming, a simple skincare routine, suitable haircare, and a few makeup products you enjoy using. You can also save money by planning purchases, using products responsibly, and avoiding unnecessary beauty trends.
2. What are the most affordable beauty tips for beginners?
Start with basic skincare, learn a simple everyday makeup look, take care of your hair, keep your beauty tools clean, and set a monthly spending limit. Add products gradually instead of buying a complete collection immediately.
3. Can I have a good skincare routine on a budget?
Yes. A beginner routine can start with a suitable cleanser, moisturizer, and daytime sunscreen. Additional products may be useful for specific needs, but they are not automatically necessary for everyone.
4. How do I save money on makeup?
Choose versatile products, compare prices, use what you already own, and avoid purchasing products just because they are trending. Check expiry dates and store cosmetics according to their instructions.
5. Is expensive skincare always better than affordable skincare?
Price alone does not tell you whether a product is suitable for your skin. Compare the formulation, ingredients, intended use, product quality, and how your skin responds rather than assuming a higher price guarantees better results.
6. How can students create a budget beauty routine?
Students can begin with a small collection of everyday essentials and set aside an amount they can comfortably afford. Prioritize products they genuinely use and postpone optional purchases when money is tight.
7. What should I buy first for a budget beauty routine?
Begin with products that meet your everyday needs, such as a suitable cleanser, moisturizer, sunscreen, and basic grooming essentials. Makeup can be added according to your preferences and available budget.
8. How can I make my beauty products last longer?
Follow the recommended amount and directions, store products as instructed, close packaging properly, and use clean tools. Do not dilute cosmetics or continue using expired products just to make them last longer.
9. Final thoughts: beauty does not have to be expensive
Beauty on a budget is about making choices that work for your needs, lifestyle, and finances. You do not need every new product or a complicated routine to enjoy skincare, makeup, haircare, and personal grooming.
Start small, learn what suits you, and spend thoughtfully. A few well-chosen products and simple habits can help you create a beauty routine that feels manageable and enjoyable.
Most importantly, do not feel pressured to spend money to meet unrealistic beauty standards. Your routine should be something you choose for yourself, not something that creates financial stress.
Have you ever wanted to create a beautiful, fresh makeup look without using too many products? If you are new to makeup, learning where to start can sometimes feel confusing. With so many foundations, concealers, brushes, and beauty tutorials available, it can be difficult to know what you actually need.
The good news is that you do not need a professional makeup kit or complicated techniques to create a natural everyday look.
In this guide, you will learn how to do natural makeup for beginners, which basic products to use, how to apply makeup step by step, and how to create a soft, glowing finish that feels comfortable for everyday wear.
Whether you are getting ready for college, work, a casual outing, or a day with friends, this simple makeup routine can help you get started.
What is a natural makeup look?
A natural makeup look focuses on enhancing your features while keeping the overall appearance soft and understated. Instead of creating a heavy or dramatic finish, this style uses lightweight coverage, subtle colour, and gentle definition.
A natural makeup routine may include:
A lightweight foundation, BB cream, or skin tint.
A small amount of concealer where needed.
Soft blush and naturally defined eyebrows.
Neutral eyeshadow and a little mascara.
A nude lipstick, tinted lip balm, or lip gloss.
The goal is to create a look that suits your personal style and feels comfortable on your skin.
10 easy steps to do natural makeup for beginners
Step 1: Cleanse your face
Start with a clean face. Use a gentle cleanser suited to your skin type to remove excess oil, dirt, and leftover skincare products.
Pat your face dry with a clean towel instead of rubbing it harshly. A clean base helps you apply makeup more comfortably.
Step 2: Apply moisturizer and sunscreen
Apply a moisturizer that suits your skin. In the morning, follow with broad-spectrum sunscreen and allow your skincare to settle before applying makeup.
This step helps prepare your skin for makeup. Choose products that feel comfortable rather than adding several unnecessary layers.
Step 3: Apply primer if needed
Primer is optional for a simple natural makeup look. If your makeup tends to separate or your skin becomes shiny, a suitable primer may help improve the appearance and wear of your base.
Apply a small amount only where you need it. You can skip this step if your skincare already gives you a comfortable base.
Step 4: Apply a lightweight base
Choose a BB cream, skin tint, tinted moisturizer, or lightweight foundation that matches your complexion.
Start with a small amount around the centre of your face and blend outward using clean fingers, a brush, or a makeup sponge.
Build coverage gradually only where you want it. For a natural finish, let some of your skin’s natural texture remain visible.
Step 5: Conceal where needed
Apply a little concealer under the eyes or around areas where you want extra coverage.
Gently tap and blend the edges with a fingertip or sponge. Avoid applying too much product at once, especially around delicate under-eye skin.
Step 6: Add a soft touch of blush
Blush adds colour and dimension to your face. Choose a shade you enjoy, such as peach, rose, or a soft berry.
Apply a small amount to your cheeks and blend the colour until it looks diffused. Cream blush can be convenient for a fresh finish, while powder blush is another option.
Step 7: Define your eyebrows
Brush your eyebrows into place with a clean spoolie.
If you want extra definition, use an eyebrow pencil or powder that complements your natural brow colour. Fill sparse areas with light, short strokes rather than drawing one heavy line.
Step 8: Keep your eye makeup simple
Apply a neutral eyeshadow in a shade such as beige, soft brown, or muted peach.
Blend gently across the eyelids. Add eyeliner or kajal if you like, then finish with mascara according to the product directions.
For a beginner-friendly routine, you can skip eyeshadow and simply use mascara.
Step 9: Finish with a natural lip colour
Choose a lipstick, lip tint, tinted balm, or gloss in a colour that complements your makeup.
Soft pink, peach, rose, brown, and berry shades are all options. There is no single nude shade that works for everyone, so choose the colour you feel comfortable wearing.
Step 10: Set your makeup
If needed, use a small amount of setting powder on areas that become oily or where makeup tends to crease.
You can also use a setting spray suitable for your skin and makeup products. Follow its instructions and allow the makeup to settle before getting dressed.
These steps are a flexible routine, not a strict rule. You can leave out products you do not need. A similar beginner-friendly sequence is also outlined in Maybelline India’s makeup tutorial.
Basic Makeup Steps
+1
3. Basic makeup products for beginners
You can start with a small collection and gradually add products as you learn what you enjoy using.
6
Makeup product
Why you may want it
Moisturizer
Prepares your skin for makeup
Sunscreen
Provides daytime sun protection
BB cream or skin tint
Gives light, even-looking coverage
Concealer
Adds coverage to selected areas
Blush
Adds colour to the cheeks
Eyebrow pencil or spoolie
Helps groom and define brows
Mascara
Adds definition to the lashes
Lip balm or lipstick
Adds colour and moisture, depending on formula
Setting powder or spray
Optional finishing products
Beginner tip: You do not need to purchase everything at once. Start with the products that fit your routine, budget, and personal preferences.
4. How to choose makeup for your skin type
Different skin types can have different preferences when it comes to makeup texture and finish.
For dry skin
Consider a comfortable moisturizing base and hydrating formulas. Apply thin layers and avoid using more powder than you need.
For oily skin
You may prefer lightweight or oil-controlling formulas. Apply setting powder selectively to areas that become shiny rather than automatically powdering your entire face.
For combination skin
Consider using different textures in different areas. For example, use a more moisturizing product on dry areas and a light setting powder on oily areas.
For sensitive skin
Look for products that suit your individual sensitivities. Introduce new cosmetics carefully, check ingredient lists, and stop using a product if it causes irritation.
Your skin type is only one factor. Climate, personal preference, the product formula, and the finish you want can also influence which makeup works for you.
5. Quick 5-minute natural makeup routine
Running late? Try this simplified routine when you want a quick, everyday look.
Your quick makeup checklist
5 minutes
An approximate routine. Your actual time may vary.1. Apply moisturizer and daytime sunscreen, allowing them to settle.2. Blend a little BB cream or skin tint where desired.3. Use concealer only where you want extra coverage.4. Add blush and brush your eyebrows into place.5. Apply mascara and finish with lip balm or lipstick.
0 of 5 steps completedReset
6. Common beginner makeup mistakes to avoid
Learning makeup takes practice. These simple adjustments can help you develop a routine that works for you.
Using too much foundation: Begin with a small amount and add coverage gradually.
Choosing a mismatched foundation shade: Test the shade in natural light when possible and check how it looks on your face and neck.
Applying powder everywhere: Use it where you need it instead of automatically applying a thick layer.
Skipping skin preparation: Cleanse and moisturize appropriately before applying makeup.
Using too many products at once: Learn a few basics before adding more steps.
Not blending the edges: Check around your jawline, hairline, and the sides of your nose.
Following every trend without adapting it: Makeup placement and colour choices can be adjusted to your preferences and features.
7. How to make your natural makeup look fresh
A natural makeup look does not have to be complicated. Keep these practical tips in mind:
Apply makeup in thin layers instead of using a large amount of product at once.
Blend gently and take a moment to check your makeup in natural light.
Choose a finish you enjoy, whether that is matte, satin, or dewy.
Keep your makeup tools clean and follow the care instructions for your products.
Carry a lip product or compact powder if you prefer to touch up during the day.
Remove your makeup gently before going to bed.
A simple routine that you can comfortably repeat is often easier to maintain than one with many unnecessary steps.
8. Frequently asked questions about natural makeup for beginners
1. How do beginners apply natural makeup?
Start by cleansing and moisturizing your face, then apply sunscreen during the day. Use a lightweight base, concealer where needed, blush, simple eye makeup, and a lip product. Finish with optional setting powder or spray.
2. What makeup products should a beginner buy first?
Start with a few essentials, such as a suitable base product, concealer if needed, blush, mascara, and a lip balm or lipstick. Add other products as you become more comfortable with makeup.
3. How can I make my makeup look natural instead of cakey?
Apply small amounts of product, blend carefully, and build coverage gradually. Avoid adding unnecessary layers of foundation and powder. Choose formulas that work well with your skin.
4. Can I do natural makeup without foundation?
Yes. You can skip foundation and use concealer only where you want coverage. Blush, mascara, groomed eyebrows, and a lip product can complete a simple makeup look.
5. Which makeup is suitable for everyday college or office wear?
A lightweight base, subtle blush, groomed eyebrows, mascara, and a comfortable lip colour can create a simple everyday look. Adjust the products and colours to suit your setting and personal style.
6. How long does it take to do beginner makeup?
A simplified routine may take around five minutes once you are familiar with the steps. A more detailed routine can take longer depending on the products and techniques you use.
7. Is primer necessary for natural makeup?
No. Primer is optional. You may choose to use one if it helps address a particular concern, such as excess shine or the way your makeup sits on your skin.
8. How do I choose the right foundation shade?
Compare shades against your complexion in natural light when possible. Consider both the depth of the shade and its undertone, and check how the product looks after it has settled.
9. Final thoughts
Creating a natural makeup look is easier when you focus on a few basic products and simple techniques. You do not need to follow every trend or use a large makeup collection to enjoy experimenting with beauty.
Start with the steps that feel right for you, practise blending, and gradually discover the colours and finishes you enjoy wearing.
Remember, makeup is a personal choice. The most useful routine is one that fits your lifestyle, preferences, and comfort.
If you are just beginning your makeup journey, try this simple routine and adjust it as you learn. With practice, you can develop an everyday makeup look that feels like your own.