You do not need a salon or a hot tool to look polished. These 10 easy hairstyles at home take about 5 to 10 minutes each, protect your hair from heat damage and work on most lengths and textures.
What You Need
A wide-tooth comb, a few hair ties, bobby pins, a claw clip, a silk or satin scrunchie and a light styling product such as serum or a texturizing spray.
10 Heatless Hairstyles
1. The Classic Low Bun. Brush hair back, twist it into a low ponytail, wrap it into a bun and pin. Pull a few front strands loose for a soft finish. Best for office and formal events.
2. Claw Clip Twist. Gather hair, twist it upward and clip it high. This takes 30 seconds and works for medium and long hair.
3. Half-Up Top Knot. Take the top section, tie it into a small bun and leave the rest down. Good for college and casual outings.
4. Side Braid. Move all hair over one shoulder, braid loosely and pull the edges to make it look fuller.
5. French Braid. Start at the crown, add hair from both sides as you braid downward. A neat style for workouts and travel.
6. Heatless Waves with a Overnight Braid. Braid damp hair loosely at night and open it in the morning for easy waves. Finish with a little serum to control frizz.
7. Messy Bun. Tie a high ponytail, twist and wrap, secure and tease out a few strands. A great second-day hair solution.
8. Low Ponytail with a Wrap. Tie hair low, then wrap a small section around the elastic and pin it for a clean finish.
9. Twisted Half-Up. Twist two small front sections back and join them with a pin or tie. Works nicely on medium length hair.
10. Sleek Center-Part Ponytail. Apply a drop of serum, brush smooth and tie high. A confident look for presentations and interviews.
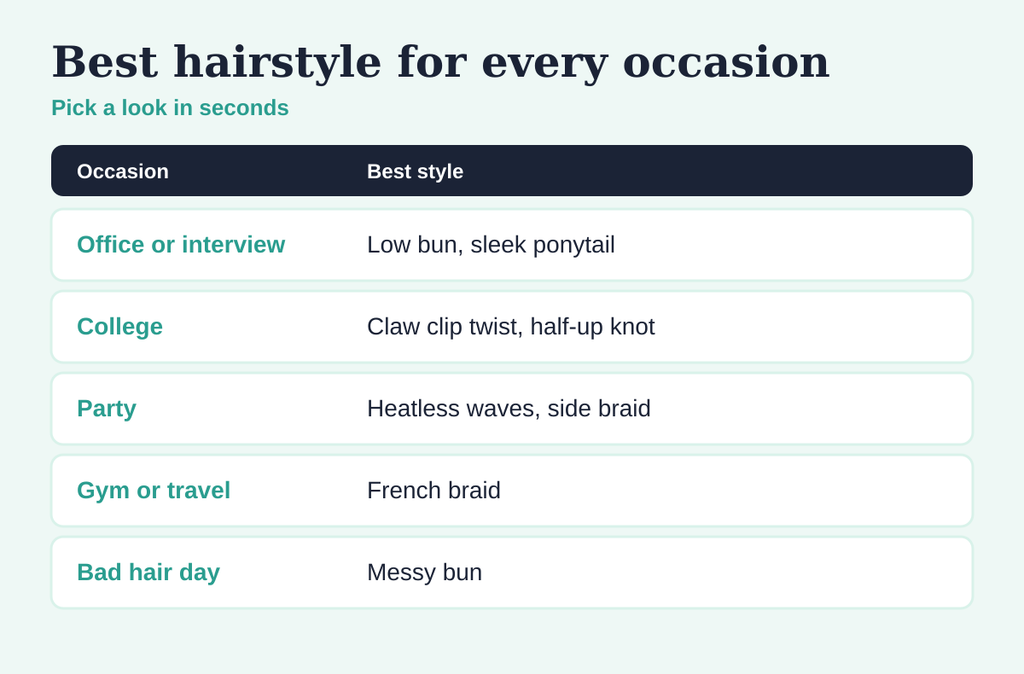
Quick Style Guide by Occasion
Occasion
Best style
Office or interview
Low bun, sleek ponytail
College
Claw clip twist, half-up knot
Party
Heatless waves, side braid
Gym or travel
French braid
Bad hair day
Messy bun
Pro Tips for Better Results
Style on slightly damp or fully dry hair, never soaking wet.
Use silk or satin ties to reduce breakage.
Change your parting and tie position often so you do not stress the same spot.
Apply a pea-sized amount of serum for shine without greasiness.
FAQs
What is the easiest hairstyle for medium hair? A low bun or a half-up top knot takes under 3 minutes.
Are heatless hairstyles better for hair health? Yes. Skipping hot tools cuts the risk of dryness and split ends.
How do I make hairstyles last all day? Start with clean, dry hair, use pins and a light hold spray.
Final takeaway: Pick two or three styles you like, practice them once and you will always have a quick option. To keep hair healthy while styling, follow our hair care routine.
Press-on nails have become an easy way to get a polished manicure at home without spending hours at a salon. From chrome and glazed finishes to French tips and short almond shapes, press-ons now come in styles for everyday wear as well as special occasions. Recent Indian nail-trend coverage has highlighted chrome, coloured French tips and other press-on styles as popular looks.
But there’s one common problem: press-on nails can start lifting or falling off sooner than expected.
The good news is that your application technique makes a big difference.
Here’s how to make press-on nails last longer while keeping your natural nails healthy.
What Are Press-On Nails?
Press-on nails are artificial nail tips designed to attach to your natural nails using either nail adhesive or adhesive tabs.
They are available in many different:
Shapes
Lengths
Colours
Finishes
Nail-art designs
Popular 2026 styles include milky neutrals, chrome, cat-eye finishes, jelly effects, micro French tips and small decorative details.
Unlike acrylic or builder-gel extensions, press-ons can be applied at home without necessarily requiring a salon appointment.
How to Make Press-On Nails Last Longer
1. Start With Clean, Dry Nails
This is one of the most important steps.
Before applying your press-ons, remove old nail polish and wash your hands. Your nails should be completely dry before application.
Avoid applying press-ons immediately after a shower or soaking your hands because moisture can interfere with adhesion.
Quick preparation:
Clean → Dry → Prepare → Apply
Don’t skip the preparation step just because you want to get your manicure done quickly.
2. Choose the Correct Nail Size
A press-on nail should fit your natural nail without sitting on the surrounding skin.
If the artificial nail is too large, it may catch on clothing or objects.
If it is too small, it may leave part of your natural nail exposed and can feel uncomfortable.
Before applying adhesive, place each press-on against your natural nail and check the fit.
If you’re between two sizes, choose the one that fits your nail better and gently file the artificial nail if the manufacturer allows it.
3. Gently Prepare the Nail Surface
A clean nail surface helps the adhesive make better contact.
You can gently remove surface oils according to the instructions supplied with your press-on nail kit.
Don’t aggressively buff your natural nails.
Dermatologists warn that artificial nail application can involve filing that makes natural nails thinner and weaker, so unnecessary filing should be avoided.
The goal is better adhesion without damaging the natural nail underneath.
4. Apply the Adhesive Correctly
If you’re using nail glue, follow the instructions that come with the product.
Apply an appropriate amount rather than flooding the entire nail with adhesive.
Place the press-on close to the cuticle area without putting it directly onto the surrounding skin.
Then press it firmly into place.
Hold it according to the adhesive manufacturer’s instructions.
Don’t immediately start using your hands.
Give the adhesive enough time to set.
5. Avoid Water Immediately After Application
One of the easiest ways to improve the longevity of your manicure is to avoid unnecessary water exposure immediately after applying your press-ons.
Try to apply your nails when you know you won’t need to:
Wash dishes
Take a long shower
Go swimming
Clean the house
soon afterward.
Give your manicure time to settle before exposing it to prolonged water.
6. Wear Gloves While Cleaning
Household cleaning can be rough on both your natural nails and artificial nails.
When washing dishes or using cleaning products, wear protective gloves.
This can help reduce prolonged exposure to water and chemicals.
It’s also a good general nail-care habit.
7. Don’t Use Your Nails as Tools
This is one of the biggest mistakes people make.
Don’t use your press-on nails to:
Open cans
Scratch labels
Peel stickers
Open packages
Scrape surfaces
Pry objects apart
Even if the press-on feels strong, putting pressure on the tip can cause it to lift or break.
Think of your press-ons as beauty accessories, not tools.
8. Choose Shorter Nails for Everyday Wear
Long nails can create a dramatic look, but shorter shapes can be easier to manage for everyday activities.
If you type frequently, work with your hands, play sports or do household tasks, consider:
Short almond
Squoval
Short square
Short oval
Shorter press-ons can also be a practical choice if you’re new to wearing artificial nails.
Current 2026 press-on trends include shorter wearable shapes alongside longer statement styles.
9. Don’t Pick or Peel Them Off
When a press-on begins lifting, it can be tempting to pull it off immediately.
Don’t.
Pulling or peeling artificial nails can also remove or damage layers of your natural nail.
The American Academy of Dermatology warns that picking and aggressive removal practices can contribute to nail damage, particularly with artificial and gel nails.
Instead, follow the removal instructions for your particular press-on system.
10. Give Your Natural Nails a Break
You don’t need to wear artificial nails continuously.
If your natural nails become:
Thin
Brittle
Peeling
Painful
Sensitive
take a break from artificial nail products.
Dermatologists recommend giving nails time without artificial nails, especially when there are signs of damage.
During the break, focus on basic care such as moisturizing your hands and nails.
How Long Do Press-On Nails Last?
The answer depends on several factors:
Type of adhesive
Nail preparation
Product quality
Nail size and fit
Water exposure
Your daily activities
How carefully they’re applied
Rather than expecting every set to last exactly the same amount of time, focus on proper preparation and application.
A manicure that’s correctly fitted and applied is less likely to lift prematurely.
Press-On Nails vs Salon Nails
Feature
Press-On Nails
Salon Extensions
Application
Usually at home
Usually salon
Time
Relatively quick
Usually longer
Design choices
Very broad
Very broad
Removal
Depends on product
Usually professional/product-specific
Cost
Often lower per application
Usually higher
Customization
Limited by set
Highly customizable
Maintenance
Can be replaced easily
Requires maintenance/fills
Neither option is automatically right for everyone.
If protecting your natural nails is your priority, how the nails are applied and removed matters more than simply choosing “press-on” or “salon.”
Are Press-On Nails Better Than Acrylic Nails?
Not necessarily.
Both can cause problems if applied or removed incorrectly.
The American Academy of Dermatology notes that artificial nails can contribute to thin, brittle and dry nails, particularly with repeated application and touch-ups.
Press-ons can be convenient because you can wear them for specific occasions rather than maintaining a salon extension continuously.
For healthy nails, moderation and careful removal are important.
How to Remove Press-On Nails Safely
Don’t rip them off.
Instead:
Follow the removal instructions for your adhesive.
Don’t force a nail that isn’t ready to come off.
Avoid scraping your natural nail aggressively.
Clean your nails after removal.
Moisturize your nails and surrounding skin afterward.
If you’re using a gel system rather than conventional press-ons, removal is different. The AAD specifically warns against picking or filing gel polish off because this can damage the nail.
What to Do After Removing Press-On Nails
Once your press-ons are removed, give your natural nails some attention.
Simple recovery routine
Step 1: Wash your hands gently.
Step 2: Apply moisturizer to your hands.
Step 3: Massage moisturizer around your cuticles.
Step 4: Keep your nails at a manageable length.
Step 5: Avoid immediately applying another set if your nails look damaged.
You don’t need a complicated collection of nail products.
7 Common Press-On Nail Mistakes
Avoid these mistakes if you want your manicure to last longer:
❌ Applying press-ons to wet nails
❌ Choosing the wrong size
❌ Using too much adhesive
❌ Applying nails directly onto the surrounding skin
❌ Washing dishes immediately after application
❌ Using your nails as tools
❌ Pulling off lifting nails
Small changes to your application routine can make your manicure much easier to maintain.
Best Press-On Nail Styles to Try in 2026
If you’re looking for a new design, current trend coverage points toward several wearable options.
🤍 Milky Nails
Soft, sheer and clean-looking.
✨ Chrome Nails
Reflective finishes remain popular for a more eye-catching manicure.
🌸 Minimal Floral Nails
Tiny floral details can add nail art without making the manicure look overly busy.
🐱 Cat-Eye Nails
Magnetic shimmer creates a dimensional effect that changes with the light.
🤍 Micro French Tips
A smaller, more modern take on the classic French manicure.
Frequently Asked Questions
How can I make press-on nails stay on longer?
Prepare clean, completely dry nails, choose the correct size, apply the adhesive correctly, avoid excessive water immediately afterward and don’t use your nails as tools.
Why do my press-on nails keep falling off?
Common reasons include poor nail preparation, incorrect sizing, excess moisture, insufficient adhesive or putting too much pressure on the nails.
Can press-on nails damage natural nails?
They can contribute to nail damage if they are applied, maintained or removed improperly. Repeated artificial nail use can leave natural nails thin, brittle or dry.
How do I remove press-on nails without damaging my nails?
Follow the instructions for the specific adhesive system and avoid ripping, picking or aggressively scraping the artificial nail away.
Are short press-on nails better for beginners?
Shorter styles can be easier to manage for everyday activities, especially if you’re new to wearing artificial nails.
Final Thoughts
Press-on nails can be an easy way to change your manicure without booking a salon appointment.
But the secret to a better manicure isn’t simply finding the strongest glue.
It’s about proper preparation, correct sizing, careful application, protecting your nails during daily activities and gentle removal.
If your natural nails become persistently thin, brittle, painful or discolored, take a break from artificial nails and consider speaking with a dermatologist.
A beautiful manicure should complement healthy nails—not hide damaged ones.
Do you dream of having strong, healthy and beautiful nails without spending hours at a salon? The good news is that you can support healthier-looking nails with a simple nail care routine at home.
Your nails go through a lot every day. Frequent handwashing, household cleaning products, nail polish removers and rough filing can leave them feeling dry, weak or prone to breaking. The right nail care habits can help protect them and keep your hands looking neat and well-groomed.
In this beginner-friendly guide, you will learn how to take care of your nails at home, build a daily nail care routine, moisturize your cuticles, and avoid common mistakes that may damage your nails.
Whether you prefer natural nails or enjoy wearing nail polish, these practical nail care tips can help you make nail health part of your regular beauty and wellness routine.
Why Is Nail Care Important?
Nail care is about more than creating a beautiful manicure. Healthy nail habits help protect the nails and the surrounding skin from unnecessary damage.
Your fingernails are made primarily of a protein called keratin. Repeated exposure to water, harsh chemicals, picking at the cuticles and rough manicure techniques can contribute to nail damage.
A consistent nail care routine can help you:
Keep your nails clean and neatly shaped.
Reduce avoidable splitting, peeling and breakage.
Maintain moisturized nails and cuticles.
Protect the skin around your nails.
Enjoy a polished, well-groomed appearance.
Remember that nail appearance can also be affected by nutrition, medical conditions and other factors. Good grooming supports nail health, but it cannot resolve every underlying nail problem.
10 Simple Nail Care Tips for Strong, Healthy Nails
1. Keep Your Nails Clean and Dry
Clean nails are an essential part of good nail hygiene. Wash your hands regularly with mild soap and water, and gently clean underneath your nails without digging into the skin.
After washing, dry your hands and the areas around your nails thoroughly. Prolonged moisture can contribute to weak, splitting nails and may encourage certain infections.
Tip: Use a soft nail brush gently when needed instead of scraping underneath your nails with sharp objects.
2. Trim and File Your Nails Gently
Regular trimming helps keep nails neat and reduces the chance of snagging or accidental breakage.
Use clean nail clippers or manicure scissors. Trim your fingernails relatively straight across, then gently round the corners with a nail file.
File in a controlled, gentle motion rather than aggressively sawing back and forth. Avoid filing too deeply into the sides of your nails.
Tip: Choose a comfortable nail length that suits your everyday activities and makes your nails easier to maintain.
3. Moisturize Your Nails and Cuticles Daily
Moisturizing is one of the simplest steps in a nail care routine. Your nails and the surrounding skin can become dry, especially after frequent handwashing or exposure to cleaning products.
Apply hand cream after washing your hands. Massage a small amount around your nails and cuticles as well.
You can also use a cuticle oil or a simple moisturizer to help condition the skin around your nails.
Tip: Keep hand cream near your sink or bedside table so that moisturizing becomes an easy daily habit.
4. Protect Your Nails From Harsh Chemicals
Household cleaning products and other chemicals can irritate the surrounding skin and contribute to nail damage.
Wear suitable protective gloves when washing dishes, cleaning the bathroom or handling cleaning products. Follow the product’s safety instructions and wash your hands afterward.
If you use nail polish remover frequently, consider reducing how often you use it and avoid unnecessarily harsh nail treatments.
Tip: Never mix household cleaning chemicals. Follow their labels and use them only as directed.
5. Avoid Biting Your Nails and Picking Your Cuticles
Nail biting and cuticle picking can injure the nail and surrounding skin. Small breaks in the skin may also allow germs to enter.
Instead of biting or picking, keep your nails comfortably trimmed and moisturize dry cuticles. If you have a hangnail, carefully clip the loose piece of skin with clean nail scissors rather than pulling it off.
Avoid cutting or aggressively removing your cuticles. The cuticle helps protect the area where the nail grows.
Tip: If nail biting is a persistent habit, try identifying the situations that trigger it and keeping your hands occupied with another activity.
6. Eat a Balanced Diet for Nail Health
Your nails need adequate nutrition to grow normally. A balanced diet that includes protein, fruits, vegetables, whole grains and a variety of other nutrient-rich foods supports general health, including nail health.
Useful dietary sources include:
Protein: Eggs, beans, lentils, dairy products, fish and tofu.
Iron: Lentils, beans, leafy greens, meat and iron-fortified foods.
Zinc: Beans, nuts, seeds, dairy products and seafood.
B vitamins: Whole grains, eggs, legumes and other varied foods.
Nail problems can sometimes be associated with nutritional deficiencies, but brittle nails do not automatically mean that you need a supplement.
Tip: Avoid starting high-dose supplements just to improve your nails. Speak with a healthcare professional if you suspect a deficiency or are considering supplementation.
7. Be Gentle With Nail Polish and Manicures
Nail polish can be part of a fun beauty routine, but rough removal and repeated intensive treatments can damage the nail plate.
Avoid peeling off polish or gel manicures. Do not scrape away layers of your natural nail, and give your nails a break from treatments if they become damaged or irritated.
If you visit a salon, choose a clean establishment that properly disinfects or sterilizes its tools. Avoid having your cuticles aggressively removed.
Tip: If your nails are already peeling or sore, pause cosmetic treatments and allow the damaged portion to grow out.
8. Avoid Using Your Nails as Tools
Your nails are not designed for opening cans, scraping labels, removing stubborn lids or prying objects apart.
Using them as tools can cause chips, cracks, splitting or lifting from the nail bed.
Instead, use the appropriate household tool and avoid putting unnecessary pressure on your fingertips.
Tip: Keep a small opener or other useful tool nearby rather than relying on your nails.
9. Build a Simple Daily Nail Care Routine
You do not need an elaborate collection of beauty products to maintain your nails. A few consistent habits can make nail care easier.
Morning:
Check that your nails are clean and free of snags.
Apply hand cream if your skin feels dry.
Use protective gloves when a task requires them.
During the day:
Dry your hands thoroughly after washing.
Reapply moisturizer when needed.
Avoid biting, picking or using your nails as tools.
Before bed:
Apply hand cream and gently massage it around your nails.
Use cuticle oil if you enjoy using it.
Check for rough edges and file gently when necessary.
Tip: Keep the routine simple enough that you can follow it consistently.
10. Pay Attention to Changes in Your Nails
Healthy-looking nails are generally smooth and consistent in appearance, although some harmless variations can occur.
Pay attention to changes such as persistent discoloration, unusual thickening, nail separation, swelling, pain or bleeding around the nails.
If you notice a persistent or unexplained change, consult a dermatologist or another qualified healthcare professional. Nail changes can sometimes be associated with infection, injury or an underlying health condition.
Tip: Do not try to diagnose a nail problem from appearance alone, especially if it is painful or getting worse.
A Simple At-Home Nail Care Routine
Here is an easy weekly schedule to help you stay consistent.
Day
Nail care activity
Monday
Clean, inspect and moisturize your nails.
Tuesday
Apply hand cream and cuticle moisturizer.
Wednesday
Check for snags and gently file rough edges.
Thursday
Protect your hands during cleaning and washing dishes.
Friday
Give your nails a gentle tidy-up if needed.
Saturday
Enjoy a simple manicure without aggressive cuticle removal.
Sunday
Review your routine and moisturize your hands and nails.
You do not need to follow a strict schedule. Trim and file your nails when necessary, and adjust your routine to suit your lifestyle.
Common Nail Care Mistakes to Avoid
Even a well-intentioned manicure can sometimes cause unnecessary damage. Avoid these common mistakes:
Cutting your cuticles: The cuticle provides a protective barrier, so avoid cutting or aggressively removing it.
Peeling off nail polish: Pulling polish or gel from the nail can remove layers of the natural nail.
Over-filing: Excessive filing can thin and weaken the nail plate.
Ignoring persistent nail changes: Pain, swelling, separation or unusual discoloration deserve attention.
Using nails as tools: This can cause cracks, chips and other injuries.
Taking supplements without a reason: Supplements are not a guaranteed solution for brittle nails and may not be appropriate for everyone.
A gentle approach is often easier to maintain than a complicated routine filled with intensive treatments.
Frequently Asked Questions About Nail Care
How can I make my nails stronger naturally?
Start with gentle nail grooming, daily moisturizing, protection from harsh chemicals and a balanced diet. Avoid biting your nails, peeling off polish and excessive filing. If your nails remain brittle, a healthcare professional can help identify possible causes.
How often should I trim my fingernails?
Trim your fingernails whenever they become too long, develop snags or interfere with your daily activities. There is no single schedule that works for everyone. Use clean clippers and file the edges gently.
Does applying oil help nails?
Cuticle oil can help condition the skin around your nails and improve the feel of dry cuticles. It is a useful moisturizing step, but it is not a guaranteed treatment for weak nails or a proven way to make them grow faster.
Should I cut my cuticles?
It is generally best to avoid cutting or aggressively removing your cuticles. They help protect the nail area from germs. Keep them moisturized and avoid picking at them.
How can I stop my nails from breaking?
Keep your nails at a manageable length, file gently, moisturize regularly and wear gloves when handling cleaning products or doing prolonged wet work. Avoid using your nails as tools and take breaks from damaging cosmetic treatments.
Can nail care make nails grow faster?
There is no reliably proven home remedy that makes nails grow dramatically faster. Gentle care and good nutrition can help support normal nail health and reduce breakage, allowing nails to maintain more length as they grow.
When should I see a dermatologist about my nails?
Seek professional advice for persistent or unexplained nail discoloration, thickening, separation, pain, swelling, bleeding or other concerning changes. Prompt evaluation is particularly important if you have a nail injury or signs of infection.
Final Thoughts
Beautiful nails begin with healthy habits, not necessarily expensive salon treatments. A simple nail care routine at home can help you keep your nails clean, moisturized, neatly shaped and protected from avoidable damage.
Start with the basics: trim and file gently, moisturize your hands and cuticles, protect your nails from harsh chemicals, eat a balanced diet and avoid biting or picking.
Consistency matters more than complexity. Choose a few habits that fit your lifestyle and make them part of your everyday self-care routine.
Healthy nails, happy hands, and a little daily care can go a long way.
Beautiful nails are more than just a finishing touch to your look. Your nails can also reflect how well you care for your hands and overall nail health.
Whether you love a fresh manicure or prefer natural nails, following a simple nail care routine can help keep your nails clean, strong, smooth and healthy.
The good news? You don’t need an expensive collection of products or complicated treatments. A few consistent habits can make a noticeable difference.
Why Is Nail Care Important?
Your fingernails are exposed to water, soap, cleaning products, weather changes and everyday friction. Without proper care, they can become dry, weak, brittle or prone to splitting.
Good nail care helps you:
Keep your nails clean and healthy
Reduce breakage and splitting
Protect the skin around your nails
Prevent excessive dryness
Maintain stronger, smoother nails
Keep your hands looking neat and well-groomed
A healthy nail care routine is ultimately about consistency rather than complexity.
10 Essential Nail Care Tips for Healthy Nails
1. Keep Your Nails Clean and Dry
Clean nails are the foundation of good nail care. Wash your hands regularly and gently clean underneath your nails.
However, avoid keeping your hands submerged in water for long periods. Repeated exposure to water can contribute to weaker, splitting nails.
After washing your hands, dry them thoroughly, including around your nails and cuticles.
2. Moisturize Your Hands and Cuticles
Just like your skin, your nails and cuticles can become dry.
Apply a nourishing hand cream regularly, paying particular attention to your cuticles. A cuticle oil can also help keep the surrounding skin soft and moisturized.
For best results, make moisturizing part of your daily routine, especially after washing your hands.
3. Trim Your Nails Regularly
Long nails aren’t necessarily unhealthy, but nails that become excessively long can be more likely to catch on clothing or break.
Use clean nail clippers or scissors to trim your nails. Avoid cutting them too aggressively, and leave enough nail length to protect the fingertip.
For fingernails, gently following the natural shape of your nail can create a neat appearance while reducing the risk of snagging.
4. File Your Nails the Right Way
Filing helps smooth rough edges and can prevent small cracks from becoming larger splits.
Use a clean nail file and gently shape your nails. Instead of aggressively sawing back and forth, use controlled strokes and avoid excessive pressure.
If your nails are naturally thin or brittle, a gentle file may be a better choice than a very coarse one.
5. Don’t Cut or Pick Your Cuticles
Cuticles provide a protective barrier around the base of your nails. Cutting or aggressively picking them can damage the surrounding skin.
Instead, keep your cuticles moisturized and gently push them back only if needed.
If you have painful, swollen or damaged skin around a nail, avoid trying to cut it yourself.
6. Protect Your Nails From Harsh Chemicals
Cleaning products and other chemicals can dry out your hands and nails.
If you’re doing household cleaning, consider wearing protective gloves. This simple habit can reduce direct contact with detergents and other irritating substances.
Remember: healthy nails need protection just as much as they need grooming.
7. Give Your Nails a Break From Frequent Manicures
Manicures can make your nails look beautiful, but frequent treatments involving strong chemicals, filing or removal processes may contribute to dryness or damage in some people.
If you regularly wear nail polish, gel polish or extensions, pay attention to the condition of your natural nails.
If your nails start becoming unusually thin, painful or damaged, consider taking a break and focusing on basic nail care.
8. Don’t Use Your Nails as Tools
This is one of the easiest habits to change.
Avoid using your nails to:
Open cans or packages
Scratch hard surfaces
Remove labels
Pry objects apart
Pick at stickers or polish
Your nails aren’t designed to function as tools. Using them this way can lead to cracks, chips and breakage.
9. Maintain a Balanced Diet
Nail health is influenced by your overall nutrition. A balanced diet containing adequate protein, fruits, vegetables, whole grains and other nutrient-rich foods supports normal nail growth.
Rather than relying on a single “nail supplement,” focus first on maintaining a varied and balanced diet.
If you experience persistent nail changes, speaking with a healthcare professional can help identify whether an underlying nutritional or health issue could be involved.
10. Don’t Ignore Changes in Your Nails
Occasional nail breakage is common. However, persistent or unusual changes deserve attention.
Pay attention to changes such as:
Persistent discoloration
Significant changes in nail thickness
Nails separating from the skin underneath
Persistent pain or swelling
Repeated splitting or breaking
New dark streaks or unusual markings
If you notice a concerning or persistent change, consult a qualified healthcare professional or dermatologist rather than trying to diagnose it yourself.
A Simple Daily Nail Care Routine
You don’t need to spend a lot of time caring for your nails.
Try this simple routine:
Morning: Wash and dry your hands properly, then apply hand moisturizer if your skin feels dry.
During the day: Protect your hands when using household cleaning products and avoid using your nails as tools.
Evening: Apply hand cream and massage a small amount of cuticle oil or moisturizer around your nails.
Weekly: Check your nails, trim them if necessary and gently file rough edges.
This simple approach can help you maintain healthier-looking nails without turning nail care into a complicated chore.
Common Nail Care Mistakes to Avoid
Even people with a regular nail care routine can make mistakes. Here are some habits worth avoiding:
Biting Your Nails
Nail biting can damage the nail and surrounding skin. It can also transfer bacteria between your hands and mouth.
Peeling Off Nail Polish
Peeling polish can remove layers from the surface of the nail. Use an appropriate remover instead.
Cutting Cuticles Too Deeply
Aggressive cuticle cutting can injure the surrounding skin and increase the risk of irritation.
Over-Buffing
Buffing may temporarily make nails look smooth and shiny, but excessive buffing can thin the nail surface.
Ignoring Your Hands
Nail care isn’t only about the nails. Healthy-looking nails go hand in hand with moisturized, protected hands and cuticles.
How Long Does It Take to Improve Nail Health?
Nails grow gradually, so improving their appearance takes patience.
Your fingernails don’t transform overnight. Consistent nail care, protection from damage and good general nutrition can support healthier-looking nails as new nail growth replaces older nail tissue.
The key is to focus on long-term habits rather than quick fixes.
Frequently Asked Questions About Nail Care
How often should I trim my nails?
There is no single schedule that works for everyone. Trim your nails whenever they become too long, uneven or prone to catching on things.
How can I make my nails stronger?
Protecting your nails from excessive water and chemicals, moisturizing regularly, avoiding picking and maintaining a balanced diet can all support healthy nails.
Is cuticle oil necessary?
Cuticle oil isn’t essential, but it can be a useful way to moisturize dry cuticles and the skin surrounding the nail.
Should I give my nails a break from nail polish?
If your nails are becoming dry, thin or damaged, taking a break from polish, gel treatments or extensions may be helpful while you focus on basic nail care.
Can nail care improve nail growth?
Good nail care can help reduce breakage and protect the nails as they grow. However, nail growth itself is influenced by factors such as genetics, age and overall health.
Final Thoughts
Healthy, beautiful nails don’t require a complicated routine. Clean nails, regular moisturizing, gentle trimming, proper filing and protection from damage are the foundations of effective nail care.
The most important step is consistency. Take a few minutes each day to care for your hands and nails, and avoid habits that cause unnecessary damage.
Remember, nail care isn’t just about having attractive nails—it’s about maintaining healthy nails and the skin around them.
Start with the basics, stay consistent, and let your nails benefit from the care they deserve.
If your skin suddenly feels tight, stings when you apply products that never used to bother you, or keeps breaking out no matter what you try, the problem might not be your routine — it might be your skin barrier.
This guide covers exactly how to repair a damaged skin barrier, why it happens in the first place, and which products actually help versus which ones make it worse.
What Is the Skin Barrier?
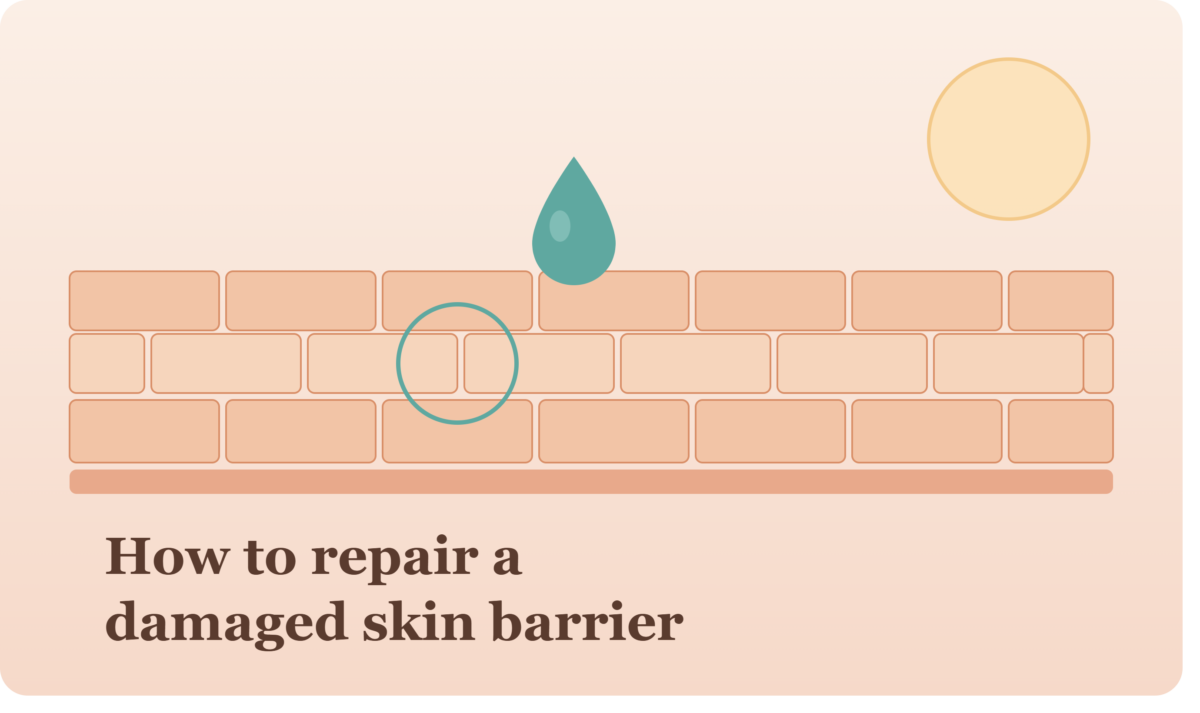
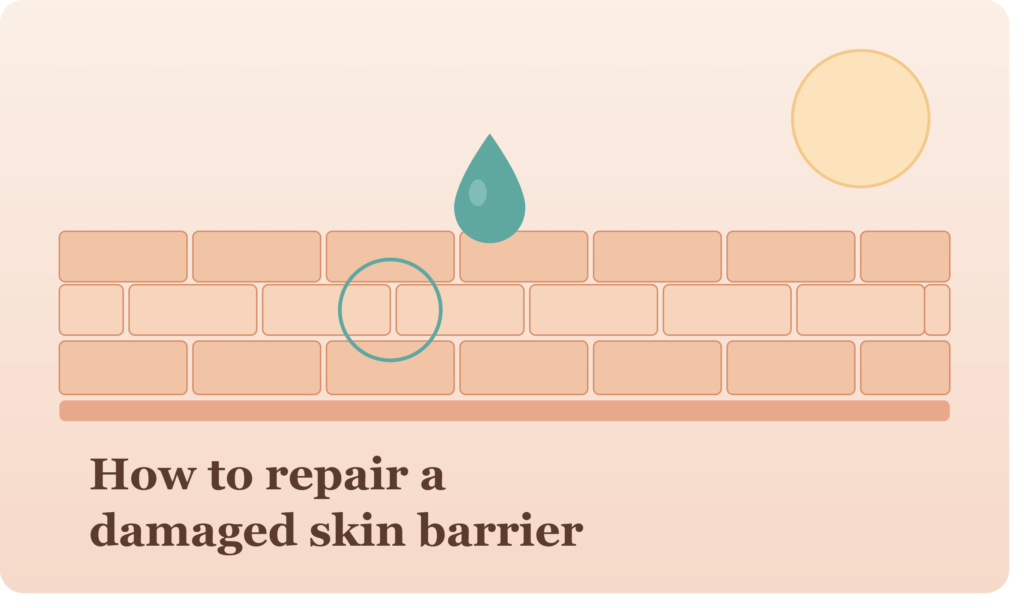
Your skin barrier is the outermost layer of skin (the stratum corneum). Think of it like a brick wall: skin cells are the “bricks,” and lipids like ceramides, cholesterol, and fatty acids are the “mortar” holding everything together. When that mortar breaks down, moisture escapes and irritants get in — which is when problems start.
Signs of a Damaged Skin Barrier
Skin feels tight, dry, or rough even right after moisturizing
Stinging or burning when applying products that used to feel fine
Redness or a flushed appearance that doesn’t fully calm down
Random breakouts alongside dry, flaky patches (a confusing combination)
Skin looks dull or feels “reactive” to weather, wind, or new products
If two or more of these sound familiar, your barrier likely needs repair before you add anything else to your routine.
What Causes a Damaged Skin Barrier
Over-exfoliating — using acids, scrubs, or retinol too frequently
Over-cleansing — washing your face more than twice a day, or using hot water
Stacking too many actives — combining retinol, vitamin C, and acids without giving skin time to adjust
Weather extremes — cold, dry winter air or harsh sun exposure
Hormonal shifts — hormonal changes can weaken the barrier and make skin more reactive, which is part of why breakouts and dryness often show up together during these periods
Long hot showers — hot water strips natural oils faster than warm or cool water
How to Repair a Damaged Skin Barrier: Step-by-Step
Step 1: Stop Everything Active for 1–2 Weeks
Pause retinol, exfoliating acids (AHA/BHA), and physical scrubs completely. This is the single most important step — you cannot repair a barrier while continuing to damage it.
Step 2: Simplify to Three Products
Cut your routine down to a gentle cleanser, a barrier-repairing moisturizer, and sunscreen. Skip toners, essences, and serums until your skin calms down.
Step 3: Choose Barrier-Repair Ingredients
Look for these on ingredient labels — they rebuild rather than treat:
Ceramides — replace the lipids your barrier has lost
Centella asiatica (cica) — calms redness and inflammation
Panthenol (pro-vitamin B5) — soothes and supports healing
Squalane — lightweight, non-irritating moisture without clogging pores
Colloidal oatmeal — reduces itching and sensitivity
Step 4: Use Lukewarm Water Only
Hot water feels good but accelerates moisture loss. Switch to lukewarm water for washing your face, and pat skin dry instead of rubbing.
Step 5: Reintroduce Actives Slowly
Once redness, tightness, and stinging have resolved (usually 2–4 weeks), reintroduce one active ingredient at a time, once every 1–2 weeks, starting with the gentlest option.
Best Products for Skin Barrier Repair (What to Look For)
You don’t need a specific brand — you need the right ingredient profile. When shopping, prioritize:
Moisturizers listing ceramides or “ceramide complex” in the first few ingredients
Fragrance-free formulas (fragrance is one of the most common irritants during barrier repair)
“Barrier repair,” “recovery,” or “sensitive skin” labeling over “brightening” or “exfoliating” labeling
How Long Does Skin Barrier Repair Take?
Most mild cases improve within 2–4 weeks of a simplified routine. More significant damage — from long-term over-exfoliation, for example — can take 6–8 weeks to fully recover. Consistency matters more than speed here; switching products again mid-repair often resets the clock.
Frequently Asked Questions
Can a damaged skin barrier cause acne? Yes. A weakened barrier lets irritants in more easily and struggles to regulate oil production, which can trigger breakouts even in skin that wasn’t previously acne-prone.
Should I stop moisturizing if my skin barrier is damaged? No — moisturizer is essential during repair. What you should stop is anything active or exfoliating, not hydration.
Is Vaseline good for skin barrier repair? Petroleum jelly can help lock in moisture as an occlusive, but it doesn’t actively rebuild the barrier the way ceramides do. It works best as a top layer over a ceramide moisturizer, not a replacement for one.
How do I know if my barrier is healed? Skin stops stinging when you apply products, redness settles, and it feels comfortable rather than tight after cleansing.
Final Thoughts
A damaged skin barrier isn’t fixed by adding more products — it’s fixed by removing what’s causing the damage and giving your skin the specific ingredients it needs to rebuild. Once your barrier is healthy again, everything else in your routine works better too.
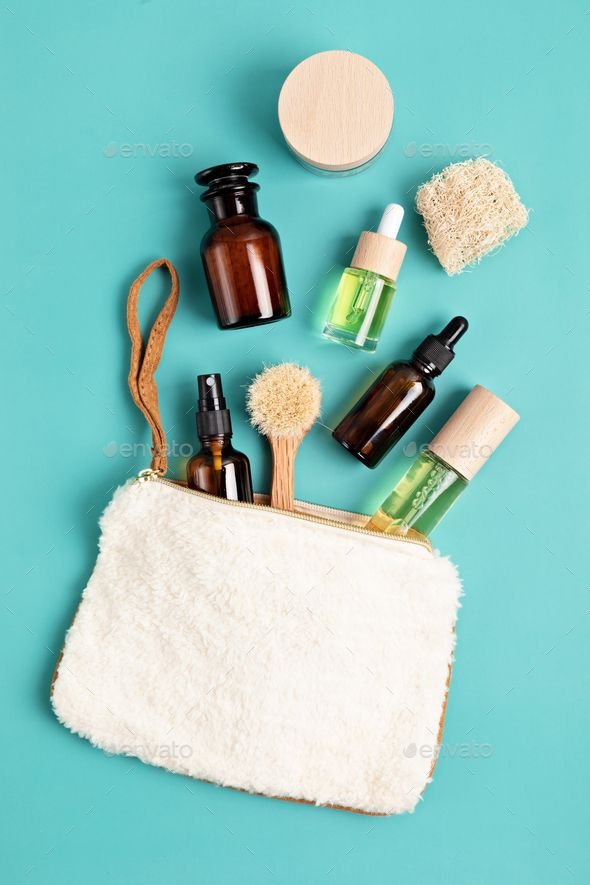
Organic natural zero waste cosmetic. Sustainable self care, wellness concept. Top view, flat lay, copy space
If your bathroom shelf looks like a plastic recycling bin waiting to happen, you’re not alone. The average skincare routine — cleanser, toner, serum, moisturizer, sunscreen, exfoliant — can rack up six or seven plastic bottles before you’ve even started your makeup. A zero-waste skincare routine is about closing that gap: choosing products, packaging, and habits that send less to landfill without giving up results.
This guide walks through exactly how to do it, one step at a time, so you can build a routine that’s good for your skin and the planet.
What Does “Zero-Waste Skincare” Actually Mean?
Zero-waste skincare doesn’t require perfection — nobody’s routine produces literally zero trash. Instead, it follows a simple hierarchy borrowed from the broader zero-waste movement:
Refuse what you don’t need (extra steps, single-use samples, impulse buys)
Reduce how much packaging and product you use overall
Applied to skincare, that means favoring eco-friendly skincare products with minimal, recyclable, or refillable packaging, choosing multi-use formulas over single-use ones, and being honest about what your skin actually needs.
Why It’s Worth the Switch
Beauty packaging is one of the most persistent sources of plastic waste — much of it too small, too mixed-material, or too contaminated with product residue to be recycled through standard municipal programs. Brands are responding: more companies are now offering refill pouches, glass and aluminum containers, and biodegradable formulas instead of the plastic-heavy packaging that’s dominated the industry for decades. Choosing sustainable skincare isn’t just a personal statement anymore — it’s becoming the mainstream default.
Step 1: Audit Your Current Routine
Before buying anything new, take stock of what you already own.
Lay out every product you currently use
Note which ones you actually finish versus which ones sit half-used for months
Separate “needs” (cleanser, moisturizer, SPF) from “wants” (that seventh serum)
Finishing what you already have — even if it’s not “sustainable” — is more zero-waste than tossing it and buying green replacements. The most eco-friendly product is the one already sitting in your bathroom.
Step 2: Simplify Before You Swap
A shorter routine is inherently lower-waste. Most skin genuinely needs only:
A gentle cleanser
A moisturizer suited to your skin type
Daily SPF
One targeted treatment (if needed) — a retinoid, vitamin C, or exfoliating acid
Cutting a ten-step routine down to four or five well-chosen products reduces both packaging waste and how often you’re repurchasing.
Step 3: Swap Toward Low-Waste Packaging
Once you know what you actually use, start replacing it — as products run out, not all at once — with lower-waste alternatives:
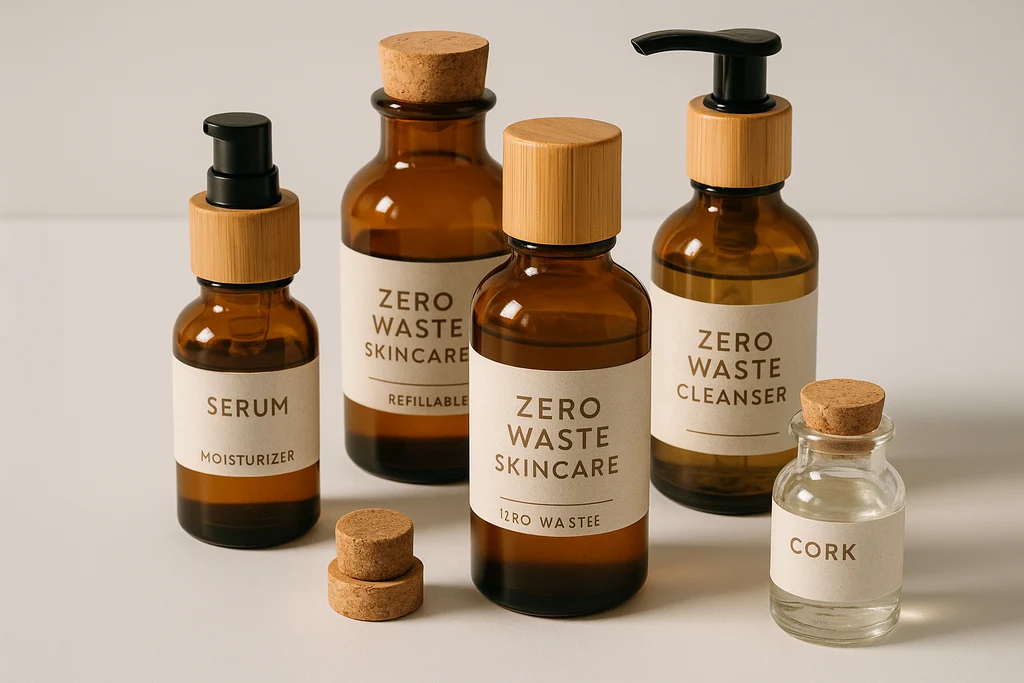
Refillable skincare systems let you buy product without buying a new container every time
Glass and aluminum packaging recycles far more reliably than mixed-plastic tubes and pumps
Concentrated or waterless formulas (powders, balms) use less packaging per use since they’re not diluted with water
Step 4: Replace Disposable Tools
Some of the biggest hidden waste in skincare isn’t the product — it’s the accessories:
Swap cotton pads and makeup wipes for reusable, washable rounds
Trade plastic exfoliating poufs for a konjac sponge, washcloth, or natural loofah
Choose a bamboo or metal facial roller/gua sha instead of plastic tools
Use a reusable makeup remover cloth instead of single-use wipes
Step 5: Look for Genuine Sustainability Signals
“Eco-friendly” is an unregulated marketing term, so look past the packaging claims:
Third-party certifications (Leaping Bunny for cruelty-free, USDA Organic, EWG Verified)
Clear ingredient sourcing information, not just vague “natural” claims
Actual biodegradable or compostable packaging — not just packaging that’s technically recyclable but rarely accepted locally
Brands that publish real sustainability data rather than one glossy campaign
Step 6: Close the Loop
Recycle mindfully — rinse containers before recycling, and check whether your municipality actually accepts the material (many “recyclable” beauty packagings aren’t accepted curbside)
Return refill programs many brands now run in-store or by mail
Repurpose empty containers for travel-size decanting or storage
Compost genuinely compostable packaging inserts, like some cardboard or bamboo components
A Sample Zero-Waste Skincare Routine
Step
Low-Waste Swap
Cleanse
Solid cleansing bar or oil cleanser in a glass bottle
Exfoliate (2–3x/week)
Konjac sponge or biodegradable exfoliating bar
Treat
Concentrated serum in a refillable glass dropper bottle
Moisturize
Moisturizer bar or cream in an aluminum jar
Protect
Mineral SPF in a recyclable or refillable tube
Remove makeup
Reusable cotton rounds + oil cleanser
Common Mistakes to Avoid
Buying a whole new “sustainable” routine at once — this creates waste from the products you’re replacing. Transition gradually.
Assuming all plastic-free means zero-waste — glass and metal have their own environmental footprint from mining and manufacturing; reuse matters more than material alone.
Ignoring shipping packaging — a beautifully sustainable product shipped in excess plastic mailers undercuts the effort.
Chasing trends over needs — the most sustainable product is one you’ll actually use up.
FAQ: Zero-Waste Skincare
Is zero-waste skincare more expensive? Not necessarily. Solid bars and concentrated formulas often last longer per dollar than diluted liquid products, and refill systems are typically cheaper than buying new containers each time.
Can zero-waste skincare work for sensitive or acne-prone skin? Yes — sustainability and formulation are separate issues. Look for the same active ingredients and gentle, fragrance-free formulas you’d normally choose; just check the packaging and sourcing separately.
What’s the easiest first swap to make? Reusable cotton rounds and a solid cleansing bar are usually the simplest, lowest-commitment starting points.
Do refill pouches actually reduce waste? Yes — refill pouches use significantly less plastic by weight than a full rigid container, even though they’re not always curbside recyclable themselves.
The Bottom Line
A zero-waste skincare routine isn’t about buying a completely new, perfectly sustainable shelf overnight. It’s a gradual shift — using up what you have, simplifying your steps, and choosing better packaging as you naturally repurchase. Small, consistent swaps compound into a routine that’s genuinely lower-impact, without sacrificing the results you’re used to.
Let’s be honest — most of us didn’t grow up learning proper skincare. We picked things up from ads, older siblings, random internet advice, and a lot of trial and error. So it’s no surprise that even people who are genuinely trying to take care of their skin end up doing things that quietly work against them.
The frustrating part? A lot of these bad skincare habits don’t look like mistakes. They feel productive. Scrubbing harder feels like “deep cleaning.” Skipping sunscreen on a cloudy day feels harmless. Popping a pimple feels satisfying in the moment. But over time, these small habits add up — and they’re often the real reason your skin isn’t cooperating no matter how many products you throw at it.
Here are the most common skincare mistakes people make, why they happen, and what actually helps instead.
1. Over-Exfoliating
Exfoliating feels great. Your skin looks brighter almost instantly, so it’s tempting to do it more often, thinking more must mean better results. In reality, this is one of the most common skincare routine mistakes out there — scrubbing too often, or mixing acids with physical scrubs in the same week, wears down your skin barrier faster than you’d expect.
You’ll usually notice it before you realize what’s causing it: your skin feels tight, looks a little red, or suddenly stings when you apply products that never bothered you before.
A better approach: 1–3 times a week is plenty for most skin types. Pick one method — chemical or physical — and stick with it instead of layering several.
2. Skipping Sunscreen (Or Not Really Applying It)
This is probably the one everyone’s heard a hundred times, and yet it’s still one of the most common daily skincare mistakes. Not because people don’t believe sunscreen works, but because it’s easy to cut corners — a thin layer here, skipping it on a cloudy day there, forgetting to reapply after a few hours.
Here’s the thing: UV rays don’t care whether it’s sunny outside. And most people apply far less sunscreen than they actually need.
A better approach: Use a proper amount — around a full teaspoon for your face — every single day, and reapply if you’re out for a while. It’s genuinely the closest thing to a magic anti-aging step that exists.
3. Piling On Too Many Products
There’s a certain appeal to a long, elaborate routine — it feels like you’re doing more for your skin. But stacking too many actives at once (retinol, vitamin C, acids, benzoyl peroxide, all in the same week) usually does the opposite of what you’re hoping for. It’s one of the classic skincare mistakes for beginners, mostly because nobody tells you that less is often more here.
A better approach: Keep it simple — cleanser, one active treatment, moisturizer, sunscreen. If you want to add something new, introduce it slowly and watch how your skin actually responds before adding the next thing.
4. Skipping the Patch Test
New product just arrived, and it’s tempting to use it right away, all over your face. But reactions don’t always show up immediately — sometimes it takes a couple of days for the redness or breakouts to appear, and by then it’s hard to tell which product caused it.
A better approach: Dab a little on your inner arm or jawline and give it 24–48 hours before committing to your whole face.
5. Sleeping With Makeup Still On
We’ve all done this after a long day. Once in a while, it’s not the end of the world. But making a habit of it clogs your pores, lets bacteria sit on your skin overnight, and speeds up how quickly your skin starts to show signs of aging. It’s one of those bad skincare habits that feels like a minor shortcut until it isn’t.
A better approach: Keep micellar water or cleansing wipes by your bed for the nights you’re too exhausted for a full routine. Even a lazy cleanse beats none at all.
6. Washing Your Face With Hot Water
There’s something comforting about a hot shower, and it’s easy to let that same water hit your face without a second thought. Unfortunately, it strips away your skin’s natural oils and weakens your moisture barrier, which leaves skin drier and more reactive over time.
A better approach: Lukewarm water is your friend here — it cleanses just as well without the damage.
7. Forgetting About Your Neck and Hands
Most routines stop right at the jawline, like the rest of the body doesn’t exist. But your neck, chest, and hands get just as much sun exposure — and they’re often the first places to show visible aging.
A better approach: Whatever moisturizer or sunscreen you’re putting on your face, extend it down to your neck and onto your hands too. It takes ten extra seconds.
8. Skipping Moisturizer Because Your Skin Is Oily
This one trips up a lot of people. The logic makes sense on the surface — oily or acne-prone skin doesn’t need more oil, right? Except skipping moisturizer often makes your skin overproduce oil to compensate, which just fuels the exact problem you’re trying to avoid.
A better approach: A lightweight, oil-free, non-comedogenic moisturizer still belongs in your routine, even if your skin already feels shiny by 2pm.
9. Picking at Pimples
Satisfying in the moment, genuinely bad for your skin. Picking increases inflammation, slows down healing, and raises your chances of scarring — sometimes turning a pimple that would’ve healed in a few days into a mark that lasts months. Out of all the mistakes that damage your skin, this is probably the easiest one to fix once you find a replacement habit.
A better approach: Reach for a spot treatment or a hydrocolloid patch instead, and let it heal on its own timeline.
10. Never Updating Your Routine
Your skin isn’t static — it changes with the seasons, your age, your stress levels, even your diet. But a lot of people run the exact same routine year-round for years, then wonder why it stopped working as well as it used to.
A better approach: Every few months, take a step back and ask whether your routine still fits your skin. You might need something richer in winter, lighter in summer, or a different active altogether as your skin evolves.
The Quick Version
If you only remember a few things from this list: don’t over-exfoliate, never skip sunscreen, keep your routine simple, patch test new products, and stop picking at your skin. Those five alone will solve most of the common skincare mistakes people struggle with.
Final Thoughts
None of this requires a 12-step routine or expensive products. Most of these healthy skin tips come down to consistency and just… not doing the things that undo your progress. Start with one or two changes, give your skin a few weeks to adjust, and you’ll likely notice a difference before you know it.
Which of these were you guilty of? Be honest — we’ve all done at least one.